Chat Widget (JavaScript)
The Chat Widget JavaScript module allows you to quickly integrate our agents into your site. This module is designed to be as simple as possible to integrate, and it provides a simple API to interact with the agent.
Setup
To add a new instance of the chat widget, you'll need to add the following resources to your HTML file:
- Empty HTML element that will be replaced by the component
- Link to the JS file
- Component initialization script
-
Add an empty HTML element that will be replaced by the chat widget:
<!-- Empty HTML element to be replaced by the widget -->
<div id="aihub-chat"></div> -
Add the JS file to the end of the
<body>section of your HTML file:<!-- Add JS for chat widget -->
<script src="https://hub.serenitystar.ai/resources/chat.js"></script> -
Initialize the chat widget with the following script:
<script>
  document.addEventListener("DOMContentLoaded", function () {
    const chat = new AIHubChat("aihub-chat", {
      apiKey: "<Your API key>", // Or use publicKey + tokenProvider. See the Authentication section.
      agentCode: "<Your Agent Code>",
      baseURL: "https://api.serenitystar.ai/api",
    });
    chat.init();
  });
</script>
If you want to extract the content of current page and send the data to the agent, you can use the Content Extractor feature.
Initialization
You can initialize the chat widget by creating a new instance of the AIHubChat class and calling the init method:
const chat = new AIHubChat("aihub-chat", {
  // Configuration options here
});
chat.init();
Configuration Options
The chat widget accepts the following configuration options:
{
  apiKey: "<Your API key>", // Required when tokenProvider is not used. See the Authentication section.
  publicKey: "<Your Public Key>", // Alternative to apiKey. Required when using tokenProvider. See the Authentication section.
  channel: "web", // The channel identifier (e.g., "web", "mobile"). Optional. Used with tokenProvider authentication.
  tokenProvider: async ({ context }) => { /* ... */ }, // Async function that returns a Client Token (signed JWT). Required when using publicKey instead of apiKey. See the Authentication section.
  agentCode: "<Your Agent Code>",
  baseURL: "https://api.serenitystar.ai/api",
  logoURL: "<URL to the logo image>", // Optional. The URL to the logo image.
  conversationId: "<Conversation ID>", // The ID of the conversation to load. Only required if you want to load an existing conversation.
  mode: "compact", // String that indicates the chat mode (compact, floating, fullscreen, side-panel or floating-side-panel). Default is "floating"
  readOnly: false, // Boolean that indicates whether the chat is read-only.
  scrollToBottom: true, // Boolean that indicates whether the chat should scroll to the bottom by default. Optional. Default is true.
  allowUpload: false, // Boolean that indicates whether file uploads are allowed.
  maxHeight: "500px", // String that indicates the maximum height of the chat widget.
  showTermsAndConditions: false, // Boolean that indicates whether the terms and conditions should be displayed.
  showAcceptCommunications: false, // Boolean that indicates whether the accept communications checkbox should be displayed.
  showMetaAnalysisInfo: false, // Boolean that indicates whether the meta analysis info should be displayed on each message. Optional. Default is false.
  showTokenUsageInfo: false, // Boolean that indicates whether the token usage info should be displayed on each message. Optional. Default is false.
  showTimeToFirstTokenInfo: false, // Boolean that indicates whether the time to first token info should be displayed on each message. Optional. Default is false.
  showExecutorTaskLogsInfo: false, // Boolean that indicates whether the executor task logs info should be displayed on each message. Optional. Default is false.
  preferredLanguage: "en", // String (BCP 47 language tag) that sets the lang attribute on the widget root element. Optional. Default is "en".
  storeConversation: true, // Boolean that indicates whether the conversation should be stored in local storage.
  expanded: false, // Boolean that indicates whether the chat widget is expanded by default. This is only relevant in when mode is floating. Optional. Default is false.
  stream: true, // Boolean that indicates whether the chat should stream responses as they are generated. Optional. Default is true.
  extractPageContent: false, // Boolean that indicates whether the page content should be extracted and sent to the agent. Optional. Default is false.
  showPreviousConversations: false, // Boolean that indicates whether previous conversations should be accessible by scrolling up. Optional. Default is false.
  userIdentifier: "user123", // String that indicates the user identifier. Optional.
  engagementMessage: {
    enabled: true, // Boolean that indicates whether the engagement message should be displayed. Optional. Default is true.
    message: "Hello, how can I help you?", // The message to display in the engagement message. Optional. It will show the initial message from the agent if not provided.
    showAfter: 10 // The time in seconds after which the engagement message should be displayed. Optional. Default is 10 seconds.
  },
  locale: {
    uploadFileErrorMessage: "", // The error message for file uploads.
    uploadFilesErrorMessage: "", // The error message for multiple file uploads.
    chatErrorMessage: "", // The error message for chat messages.
    headerTitle: "<Chat header title>", // The title of the chat header.
    finalizedMessage: "", // The message displayed when the chat is finalized.
    chooseAnOptionMessage: "", // The message displayed when choosing an option.
    limitExceededMessage: "", // The message displayed when the character limit is exceeded.
    waitUntilMessage: "", // The message displayed when waiting for a response.
    remainingMessage: "", // The message displayed when there are remaining characters.
    termsAndConditionsMessage: "<Your terms and conditions message>", // The terms and conditions message.
    acceptCommunicationsMessage: "<Your accept communications message>", // The accept communications message.
    inputPlaceholder: "write your message here...", // The placeholder text for the chat input.
    metaAnalysisTitle: "Meta Analysis", // The title for the meta analysis card on each message.
    completionUsageTitle: "Completion Usage", // The title for the token completion usage card on each message.
    timeToFirstTokenTitle: "Time to first token", // The title for the time to first token tooltip.
    newChatBtnMessage: "New Chat", // The message for the "New chat" button in the header. (Only visible when storeConversation is true)
    executorTaskLogsTitle: "Executor Task Logs" // The title for the executor task logs card on each message.
    millisecondsUnit: "ms", // The unit for milliseconds,
    exceededMaxNumberOfFilesMessage: "You can only upload up to 5 files per message", // The message displayed when the user tries to upload more than the allowed number of files
    exceededMaxFileStatusChecksMessage: "It seems that the file upload is taking longer than expected. Please try again later.", // Message to display when files are taking longer than expected to upload
    chatInitConversationErrorMessage: "Error initializing conversation", // The error message to display when there is an error initializing the conversation
    closedConversationMessage: "", // The message displayed when the conversation has been closed.
    loadingPreviousChatMessage: "Loading previous chat...", // The message displayed while loading a previous conversation. Optional.
    endOfChatHistoryMessage: "End of chat history", // The message displayed at the boundary between previous conversations and the current one. Optional.
    loadPreviousChatButtonMessage: "Load previous chat", // The label for the button that loads a previous conversation. Optional.
    newChatSeparatorMessage: "New Chat", // The text displayed on the separator between conversations when a new chat is started. Optional.
  },
  theme: {
    header: {
      bgColor: "<Header background color>",
      textColor: "<Text color for the header>",
      resetChatBtn: {
        bgColor: "<Background color for reset button>",
        hoverBgColor: "<Hover background color for reset button>",
        textColor: "<Text color for reset button>",
      },
      minimizeBtn: {
        iconStrokeColor: "<Line Stroke color for the icon in the minimize button>"
      }
    },
    fabButton: {
      bgColor: "<Background color for the fab button>",
      iconStrokeColor: "<Line Stroke color for the icon in the fab button>",
      buttonSize: "<Floating action button size>", // Optional. Default is 50
      iconSize: "<Floating action button icon size>", // Optional. Default is 25
    },
    sendButton: {
      bgColor: "<Background color for the send button>",
      iconStrokeColor: "<Line Stroke color for the icon in the send button>"
    },
    attachments: {
      borderColor: "<Border color for attachments container>",
    },
    engagementMessage: {
      bgColor: "<Background color for the engagement message>",
      textColor: "<Text color for the engagement message>",
    },
    uploadFileBtn: {
      iconStrokeColor: "<Line Stroke color for the icon in the upload file button>"
    },
    messageBubble: {
      user: {
        bgColor: "<Background color for user message bubble>",
        textColor: "<Text color for user message bubble>",
      },
      assistant: {
        bgColor: "<Background color for assistant message bubble>",
        textColor: "<Text color for assistant message bubble>",
      },
    },
    conversationStarters: {
      bgColor: "<Background color for conversation starters>",
      textColor: "<Text color for conversation starters>",
      containerBgColor: "<Background color for conversation starters container>",
      initialMessageBgColor: "<Background color for initial message in conversation starters>",
      initialMessageTextColor: "<Text color for initial message in conversation starters>",
    },
    scrollToBottomIndicator: {
      bgColor: "<Background color for scroll to bottom indicator>",
      iconStrokeColor: "<Line Stroke color for the icon in the scroll to bottom indicator>"
    }
  },
  // Optional static input parameters to send to the agent
  inputParameters: {
    name: "John Doe",
    email: "[email protected]",
  },
  // Optional callback to resolve input parameters at runtime.
  // Runs when the conversation starts and before each message.
  // If provided, it takes precedence over inputParameters.
  getInputParameters: () => ({
    page: window.location.pathname,
    locale: navigator.language,
  })
};
Authentication
The chat widget supports two authentication modes: API Key and Token Provider. Both are suitable for production use — choose the one that best fits your needs. You must use one or the other — they are mutually exclusive. If both apiKey and tokenProvider are provided, the widget will throw an error.
To use a Token Provider, you first need to create an Agent Client, which provides the credentials required to authenticate your client application. See the Client Credentials documentation for more details.
API Key
The simplest way to authenticate. Provide your API key directly in the configuration:
const chat = new AIHubChat("aihub-chat", {
  apiKey: "<Your API key>",
  agentCode: "<Your Agent Code>",
  baseURL: "https://api.serenitystar.ai/api",
});
chat.init();
API keys are safe to include in client-side code — they are scoped with limited permissions and can be configured to only access specific Agents. The API key is sent with every request to authenticate the widget.
Token Provider
If you want an extra layer of security by managing authentication through your own server, you can use a token provider function. This delegates authentication to your own backend, which signs a short-lived Client Token (JWT) using the Client Secret.
The token provider consists of two components: the Client Token Provider, which runs in the client application (e.g., within the chat widget), and the Server Token Provider, which runs on your server.
Instead of providing an apiKey, you provide a publicKey and a tokenProvider callback:
const chat = new AIHubChat("aihub-chat", {
  agentCode: "<Your Agent Code>",
  channel: "web",
  baseURL: "https://api.serenitystar.ai/api",
  publicKey: "<Your Public Key>",
  tokenProvider: async ({ context }) => {
    const response = await fetch("https://your-server.com/auth/serenity-token", {
      method: "POST",
      headers: { "Content-Type": "application/json", "Authorization": `<if needed, add your server's authorization token here>` },
      body: JSON.stringify({ /* pass any necessary context information here as needed */ }),
    });
    const { token } = await response.json();
    return token; // Returns the Client Token (signed JWT)
  },
});
chat.init();
Configuration
| Property | Type | Required | Description |
|---|---|---|---|
publicKey | string | Yes | The Public Key provided when creating the Agent Client. |
channel | string | No | A channel identifier (e.g., "web", "mobile", "kiosk"). Defaults to undefined. Passed to the tokenProvider callback as part of the context. |
tokenProvider | ({ context }) => Promise<string> | Yes | Async function that returns a Client Token (signed JWT) from your backend. The context parameter contains information such as channel and agent details. |
apiKey and tokenProvider are mutually exclusive. When using tokenProvider, you must provide publicKey instead of apiKey.
How it works
The authentication flow works as follows:
-
Widget calls Client Token Provider — On initialization (and on every token refresh), the widget calls your
tokenProviderfunction, passing context information (such as channel and agent details). -
Server Token Provider signs a Client Token — The Client Token Provider sends a token request to your Server Token Provider. Your server creates a short-lived Client Token (JWT with recommended TTL: 30–60 seconds) signed with the Client Secret, and returns it.
-
Widget exchanges the Client Token — The widget sends the Client Token to the Serenity API, which validates the signature using the associated Client Secret stored on our servers.
-
Serenity API returns an Access Token — If the Client Token is valid, the Serenity API returns an Access Token that the widget uses for all subsequent API requests via the
Authorization: Bearer {accessToken}header.
┌────────────┐     ┌──────────────────────┐     ┌──────────────────────┐     ┌──────────────┐
│  Widget    │     │ Client Token         │     │ Server Token         │     │ Serenity API │
│ (browser)  │     │ Provider (your code) │     │ Provider (your code) │     │              │
└─────┬──────┘     └──────────┬───────────┘     └──────────┬───────────┘     └─────┬────────┘
      │                       │                            │                       │
      │  1. call with         │                            │                       │
      │  {context}            │                            │                       │
      │──────────────────────>│                            │                       │
      │                       │  2. POST {tokenRequest}    │                       │
      │                       │───────────────────────────>│                       │
      │                       │                            │  3. Sign Client Token │
      │                       │                            │     with Client Secret│
      │                       │  4. Client Token (JWT)     │                       │
      │                       │<───────────────────────────│                       │
      │  5. Client Token      │                            │                       │
      │<──────────────────────│                            │                       │
      │                                                                            │
      │  6. Exchange Client Token                                                  │
      │───────────────────────────────────────────────────────────────────────────>│
      │                                                     7. Validate signature  │
      │  8. Access Token                                                           │
      │<───────────────────────────────────────────────────────────────────────────│
      │                                                                            │
      │  9. Authorization: Bearer {accessToken}                                    │
      │───────────────────────────────────────────────────────────────────────────>│
Token refresh
The Access Token issued by the Serenity API has a limited lifetime. The widget automatically handles token refresh by calling your tokenProvider function again when needed, exchanging the new Client Token for a fresh Access Token, and resuming normal operation. No manual intervention or additional configuration is required.
Your tokenProvider function runs in the browser, so never include your Client Secret in client-side code. The signing must always happen on your server.
API Keys vs Public Keys
- API Keys can be used to authenticate a client application to access the Serenity Star API. They can be configured to have specific permissions and access to specific Agents. Anyone with the API Key can access the API and perform actions based on the permissions granted to that key.
- Public Keys are used in conjunction with the Client ID and Client Secret to authenticate a client application. They don't grant access to the API nor hold any permissions on their own.
Presentation modes
You can choose between different presentation modes for the chat widget. We have 2 inline modes and 3 floating modes available:
Inline modes
-
compact: The chat widget will be displayed as a box. This is useful when you want to manually position the chat widget on your page.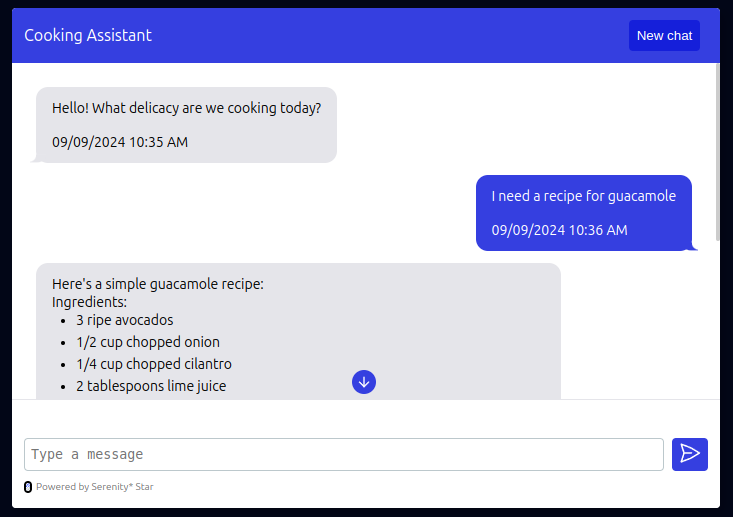
-
fullscreen: Similar to compact mode, but the chat widget will take up the entire screen.
Floating modes
Floating modes will always show a floating button on the bottom right corner of the page. When clicked, the chat widget will be displayed in different ways:
-
side-panel: The chat widget will be displayed as a side panel on the right side of the page, pushing the content to the left.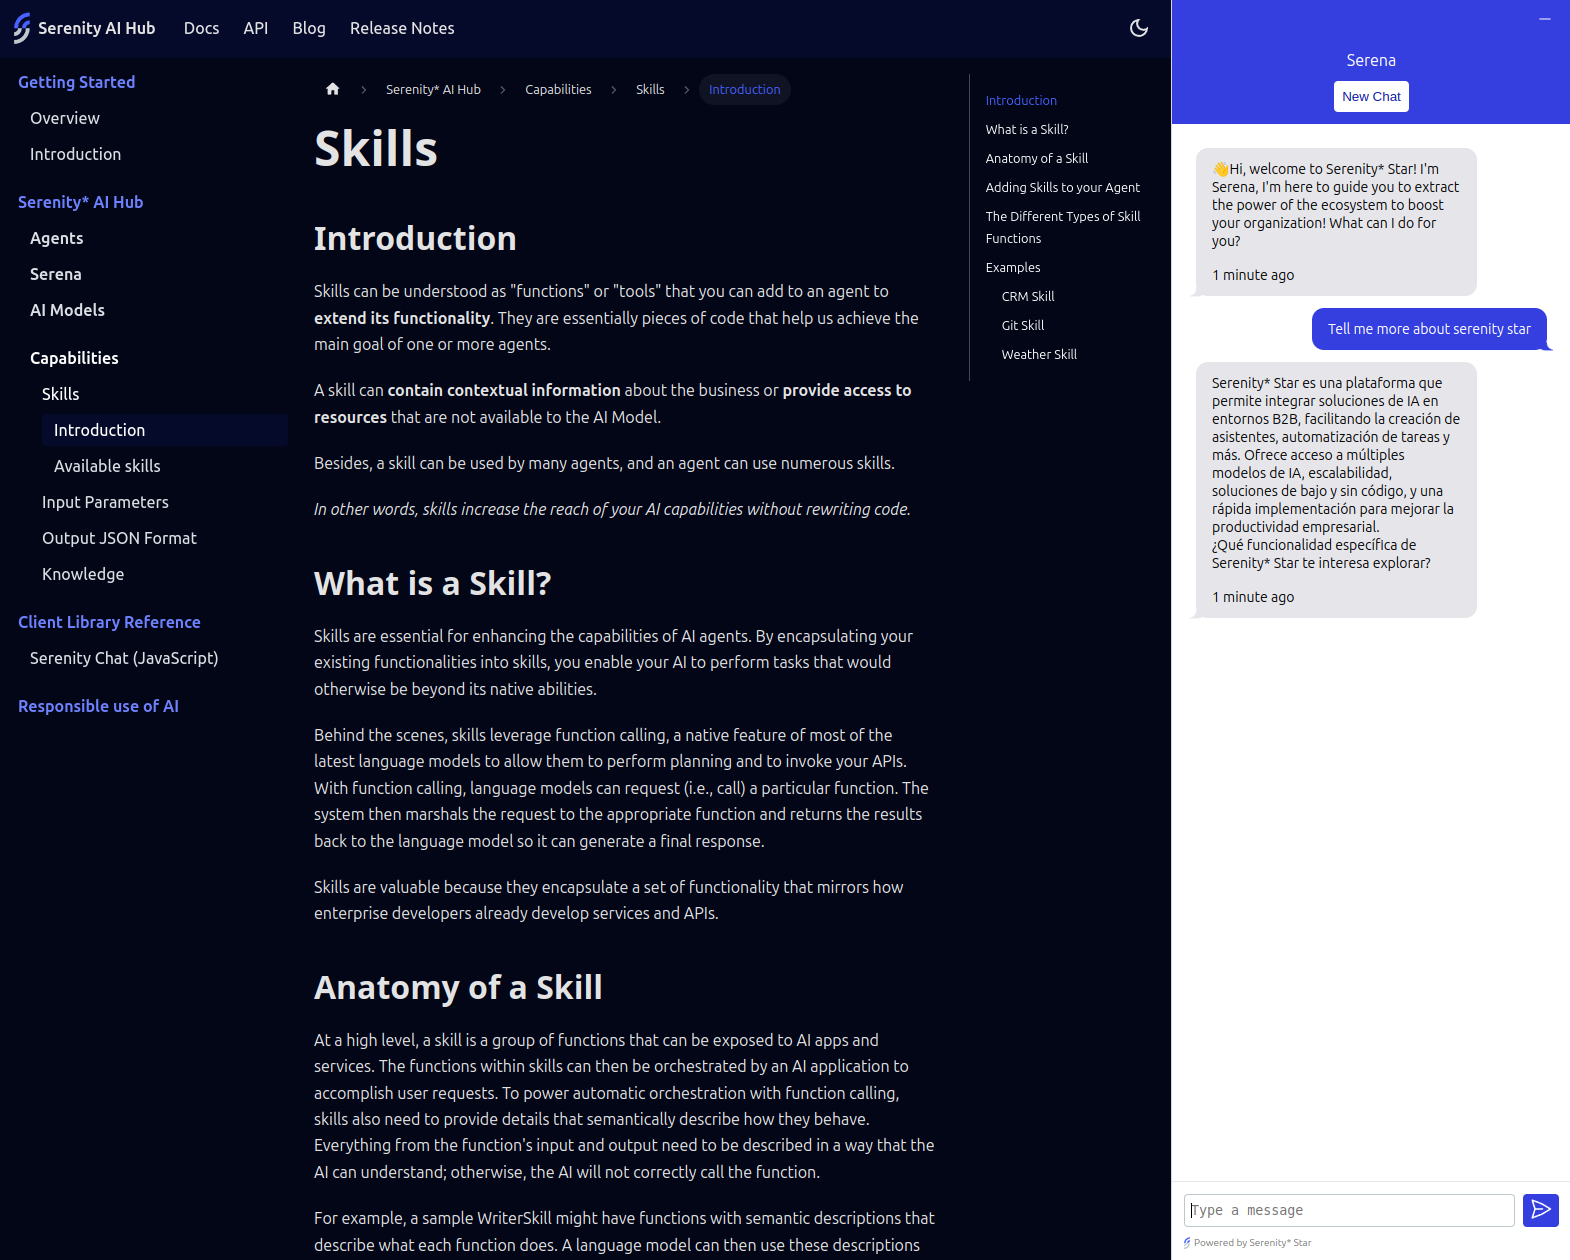
-
floating: The chat widget will be displayed as a floating chat window. (Default)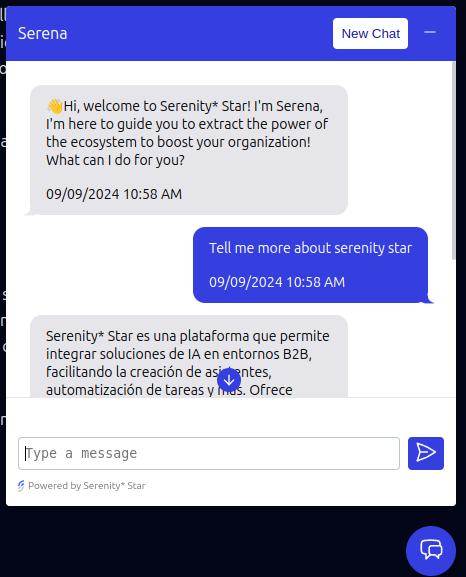
-
floating-side-panel: The chat widget will be displayed as a floating side panel on the right side of the page. It won't push the content to the left.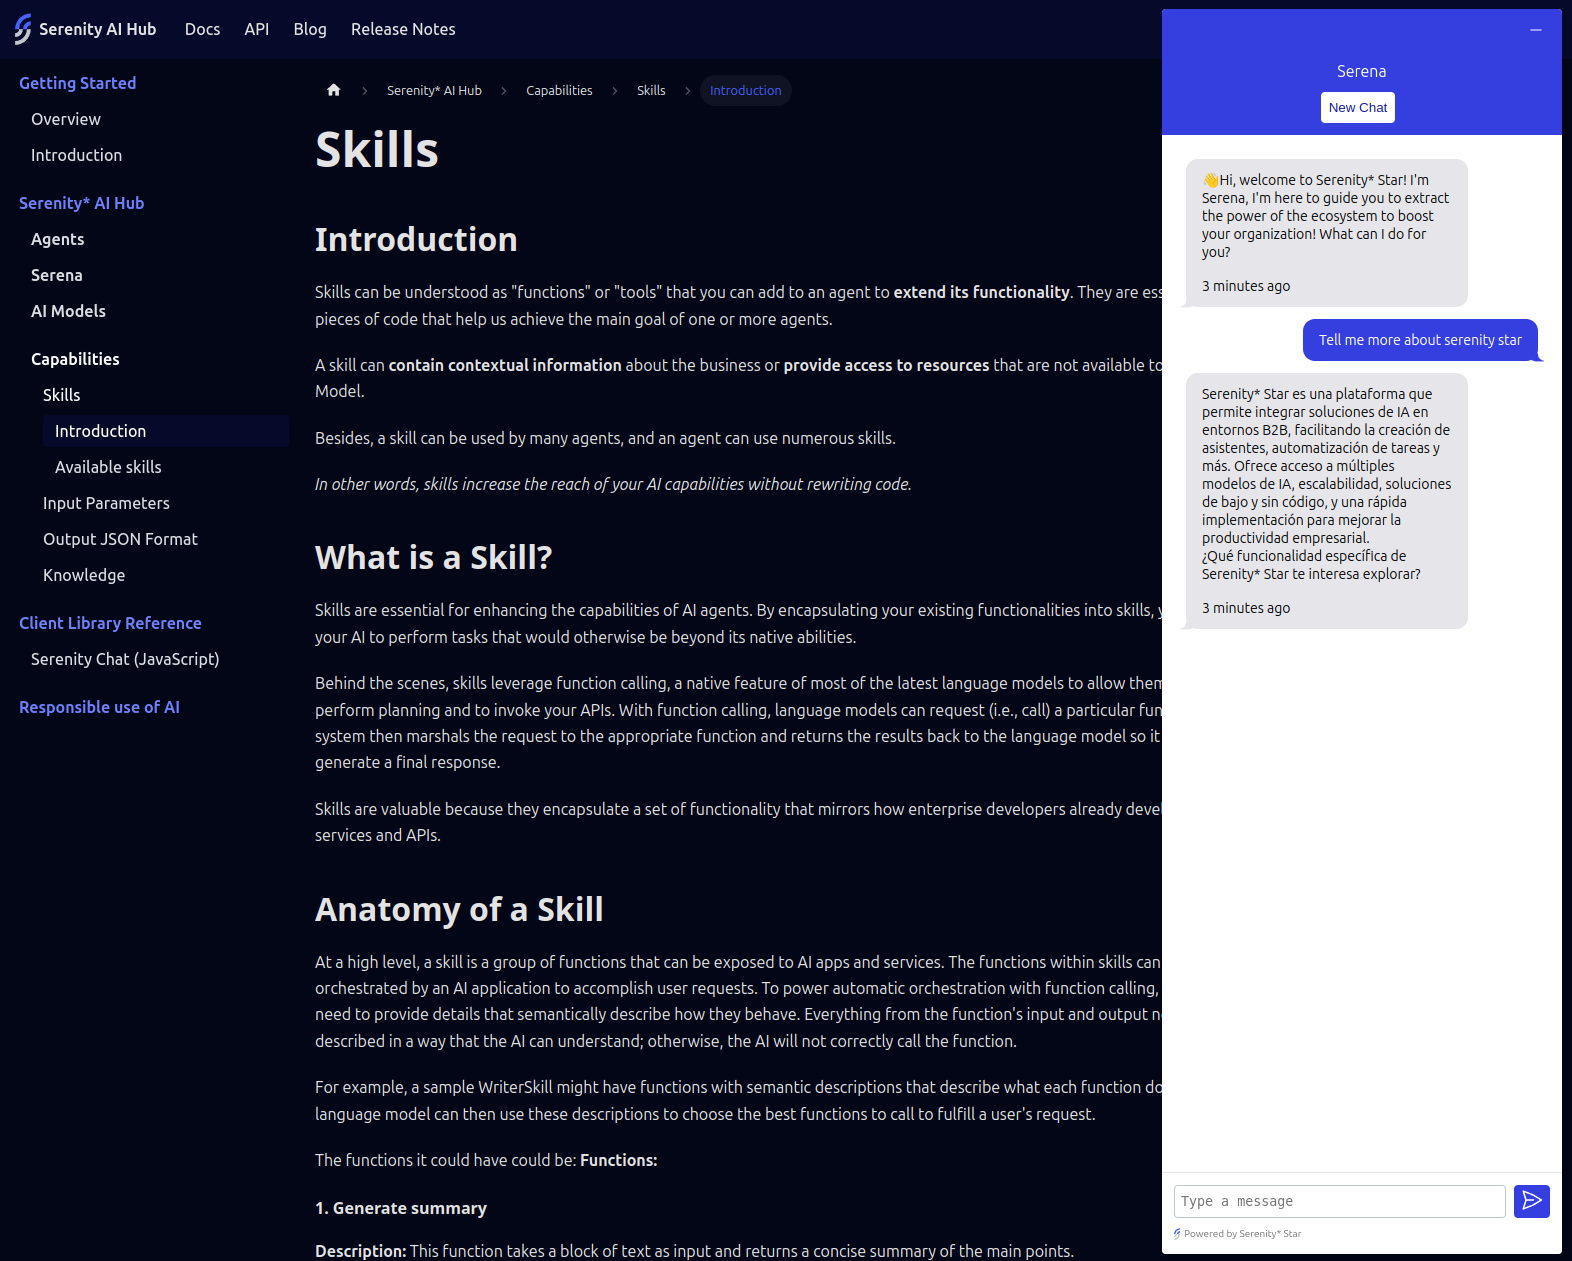
Stream / Single shot responses
You can choose between streaming responses as they are generated, or get a single-shot response at the end.
By default, the chat widget will stream responses as they are generated. If you want to get a single-shot response at the end, you can set the stream option to false.
const chat = new AIHubChat("aihub-chat", {
  apiKey: "<Your API key>",
  agentCode: "<Your Agent Code>",
  baseURL: "https://api.serenitystar.ai/api",
  stream: false, // Get a single-shot response at the end
});
Multiple instances on the same page
The chat widget supports multiple instances on the same page. You can create multiple instances of the chat widget by providing a unique ID for each instance:
<!-- These ids will be used to identify each instance -->
<div id="chat-1"></div>
<div id="chat-2"></div>
const chat1 = new AIHubChat("chat-1", {
  ...
});

const chat2 = new AIHubChat("chat-2", {
  ...
});
Keeping the conversation alive
By default, the chat widget will store the current conversation so that the user can continue the conversation even after refreshing the page.
If you want to start a new chat every time the page is refreshed, you can disable this behavior by setting the storeConversation option to false.
const chat = new AIHubChat("aihub-chat", {
  apiKey: "<Your API key>",
  agentCode: "<Your Agent Code>",
  baseURL: "https://api.serenitystar.ai/api",
  storeConversation: false, // Do not store the conversation
});
When
storeConversationis set totrue(by default), the header of the chat widget will display a "New Chat" button that allows the user to start a new chat.
You can even keep multiple conversations alive by providing a unique key for each conversation (as mentioned above):
<div id="chat-1"></div>
<div id="chat-2"></div>
const chat1 = new AIHubChat("chat-1", {
  apiKey: "<Your API key>",
  agentCode: "<Your Agent Code>",
  baseURL: "https://api.serenitystar.ai/api",
  storeConversation: true, // Store the conversation in local storage
});

const chat2 = new AIHubChat("chat-2", {
  apiKey: "<Your API key>",
  agentCode: "<Your Agent Code>",
  baseURL: "https://api.serenitystar.ai/api",
  storeConversation: true, // Store the conversation in local storage
});
Previous conversations
When showPreviousConversations is enabled, the chat widget stores all past conversation IDs in local storage. As the user scrolls up in the chat body, previous conversations are lazily loaded (most-recent-first) and rendered read-only above the current chat, separated by visual dividers.
const chat = new AIHubChat("aihub-chat", {
  apiKey: "<Your API key>",
  agentCode: "<Your Agent Code>",
  baseURL: "https://api.serenitystar.ai/api",
  showPreviousConversations: true,
});
chat.init();
How it works
- Every time a new conversation is created, its ID is persisted in local storage.
- When the user clicks "New Chat", the current conversation is finalized and a new one begins.
- As the user scrolls to the top of the chat body, previous conversations are loaded one at a time (most recent first) and displayed above the current messages.
- A visual separator with the text configured in
locale.endOfChatHistoryMessagemarks the boundary between previous conversations and the current one. - While a previous conversation is being fetched, a loading indicator with the text configured in
locale.loadingPreviousChatMessageis shown at the top of the chat.
Interaction with storeConversation
showPreviousConversations works independently of storeConversation. Even when storeConversation is false (meaning the current conversation is not persisted across page reloads), the previous conversation IDs are still stored. This allows the user to chat, reload the page, start a new conversation, and then scroll up to access their previous conversations.
Multiple instances
When using multiple chat widget instances on the same page, each instance stores its previous conversations separately using its own instance-scoped local storage key.
Edge cases
| Scenario | Behavior |
|---|---|
| No previous conversations exist | Scroll-to-top detection is skipped; nothing is rendered above the current chat. |
| All previous conversations already loaded | Scroll-to-top detection becomes a no-op; the "End of chat history" separator is displayed. |
| A previous conversation cannot be found (404) | The entry is skipped and the next one is loaded. |
| Agent code or base URL changed | Previous conversation history is cleared to avoid loading chats from a different agent. |
Customization
There are certain options available to customize the look and feel & general behavior of the chat widget:
maxHeight: The maximum height of the chat widget. This value will be ignored if the chat is in fullscreen mode.mode: The mode of the chat widget. The available options arecompact,floating, andfullscreen,side-panel, andfloating-side-panel. Default isfloating.compact: The chat widget will be displayed as a box. This is useful when you want to manually position the chat widget on your page.floating: The chat widget will be displayed as a floating button in the bottom right corner of the page. This is useful when you want the chat widget to be easily accessible. Once clicked, the chat will be displayed as a floating chat window (Default).fullscreen: The chat widget will be displayed as a fullscreen chat window. This is useful when you want the chat widget to take up the entire screen.side-panel: The chat widget will be displayed as a side panel on the right side of the page, pushing the content to the left.floating-side-panel: The chat widget will be displayed as a floating side panel on the right side of the page. It won't push the content to the left.
readOnly: Boolean that indicates whether the chat is read-only. When set totrue, the chat will not accept any user input.scrollToBottom: Boolean that indicates whether the chat should scroll to the bottom by default. Optional. Default istrue.allowUpload: Boolean that indicates whether file uploads are allowed.stream: Boolean that indicates whether the chat should stream responses as they are generated. Default istrue.showTermsAndConditions: Boolean that indicates whether the terms and conditions should be displayed before starting the chat.showAcceptCommunications: Boolean that indicates whether the accept communications checkbox should be displayed before starting the chat.expanded: Boolean that indicates whether the chat widget is expanded by default. This is only relevant in whenmodeisfloating,side-panel, orfloating-side-panel. Optional. Default isfalse.extractPageContent: Boolean that indicates whether the page content should be extracted and sent to the agent. Optional. Default isfalse.showPreviousConversations: Boolean that indicates whether previous conversations should be accessible by scrolling up in the chat body. When enabled, past conversation IDs are stored in local storage and their messages are lazily loaded as the user scrolls to the top. Optional. Default isfalse. Click here to learn more.inputParameters: Optional static input parameters object to send to the agent. Click here to learn more.getInputParameters: Optional callback that dynamically resolves input parameters during conversation setup and before each message. It can return the object directly or as aPromise, and it takes precedence overinputParameters. Click here to learn more.userIdentifier: String that indicates the user identifier. This will be sent to the agent only when the conversation starts. Optional.engagementMessage: Object that contains the configuration for the engagement message. Click here to learn more.logoURL: The URL to the logo image. Optional.preferredLanguage: Sets thelangattribute on the widget root element, which determines the language context for screen readers and assistive technology. Accepts a BCP 47 language tag (e.g.,"en","es","fr"). Optional. Default is"en".
Message metadata
You can optionally show metadata for each message, such as meta analysis, token completion usage, and time to first token. All this information is optional and can be enabled/disabled using the following options:
const chat = new AIHubChat("aihub-chat", {
  ..., // Other options
  showMetaAnalysisInfo: true, // Show meta analysis info on each message
  showTokenUsageInfo: true, // Show token usage info on each message
  showTimeToFirstTokenInfo: true, // Show time to first token info on each message
  showExecutorTaskLogsInfo: true, // Show executor task logs info on each message
});
Localization
You can customize the text displayed in the chat widget by providing a locale object with the following properties:
uploadFileErrorMessage: The error message for file uploads.uploadFilesErrorMessage: The error message for multiple file uploads.chatErrorMessage: The error message for chat messages.headerTitle: The title of the chat header.finalizedMessage: The message displayed when the chat is finalized.chooseAnOptionMessage: The message displayed when choosing an option.limitExceededMessage: The message displayed when the character limit is exceeded.waitUntilMessage: The message displayed when waiting for a response.remainingMessage: The message displayed when there are remaining characters.termsAndConditionsMessage: The terms and conditions message.acceptCommunicationsMessage: The accept communications message.inputPlaceholder: The placeholder text for the chat input.metaAnalysisTitle: The title for the meta analysis card on each message.completionUsageTitle: The title for the token completion usage card on each message.newChatBtnMessage: The message for the "New chat" button in the header. (Only visible whenstoreConversationistrue)timeToFirstTokenTitle: The title for the time to first token tooltip.executorTaskLogsTitle: The title for the executor task logs card on each message.millisecondsUnit: The unit for milliseconds.exceededMaxNumberOfFilesMessage: The message displayed when the user tries to upload more than the allowed number of files.exceededMaxFileStatusChecksMessage: Message to display when files are taking longer than expected to upload.chatInitConversationErrorMessage: The error message to display when there is an error initializing the conversation.closedConversationMessage: The message displayed when the conversation has been closed by the server.loadingPreviousChatMessage: The message displayed while loading a previous conversation. Default is"Loading previous chat...".endOfChatHistoryMessage: The message displayed at the boundary between previous conversations and the current one. Default is"End of chat history".loadPreviousChatButtonMessage: The label for the button that loads a previous conversation. Default is"Load previous chat".newChatSeparatorMessage: The text displayed on the separator between conversations when a new chat is started. Default is"New Chat".accessibility: An object containing all accessibility-related labels used by screen readers and assistive technology. See below for the full list of properties and their defaults.
Accessibility labels
The locale.accessibility object allows you to customize all ARIA labels and screen reader announcements used throughout the widget. All properties are optional and have sensible English defaults.
| Property | Default | Description |
|---|---|---|
widgetLabel | "Chat" | Label for the chat widget region |
messageListLabel | "Chat messages" | Label for the message list |
audioMessageLabel | "Audio message" | Label for audio messages |
assistantMessageLabel | "Assistant message" | Label for assistant messages |
userMessageLabel | "Your message" | Label for user messages |
minimizeChat | "Minimize chat" | Label for the minimize button |
maximizeChat | "Maximize chat" | Label for the maximize button |
startNewConversation | "Start new conversation" | Label for the new conversation button |
expandChat | "Expand chat" | Label for the expand button |
collapseChat | "Collapse chat" | Label for the collapse button |
sendMessage | "Send message" | Label for the send button |
attachFile | "Attach file" | Label for the file upload button |
recordAudioMessage | "Record audio message" | Label for the audio record button |
openChat | "Open chat" | Label for the FAB button |
scrollToLatestMessages | "Scroll to latest messages" | Label for the scroll-to-bottom button |
rateAsHelpful | "Rate as helpful" | Label for the thumbs-up feedback button |
rateAsNotHelpful | "Rate as not helpful" | Label for the thumbs-down feedback button |
dismissMessage | "Dismiss message" | Label for dismissing a message |
stopGenerating | "Stop generating" | Label for the stop streaming button |
loading | "Loading" | Label for loading indicators |
recordingStarted | "Recording audio. Press Escape to cancel." | Announced when audio recording starts |
recordingStopped | "Audio recording complete." | Announced when audio recording completes |
recordingCancelled | "Audio recording cancelled." | Announced when audio recording is cancelled |
cancelRecording | "Cancel recording" | Label for the cancel recording button |
pauseRecording | "Pause recording" | Label for the pause recording button |
resumeRecording | "Recording paused. Resume recording" | Label for the resume recording button |
sendRecording | "Send recording" | Label for the send recording button |
rateLimitCountdown | "Rate limit countdown" | Label for the rate limit countdown timer |
conversationStartersLabel | "Suggested conversation starters" | Label for the conversation starters section |
removeAttachment | "Remove attachment" | Label for the remove attachment button |
attachedFiles | "Attached files" | Label for the attached files area |
skipToMessageInput | "Skip to message input" | Label for the skip link |
accessibilityMenuButton | "Accessibility options" | Label for the accessibility menu button |
accessibilityMenu | "Accessibility options menu" | Label for the accessibility menu |
highContrastMode | "High contrast mode" | Label for the high contrast mode toggle |
const chat = new AIHubChat("aihub-chat", {
  ..., // Other options
  locale: {
    uploadFileErrorMessage: "Error uploading file",
    uploadFilesErrorMessage: "Error uploading files",
    chatErrorMessage: "Error sending message",
    headerTitle: "Chat with us",
    finalizedMessage: "Chat finalized",
    chooseAnOptionMessage: "Choose an option",
    limitExceededMessage: "Character limit exceeded",
    waitUntilMessage: "Please wait until we respond",
    remainingMessage: " characters remaining",
    termsAndConditionsMessage: "By using this chat, you agree to our terms",
    acceptCommunicationsMessage: "I agree to receive communications",
    inputPlaceholder: "Write your message here...",
    newChatBtnMessage: "New Chat",
    timeToFirstTokenTitle: "Time to first token",
    executorTaskLogsTitle: "Executor Task Logs",
    millisecondsUnit: "ms",
    exceededMaxNumberOfFilesMessage: "You can only upload up to 5 files per message",
    exceededMaxFileStatusChecksMessage: "It seems that the file upload is taking longer than expected. Please try again later.",
    chatInitConversationErrorMessage: "Error initializing conversation",
    closedConversationMessage: "This conversation has ended.",
    loadingPreviousChatMessage: "Loading previous chat...",
    endOfChatHistoryMessage: "End of chat history",
    loadPreviousChatButtonMessage: "Load previous chat",
    newChatSeparatorMessage: "New Chat",
    accessibility: {
      widgetLabel: "Chat",
      messageListLabel: "Chat messages",
      audioMessageLabel: "Audio message",
      assistantMessageLabel: "Assistant message",
      userMessageLabel: "Your message",
      minimizeChat: "Minimize chat",
      maximizeChat: "Maximize chat",
      startNewConversation: "Start new conversation",
      expandChat: "Expand chat",
      collapseChat: "Collapse chat",
      sendMessage: "Send message",
      attachFile: "Attach file",
      recordAudioMessage: "Record audio message",
      openChat: "Open chat",
      scrollToLatestMessages: "Scroll to latest messages",
      rateAsHelpful: "Rate as helpful",
      rateAsNotHelpful: "Rate as not helpful",
      dismissMessage: "Dismiss message",
      stopGenerating: "Stop generating",
      loading: "Loading",
      recordingStarted: "Recording audio. Press Escape to cancel.",
      recordingStopped: "Audio recording complete.",
      recordingCancelled: "Audio recording cancelled.",
      cancelRecording: "Cancel recording",
      pauseRecording: "Pause recording",
      resumeRecording: "Recording paused. Resume recording",
      sendRecording: "Send recording",
      rateLimitCountdown: "Rate limit countdown",
      conversationStartersLabel: "Suggested conversation starters",
      removeAttachment: "Remove attachment",
      attachedFiles: "Attached files",
      skipToMessageInput: "Skip to message input",
      accessibilityMenuButton: "Accessibility options",
      accessibilityMenu: "Accessibility options menu",
      highContrastMode: "High contrast mode",
    },
  },
});
Theme
You can customize the look and feel of the chat widget by providing a theme object with the following properties:
The
themeobject is optional. If not provided, the default theme will be used.
const chat = new AIHubChat("aihub-chat", {
  ...
  theme: {
    header: {
      bgColor: "<Header background color>",
      textColor: "<Text color for the header>",
      resetChatBtn: {
        bgColor: "<Reset chat button background color>",
        hoverBgColor: "<Hover background color for reset chat button>",
        textColor: "<Reset chat button text color>",
      },
      minimizeBtn: {
        iconStrokeColor: "<Line Stroke color for the icon in the minimize button>"
      },
    },
    fabButton: {
      bgColor: "<Floating action button background color>",
      iconStrokeColor: "<Line Stroke color for the icon in the fab button>",
      buttonSize: "<Floating action button size>", // Optional. Default is 50
      iconSize: "<Floating action button icon size>", // Optional. Default is 25
    },
    sendButton: {
      bgColor: "<Send button background color>",
      iconStrokeColor: "<Line Stroke color for the icon in the send button>"
    },
    attachments: {
      borderColor: "<Border color for attachments container>",
    },
    engagementMessage: {
      bgColor: "<Background color for the engagement message>",
      textColor: "<Text color for the engagement message>",
    },
    uploadFileBtn: {
      iconStrokeColor: "<Line Stroke color for the icon in the upload file button>"
    },
    messageBubble: {
      user: {
        bgColor: "<Background color for user message bubble>",
        textColor: "<Text color for user message bubble>",
      },
      assistant: {
        bgColor: "<Background color for assistant message bubble>",
        textColor: "<Text color for assistant message bubble>",
      },
    },
    conversationStarters: {
      bgColor: "<Background color for conversation starters>",
      textColor: "<Text color for conversation starters>",
      containerBgColor: "<Background color for conversation starters container>",
      initialMessageBgColor: "<Background color for initial message in conversation starters>",
      initialMessageTextColor: "<Text color for initial message in conversation starters>",
    },
    scrollToBottomIndicator: {
      bgColor: "<Background color for scroll to bottom indicator>",
      iconStrokeColor: "<Line Stroke color for the icon in the scroll to bottom indicator>"
    }
  }
})
CSS Styling Considerations
Default build (Shadow DOM)
The default chat widget uses Shadow DOM, which fully isolates the widget's styles from your page. No special CSS precautions are needed — your page styles will not affect the widget, and the widget's styles will not leak into your page.
If you need to adjust the widget's appearance, use the theme configuration object.
Customizable build (no Shadow DOM)
If you are using the customizable build, the widget renders without Shadow DOM and exposes stable sc-* semantic CSS classes for overriding styles. See the Customizable Build section for full setup and usage details.
Because the customizable build does not use Shadow DOM, overly broad CSS selectors on your page can unintentionally break the widget. Keep these guidelines in mind:
- Avoid generic selectors like
*,div,button,input,p— scope them to your own containers instead (e.g.,.my-page-content button) - Don't use
!importantin global styles — the widget's baseline CSS does not use!important, so generic!importantrules will override it unexpectedly - Watch for box-sizing resets — the widget relies on
box-sizing: border-box - Be mindful of z-index — very high z-index values in your styles might cover the widget's floating elements
- Test the widget after making global CSS changes to ensure it still renders correctly
Loading an existing conversation
You can load an existing conversation by using the conversationId option like this:
const chat = new AIHubChat("aihub-chat", {
  apiKey: "<Your API key>",
  agentCode: "<Your Agent Code>",
  baseURL: "https://api.serenitystar.ai/api",
  conversationId: "<Conversation ID>", // <-- Required
});
Extracting the page content
We have a content extractor that can be used to extract the content from the current page and send it to the agent.
This way, you can easily improve the agent response by providing more context about the user's current page.
To use the content extractor, use the extractPageContent flag like this:
<script>
  document.addEventListener("DOMContentLoaded", function () {
    const chat = new AIHubChat("aihub-chat", {
      apiKey: "API_KEY",
      agentCode: "AGENT_CODE",
      baseURL: "https://api.serenitystar.ai/api",
      extractPageContent: true,
    });
    chat.init();
  });
</script>
Input parameters
You can optionally provide input parameters to the agent to send additional context with the conversation.
Use inputParameters when the values are static and use getInputParameters when the values need to be resolved at runtime.
If you provide both options, getInputParameters takes precedence over inputParameters.
Static input parameters
Use inputParameters when you want to send the same object during conversation setup and with each message.
const chat = new AIHubChat("aihub-chat", {
  apiKey: "<Your API key>",
  agentCode: "<Your Agent Code>",
  baseURL: "https://api.serenitystar.ai/api",
  inputParameters: {
    name: "John Doe",
    email: "[email protected]",
  },
});
Static input parameters are sent to the agent when the conversation starts and with each message.
Dynamic input parameters
Use getInputParameters when you want the widget to read the latest values from your page or application state before sending data to the agent.
The callback runs when the conversation is created and again before each message is sent. It can return the object directly or return a Promise that resolves to the object.
const chat = new AIHubChat("aihub-chat", {
  apiKey: "<Your API key>",
  agentCode: "<Your Agent Code>",
  baseURL: "https://api.serenitystar.ai/api",
  getInputParameters: () => ({
    currentPath: window.location.pathname,
    language: navigator.language,
  }),
});
Use this callback when the values may change between messages, such as the current route, a selected account, or a session value.
Agent Response Callbacks
You can capture each response from the agent by providing an onAgentResponse callback function. This allows you to process or use the agent's response data in your application.
const chat = new AIHubChat("aihub-chat", {
  apiKey: "<Your API key>",
  agentCode: "<Your Agent Code>",
  baseURL: "https://api.serenitystar.ai/api",
  onAgentResponse: (response) => {
    console.log("Agent response:", response);
    // Process the response data as needed
  }
});
The response object contains detailed information about the agent's response, including:
content: The text content of the agent's responsejson_content: Any JSON content that might be returned (null if not applicable)completion_usage: Token usage statistics for the responsecompletion_tokens: Number of tokens used for the completionprompt_tokens: Number of tokens used for the prompttotal_tokens: Total number of tokens used
action_results: Results of any actions performed by the agentmeta_analysis: Any meta analysis data (null if not applicable)time_to_first_token: Time in milliseconds until the first token was receivedinstance_id: Unique identifier for the response instanceexecutor_task_logs: Detailed logs of the execution tasks, including:description: Description of the taskduration: Duration of the task in millisecondssuccess: Boolean indicating if the task was successful
Example response object:
{
  "content": "To create a contact form in HTML, you'll need to use the <form> element along with various input fields. Here's a basic example:\n\n```html\n<form action=\"submit_form.php\" method=\"POST\">\n  <div>\n    <label for=\"name\">Name:</label>\n    <input type=\"text\" id=\"name\" name=\"name\" required>\n  </div>\n  \n  <div>\n    <label for=\"email\">Email:</label>\n    <input type=\"email\" id=\"email\" name=\"email\" required>\n  </div>\n  \n  <div>\n    <label for=\"message\">Message:</label>\n    <textarea id=\"message\" name=\"message\" rows=\"5\" required></textarea>\n  </div>\n  \n  <button type=\"submit\">Submit</button>\n</form>\n```\n\nYou can style this form using CSS and add JavaScript for validation. Remember to implement proper server-side processing for the form submission.",
  "json_content": null,
  "completion_usage": {
    "completion_tokens": 182,
    "prompt_tokens": 125,
    "total_tokens": 307
  },
  "action_results": {},
  "meta_analysis": null,
  "time_to_first_token": 1520,
  "instance_id": "675e9321-4b76-c3e8-f5a2-9c41b7d32e45",
  "executor_task_logs": [
    {
      "description": "Loading configuration",
      "duration": 18,
      "success": true
    },
    {
      "description": "Validating configuration",
      "duration": 7,
      "success": true
    },
    {
      "description": "Calculating remaining token budget",
      "duration": 45,
      "success": true
    },
    {
      "description": "Appending context",
      "duration": 39,
      "success": true
    },
    {
      "description": "Getting AI response",
      "duration": 2458,
      "success": true
    },
    {
      "description": "Calculating prices",
      "duration": 3,
      "success": true
    },
    {
      "description": "Updating chat",
      "duration": 10,
      "success": true
    }
  ]
}
This callback is particularly useful for applications that need to:
- Track and analyze agent responses
- Extract specific data from responses
- Trigger additional actions based on agent responses
- Log conversation metrics
Engagement message
By default, the chat widget will display an engagement message (popup) after a certain amount of time.
This message is intended to engage the user and encourage them to start a conversation with the agent.
You can customize the engagement message by providing an engagementMessage object with the following properties:
enabled: Boolean that indicates whether the engagement message should be displayed. Optional. Default istrue.message: The message to display in the engagement message. Optional. It will show the initial message from the agent if not provided.showAfter: The time in seconds after which the engagement message should be displayed. Optional. Default is10seconds.
const chat = new AIHubChat("aihub-chat", {
  apiKey: "<Your API key>",
  agentCode: "<Your Agent Code>",
  baseURL: "https://api.serenitystar.ai/api",
  engagementMessage: {
    enabled: true,
    message: "Hello, how can I help you?",
    showAfter: 10, // seconds
  },
});
If the message is not provided, the initial message from the agent will be displayed instead.
Error Handling
The chat widget handles errors gracefully and displays appropriate messages to users when something goes wrong. Depending on the type of error, the widget will show a message in the chat, display a countdown timer, or disable the input.
Error scenarios
| Scenario | What the user sees | Chat input behavior |
|---|---|---|
| Rate limit exceeded | A countdown timer indicating when messages can be sent again. | Disabled until the countdown expires. |
| Conversation closed | An informational message indicating the conversation has ended. | Permanently disabled. |
| Quota or balance exceeded | A generic error message. | Re-enabled for retry. |
| Validation errors | The specific error details returned by the server. | Re-enabled for retry. |
| Network or unexpected errors | A generic error message. | Re-enabled for retry. |
| Streaming errors | The server-provided error message, or a generic fallback. | Re-enabled for retry. |
Error display styles
Errors are displayed differently depending on their nature:
- Error messages appear as chat bubbles with error styling (e.g., quota exceeded, network failures, streaming errors).
- Info messages appear with informational styling (e.g., conversation closed).
- Countdown timer replaces the chat input area when a rate limit is hit, showing a timer until the user can send messages again.
Customizing error messages
You can customize the error messages shown to users through the locale configuration:
const chat = new AIHubChat("aihub-chat", {
  apiKey: "<Your API key>",
  agentCode: "<Your Agent Code>",
  baseURL: "https://api.serenitystar.ai/api",
  locale: {
    chatErrorMessage: "Something went wrong. Please try again.",
    closedConversationMessage: "This conversation has ended.",
    limitExceededMessage: "You've reached the message limit.",
    waitUntilMessage: "Please wait until",
  },
});
| Property | Description |
|---|---|
chatErrorMessage | Generic fallback message for most error types. Defaults to "Unexpected error" if not set. |
closedConversationMessage | Message shown when the conversation has been closed by the server. |
limitExceededMessage | Text displayed alongside the countdown timer when a rate limit is hit. |
waitUntilMessage | Text displayed alongside the countdown timer to indicate when the user can retry. |
If no custom error messages are configured through locale, the widget will fall back to "Unexpected error" as the default message.
Usage examples
Basic usage
const chat = new AIHubChat("aihub-chat", {
  apiKey: "<Your API key>",
  agentCode: "<Your Agent Code>",
  baseURL: "https://api.serenitystar.ai/api",
});
chat.init();
Read-only mode
const chat = new AIHubChat("aihub-chat", {
  apiKey: "<Your API key>",
  agentCode: "<Your Agent Code>",
  baseURL: "https://api.serenitystar.ai/api",
  readOnly: true,
  messages: [
    {
      sender: "bot",
      createdAt: "2024-04-26T12:00:00Z",
      type: "text",
      value: "Hello, how can I help you?",
    },
    {
      sender: "user",
      createdAt: "2024-04-26T12:01:00Z",
      type: "text",
      value: "Hello, I have a question about cooking recipes",
    },
    {
      sender: "bot",
      createdAt: "2024-04-26T12:02:00Z",
      type: "text",
      value: "Sure, what would you like to know?",
    },
  ],
});
Customizable Build (Advanced CSS Overrides)
The default chat widget uses Shadow DOM to isolate its styles from your page. This is ideal for most use cases, but it prevents you from overriding the widget's internal CSS.
For clients who need full control over the widget's appearance, we provide an alternative customizable build that renders without Shadow DOM and ships styles as a separate CSS file. This allows you to override any style using standard CSS selectors.
The customizable build intentionally exposes the widget's internals to your page CSS. This means global styles on your page can affect the widget. Use this build only when you need deep CSS customization and are prepared to manage potential style conflicts.
Setup
Replace the default resources with the customizable ones:
<!-- 1. Widget CSS (load first) -->
<link
  rel="stylesheet"
  href="https://hub.serenitystar.ai/resources/chat-customizable.css"
/>

<!-- 2. Your CSS overrides (load after the widget CSS) -->
<link rel="stylesheet" href="your-overrides.css" />

<!-- 3. Widget container -->
<div id="aihub-chat"></div>

<!-- 4. Widget JS -->
<script src="https://hub.serenitystar.ai/resources/chat-customizable.js"></script>

<!-- 5. Initialize (same API as the default build) -->
<script>
  document.addEventListener("DOMContentLoaded", function () {
    const chat = new AIHubChat("aihub-chat", {
      apiKey: "<Your API key>",
      agentCode: "<Your Agent Code>",
      baseURL: "https://api.serenitystar.ai/api",
    });
    chat.init();
  });
</script>
How it works
- The widget renders in the light DOM (no Shadow DOM), so your CSS rules can reach its internal elements.
- The widget's own stylesheet uses
all: initial(without!important) on the root element, giving it a clean baseline. - Because
!importantis not used, any CSS you load after the widget's stylesheet wins naturally via the cascade — no need for!importanton your side.
Overriding styles with semantic classes
Every meaningful element in the widget has a stable semantic CSS class prefixed with sc- (serenity chat). These classes carry no styles by themselves — they exist purely as hooks for your overrides.
/* your-overrides.css */

/* Change header appearance */
.sc-header {
  background: #1a1a2e;
  border-radius: 0;
}

/* Style user message bubbles */
.sc-message-bubble--user {
  background: #1a73e8;
  color: white;
  border-radius: 16px 16px 4px 16px;
}

/* Style agent message bubbles */
.sc-message-bubble--agent {
  background: white;
  border: 1px solid #e0e0e0;
  border-radius: 16px 16px 16px 4px;
}

/* Customize the send button */
.sc-footer-send-btn {
  background: #1a73e8;
  border-radius: 50%;
}

/* Customize the floating action button */
.sc-fab-btn {
  width: 64px;
  height: 64px;
  background: #1a73e8;
}
Naming convention
| Pattern | Example | Meaning |
|---|---|---|
sc-{component} | sc-header, sc-footer | Component root |
sc-{component}-{element} | sc-header-title, sc-footer-textarea | Child element |
sc-{component}--{variant} | sc-message-bubble--user | Variant/modifier |
Default build vs. Customizable build
| Feature | Default build | Customizable build |
|---|---|---|
| Files needed | chat.js only | chat-customizable.js + chat-customizable.css |
| Shadow DOM | Yes (styles fully isolated) | No (styles exposed to page CSS) |
| CSS overrides | Only via theme config options | Full CSS control via sc-* classes |
| Risk of style conflicts | None | Client accepts this trade-off |
| Configuration API | Identical | Identical |
The sc-* classes are treated as a public API. They follow semantic versioning — class names will not change in minor or patch releases.
For a complete list of all available semantic classes, see the Appendix: Semantic CSS Classes Reference at the end of this page.
Accessibility
The Chat Widget is designed to be fully accessible and compliant with WCAG 2.1 AA and UNE-EN 301549 standards. It includes semantic HTML structure, comprehensive ARIA attribute support, full keyboard navigation, visual accessibility features, and a built-in high contrast mode.
All accessibility labels used by screen readers and assistive technology can be customized through the locale.accessibility configuration.
For a detailed breakdown of all accessibility measures, implementation details, and the full WCAG 2.1 AA compliance matrix, see the Chat Widget — Accessibility page.
Appendix: Semantic CSS Classes Reference
Below is the complete list of semantic CSS classes available in the customizable build, grouped by component. Use these classes in your override stylesheet to target specific elements.
Layout
Chat (root wrapper)
| Class | Element |
|---|---|
sc-root | Outermost wrapper |
sc-wrapper | Positioned container |
sc-wrapper-inner | Animated inner wrapper |
sc-chat | Main chat card |
sc-fab-area | FAB + engagement message container |
Header
| Class | Element |
|---|---|
sc-header | Header root |
sc-header--side-panel | Side-panel header variant |
sc-header-actions | Top buttons row (side-panel mode) |
sc-header-content | Logo + title area (side-panel mode) |
sc-header-logo | Logo image |
sc-header-title | Title text |
sc-header-toggle-btn | Minimize / expand button |
sc-header-expand-btn | Expand to side-panel button |
sc-header-reset-btn | New chat / reset button |
Body
| Class | Element |
|---|---|
sc-body | Scrollable outer area |
sc-body-inner | Inner content wrapper |
sc-messages | Message list container |
sc-prev-chats-loading | Loading indicator for previous chats |
sc-messages-load-prev-btn | "Load previous chat" button |
sc-messages-typing-indicator | Typing animation wrapper |
sc-messages-countdown | Rate-limit countdown wrapper |
Footer
| Class | Element |
|---|---|
sc-footer | Footer root container |
sc-footer-input-wrapper | Input area wrapper (textarea + buttons) |
sc-footer-textarea | Text input |
sc-footer-mic-btn | Microphone / audio recording button |
sc-footer-upload-btn | File upload button |
sc-footer-file-input | Hidden file input |
sc-footer-send-btn | Send message button |
sc-footer-stop-btn | Stop streaming button |
sc-footer-finalized | End-of-conversation message |
sc-footer-attachments | Attachments scroll area |
sc-footer-upload-error | File validation error |
sc-footer-disclaimer | Disclaimer wrapper |
sc-footer-disclaimer-text | Disclaimer text |
sc-footer-disclaimer-toggle | "See more" / "See less" toggle |
Messages
MessageBox
| Class | Element |
|---|---|
sc-message-wrapper | Message row wrapper |
sc-message-wrapper--agent | Agent message row |
sc-message-wrapper--user | User message row |
sc-message-bubble | Message bubble |
sc-message-bubble--agent | Agent bubble variant |
sc-message-bubble--user | User bubble variant |
sc-message-bubble--error | Error message variant |
sc-message-bubble--info | Info message variant |
sc-message-text | Message text content |
sc-message-audio | Audio message player |
sc-message-time | Message timestamp |
Message Metadata
| Class | Element |
|---|---|
sc-message-metadata | Metadata row |
sc-message-metadata-time | Timestamp |
sc-message-metadata-icons | Action icons row |
sc-message-metadata-analysis | Meta analysis button |
sc-message-metadata-usage | Token usage button |
sc-message-metadata-logs | Executor logs button |
sc-message-metadata-ttft | Time-to-first-token indicator |
Message Pending Actions
| Class | Element |
|---|---|
sc-pending-actions | Actions container |
sc-pending-action | Single action card |
sc-pending-action-icon | Connector icon |
sc-pending-action-name | Connector name |
sc-pending-action-connect-btn | Connect button |
Message Skills
| Class | Element |
|---|---|
sc-message-skills | Skills container |
sc-message-skill | Individual skill |
Inline Attachments
| Class | Element |
|---|---|
sc-inline-attachments | Attachments list |
sc-inline-attachment | Single attachment |
sc-inline-attachment-icon | File icon |
sc-inline-attachment-info | File name + details |
sc-inline-attachment-size | File size |
Feedback
| Class | Element |
|---|---|
sc-feedback | Feedback container |
sc-feedback-thumbs-up | Thumbs-up button |
sc-feedback-thumbs-down | Thumbs-down button |
Interactive Components
Floating Action Button (FAB)
| Class | Element |
|---|---|
sc-fab-btn | Floating action button |
Conversation Starters
| Class | Element |
|---|---|
sc-starters | Root container |
sc-starters-welcome | Welcome message container |
sc-starters-welcome-logo | Welcome logo |
sc-starters-welcome-text | Welcome text |
sc-starters-buttons | Buttons wrapper |
sc-starters-btn | Individual starter button |
Engagement Message
| Class | Element |
|---|---|
sc-engagement | Popup wrapper |
sc-engagement-card | Message card |
sc-engagement-close | Close button |
sc-engagement-text | Message text |
sc-engagement-arrow | Arrow / triangle pointer |
Scroll To Bottom Indicator
| Class | Element |
|---|---|
sc-scroll-indicator | Outer container |
sc-scroll-indicator-btn | Clickable button |
Audio Recorder
| Class | Element |
|---|---|
sc-audio-recorder | Root container |
sc-audio-recorder-inner | Inner container |
sc-audio-recorder-error | Permission error container |
sc-audio-recorder-error-text | Error text |
sc-audio-recorder-status | Recording status message |
sc-audio-recorder-actions | Buttons container |
sc-audio-recorder-cancel-btn | Cancel button |
sc-audio-recorder-pause-btn | Pause / resume button |
sc-audio-recorder-send-btn | Send recording button |
sc-audio-recorder-uploading | Uploading indicator |
File Attachments
| Class | Element |
|---|---|
sc-attachments | Attachments list |
sc-attachment | Single attachment |
sc-attachment--error | Attachment with error |
sc-attachment--processed | Successfully processed attachment |
sc-attachment-icon | File icon container |
sc-attachment-info | File name + details |
sc-attachment-tags | Tags wrapper |
sc-attachment-size | File size tag |
sc-attachment-error-tag | Error tag |
sc-attachment-actions | Remove / action buttons |
sc-attachments-max-error | "Max files exceeded" error |
sc-attachments-status-error | File status check error |
Pre-conditions
Terms and Conditions
| Class | Element |
|---|---|
sc-terms | Container |
sc-terms-checkbox | Checkbox input |
sc-terms-text | Terms text |
Accept Communications
| Class | Element |
|---|---|
sc-accept-comms | Container |
sc-accept-comms-checkbox | Checkbox input |
sc-accept-comms-text | Communications text |
Pre-conditions Wrapper
| Class | Element |
|---|---|
sc-preconditions | Root container |
sc-preconditions-terms | Terms section wrapper |
sc-preconditions-comms | Communications section wrapper |
Utilities
Countdown Timer
| Class | Element |
|---|---|
sc-countdown | Timer container |
sc-countdown-title | Limit exceeded message |
sc-countdown-subtitle | "Wait until" message |
sc-countdown-time | Time remaining display |
Previous Chats
| Class | Element |
|---|---|
sc-prev-chats | Root container |
sc-prev-chat | Single previous chat group |
sc-prev-chat-separator | Separator between chats |
sc-prev-chat-separator-line | Separator line |
sc-prev-chat-separator-text | Separator text |
sc-prev-chats-end-separator | End-of-history separator |
Realtime Voice
| Class | Element |
|---|---|
sc-realtime | Root container |
sc-realtime-avatar | Agent avatar image |
sc-realtime-greeting | Greeting heading |
sc-realtime-wavesurf | Waveform wrapper |
sc-realtime-error | Error message |
sc-realtime-actions | Action buttons container |
sc-realtime-start-btn | Start conversation button |
sc-realtime-loading | Loading indicator |
sc-realtime-mute-btn | Mute / unmute button |
sc-realtime-stop-btn | Stop conversation button |
Loading Indicators
| Class | Element |
|---|---|
sc-dots | Animated dots container |
sc-dot | Individual dot |
sc-three-dots | Three-dots typing wrapper |
sc-spinner | Spinner container |
sc-spinner-roller | Spinner roller element |
Audio Player
| Class | Element |
|---|---|
sc-audio-player | Audio element |