In today's data-driven world, organizations maintain vast knowledge bases containing information about similar products, services, or concepts. Traditional semantic search often struggles to distinguish between closely related content, leading to mixed or confusing results. Serenity* AI Hub offers a powerful solution: hybrid search with document metadata that enhances RAG-based agents with structured fields for more precise information retrieval across any domain.
For instance, imagine managing documentation for multiple similar products—like user manuals for different smartphone models, technical specifications for competing software tools, or guides for various financial services. Without proper filtering, agents might mix information from different sources, causing confusion. Hybrid search with metadata solves this by adding structured context to documents, ensuring accurate, targeted responses.
This approach is particularly valuable in scenarios where content structures are similar but details differ, such as:
- Product documentation across multiple versions or variants
- Technical manuals for related but distinct equipment
- Knowledge bases covering similar services or offerings
- Research papers on comparable technologies or methodologies
As a concrete example, let's explore how this applies to LLM model documentation, where organizations manage extensive knowledge bases about numerous AI models with similar structures but different capabilities, pricing, and specifications.
Document metadata introduces structured fields that work alongside semantic search to improve retrieval accuracy. The system uses two key components:
- Tags: Key-value pairs that categorize documents (e.g., model: Qwen3-Next-80B-A3B-Thinking)
- Descriptions: Concise summaries that provide context about the document's content and purpose
These metadata fields enhance the retrieval process in two critical ways:
- Hybrid Filtering: Tags are matched to conversation context to filter and rank relevant documents
- LLM Grounding: Descriptions provide additional context during answer generation
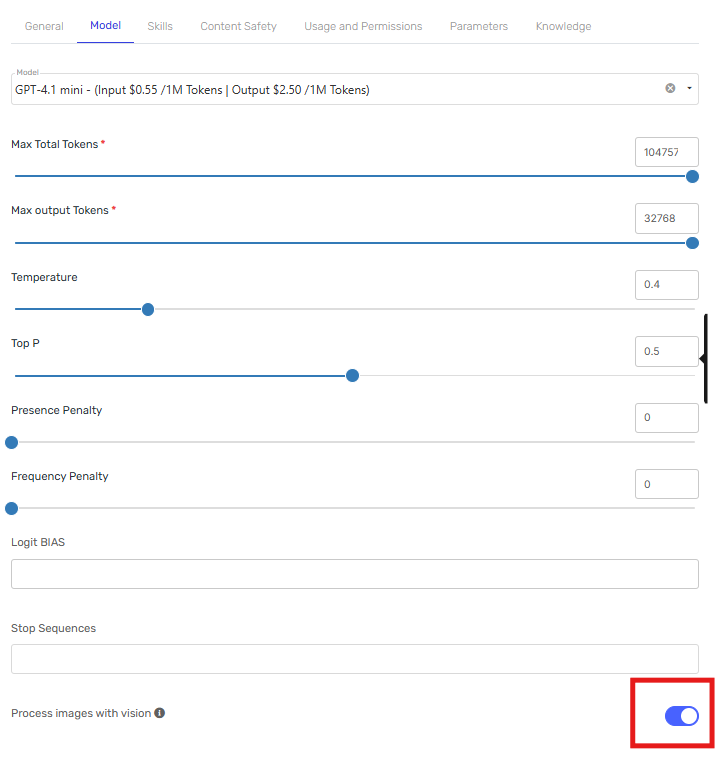
Important Note: Custom metadata is only available with the "Large Context Knowledge" or "AI Hybrid Search" integration modes. For optimal performance with metadata filtering, select "Knowledge with AI Hybrid Search (recommended)" in your Advanced Settings.
AI-Enhanced Search Query Generation
One of the key advantages of the "AI Hybrid Search" mode is its intelligent query optimization. Instead of using the user's literal text for embedding searches, the system:
- Analyzes the user's intent and extracts key concepts
- Generates optimized search text specifically designed for better embedding matching
- Combines this with metadata filtering to retrieve the most relevant sections
For example, if a user asks: "Can you tell me about the thinking capabilities of that Qwen model?", the AI might generate a more targeted search query like "Qwen3-Next-80B-A3B-Thinking reasoning capabilities specifications" for the embedding search, while simultaneously filtering by the model: Qwen3-Next-80B-A3B-Thinking tag.
This dual approach significantly improves retrieval accuracy compared to using the user's original text directly.
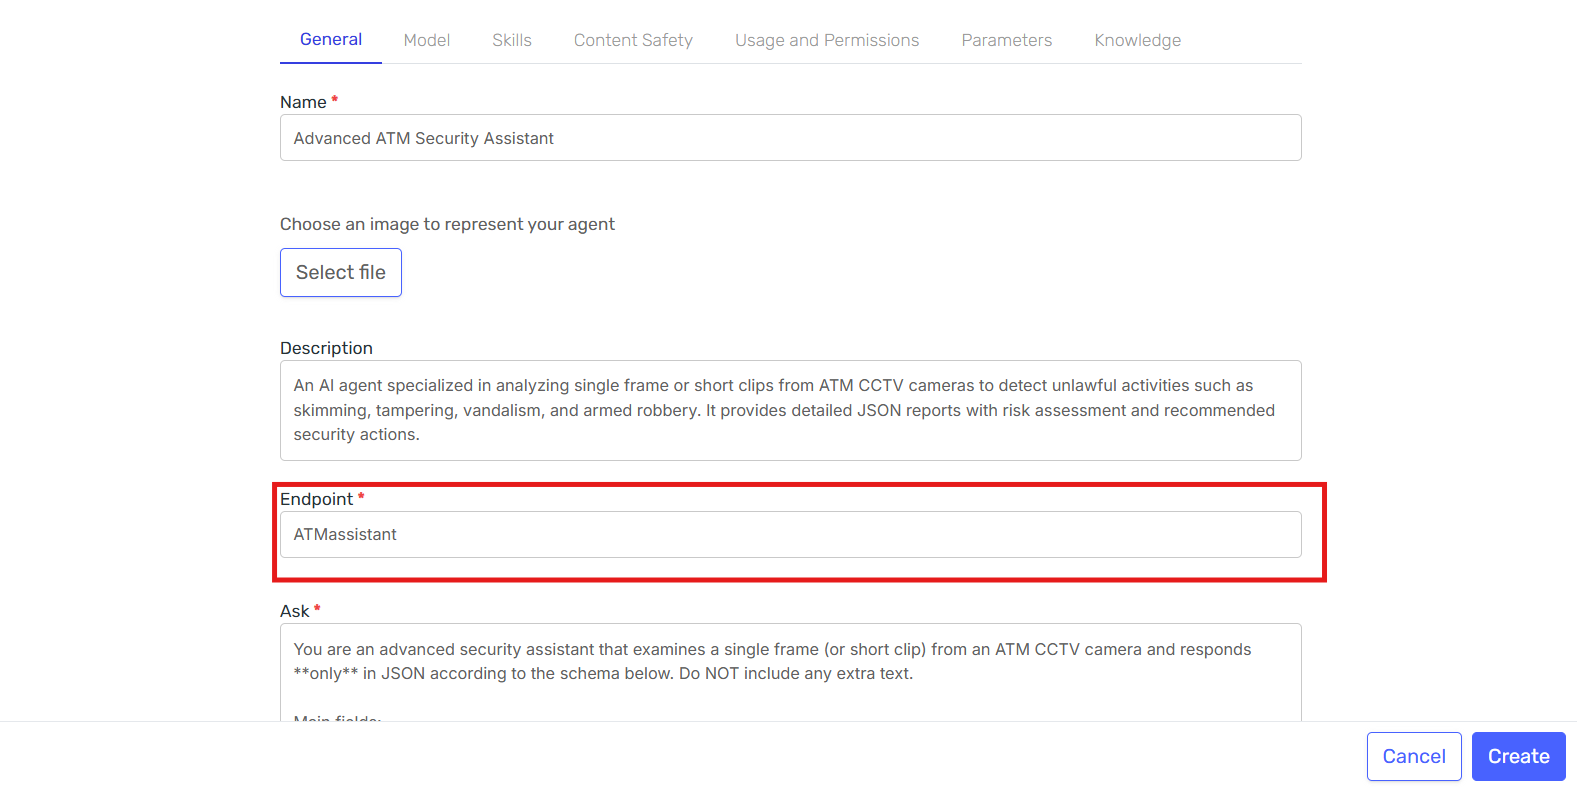
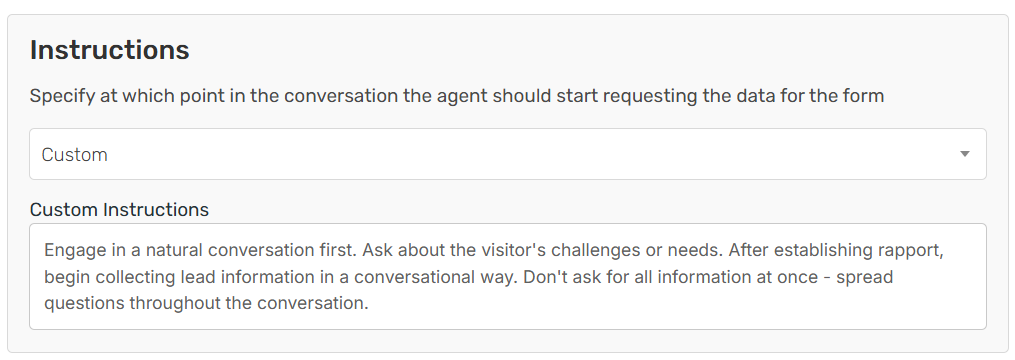
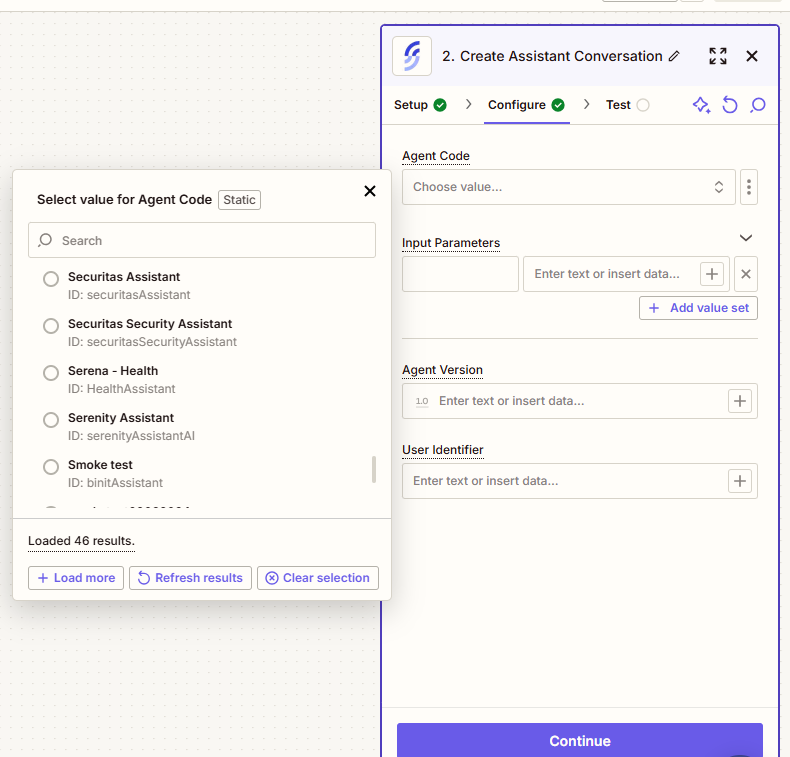
To implement metadata-enhanced retrieval, follow these key steps using Serenity* AI Hub:
Prerequisites
- Access to Serenity* AI Hub
- A collection of documents to use as knowledge in your agent
Before adding metadata, identify the key dimensions that differentiate your LLM model documents. For this example, we'll use a simple but effective approach:
Primary Tag Strategy:
- Model name as the main differentiator (Qwen3-Next-80B-A3B-Thinking, DeepSeek-R1, Llama-3.1-8B, gemma-3-270m, etc.)
This simple tagging approach is often the most practical because:
- It directly addresses the main challenge: preventing information mixing between models
- It's easy to maintain and scale as you add more model documentation
- It provides clear filtering that users can understand and rely on
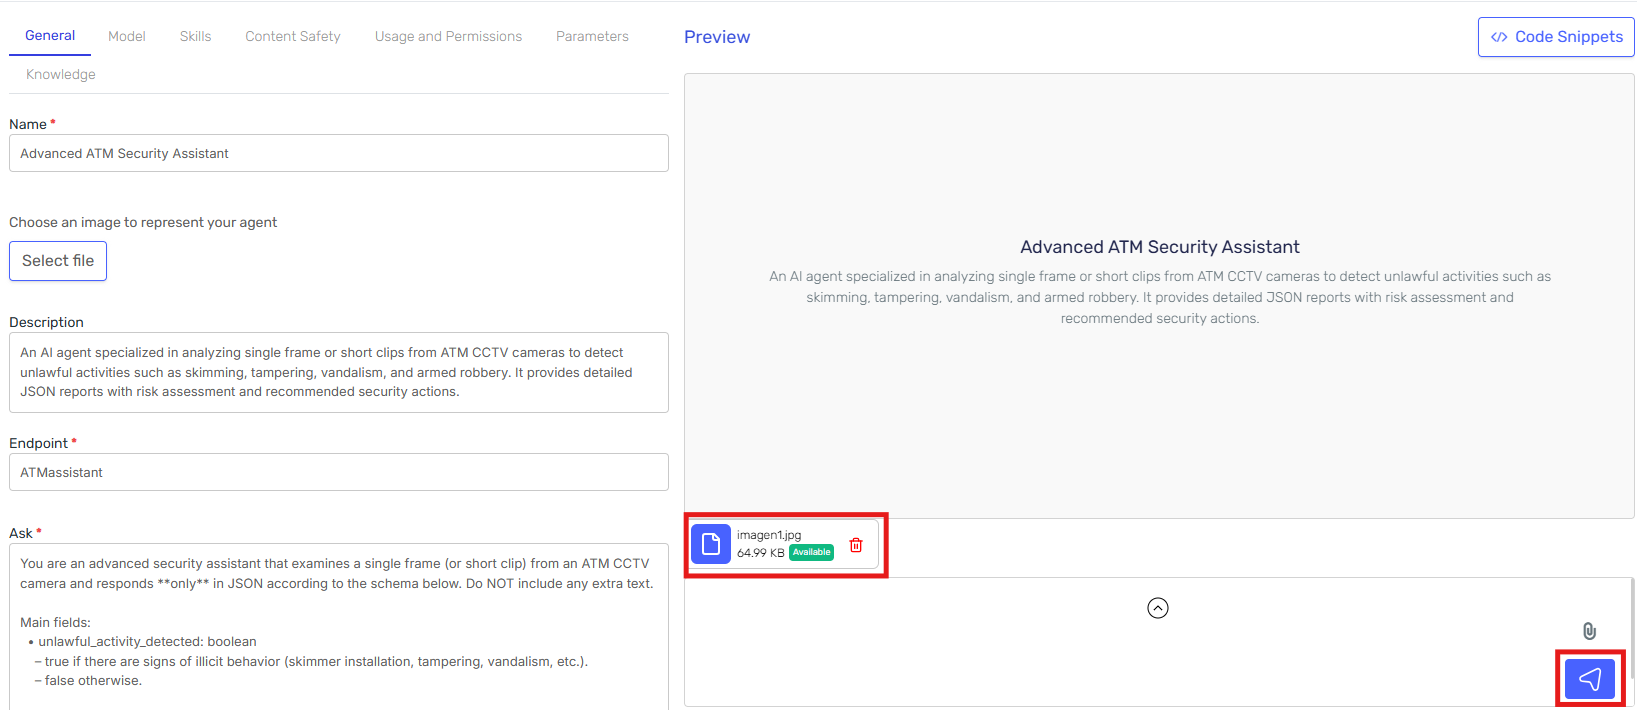
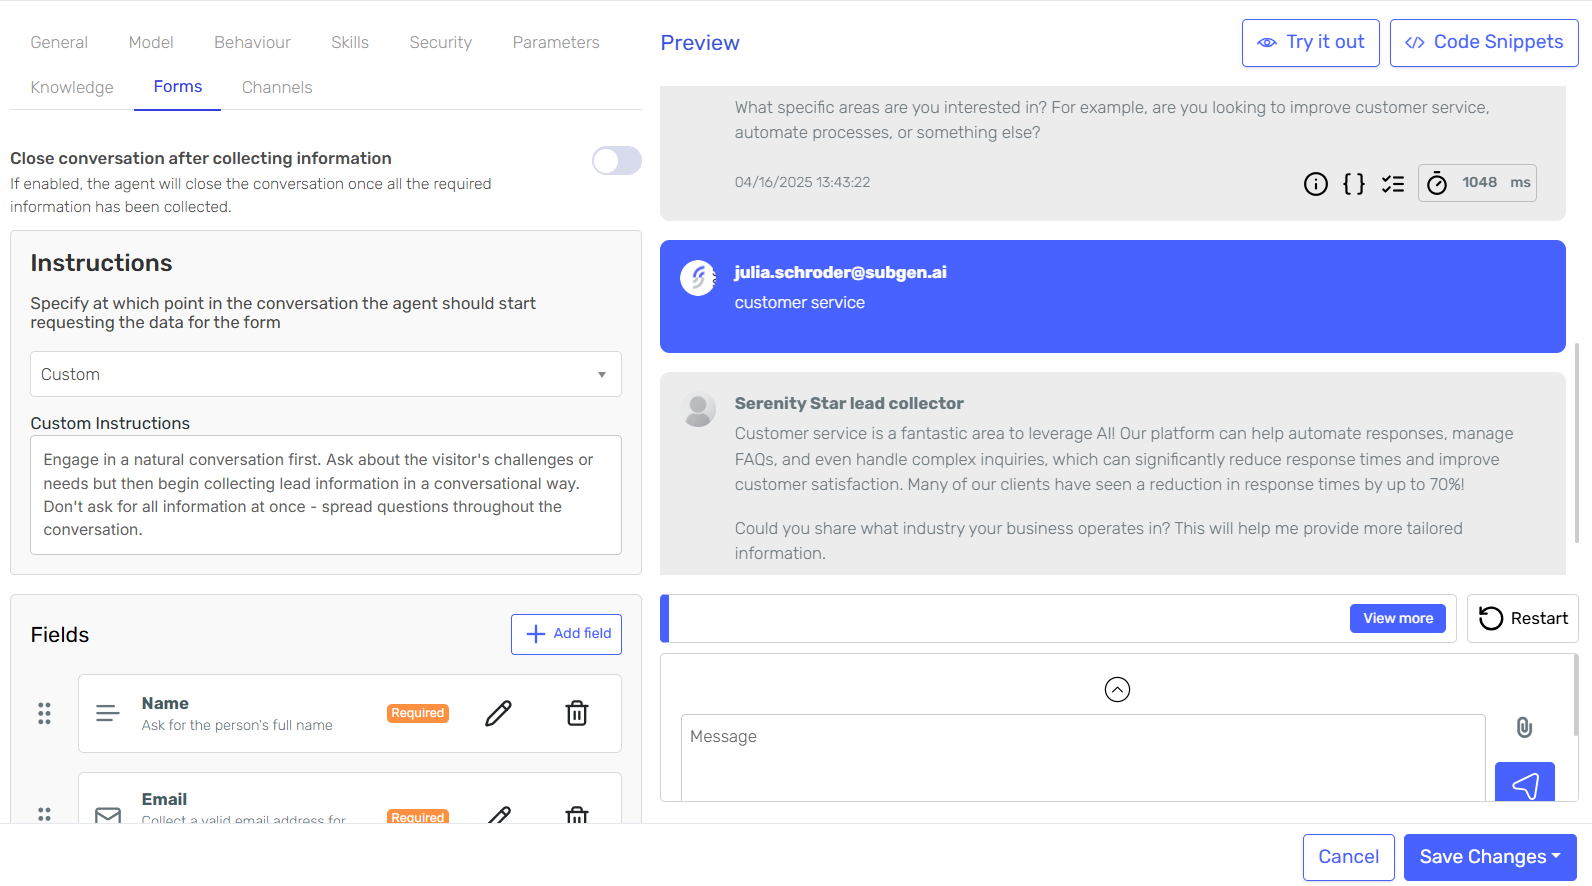
Step 2: Access the Knowledge Management Interface
Navigate to your agent's Knowledge tab in AI Hub.
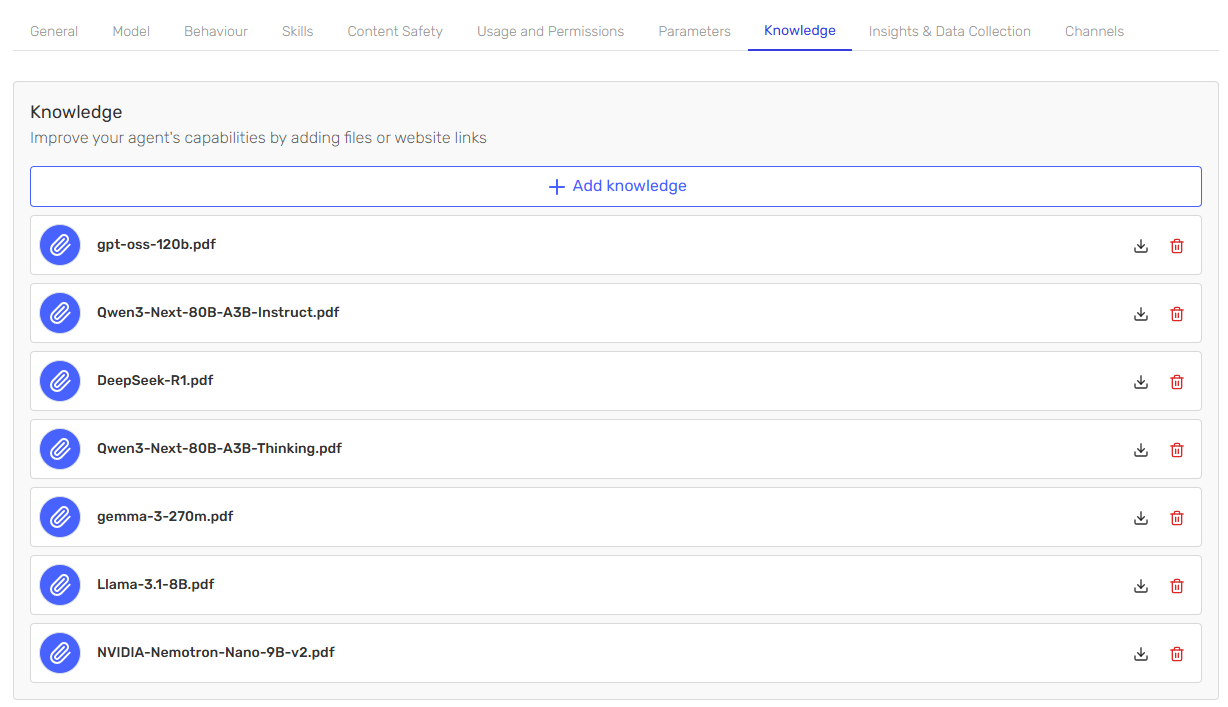
Click on "Knowledge" to access your document library where you can upload your LLM model documentation files.
For each document in your knowledge base, you can add structured metadata by clicking the configure metadata icon:

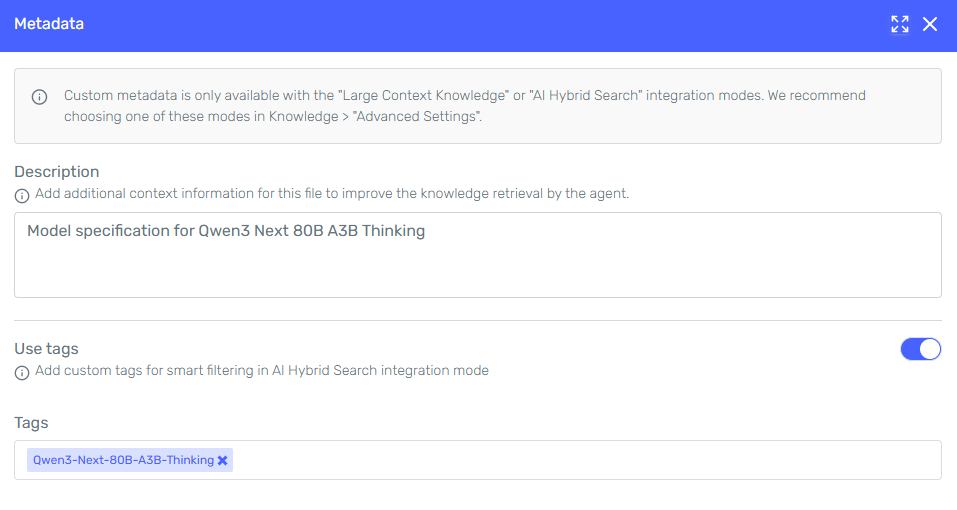
As shown in the example, for a document like Qwen3-Next-80B-A3B-Thinking.pdf, you would add the description "Model specification for Qwen3 Next 80B A3B Thinking" and use the tag Qwen3-Next-80B-A3B-Thinking.
Note the important message that appears: "Custom metadata is only available with the 'Large Context Knowledge' or 'AI Hybrid Search' integration modes. We recommend choosing one of these modes in Knowledge > 'Advanced Settings'."
Tags should follow a consistent key-value structure. In this case, we're using a simple but effective approach:
Model Name Tags
model: Qwen3-Next-80B-A3B-Thinking
This straightforward tagging strategy ensures that when users ask about a specific model, the hybrid search will only retrieve sections from documents tagged with that exact model name, preventing confusion between different models.
Writing Effective Descriptions
Descriptions should be concise (1-2 lines) but provide meaningful context:
Good Examples:
- "Technical specifications and capabilities for Qwen3-Next-80B-A3B-Thinking model including context length and performance benchmarks"
- "Comprehensive guide to DeepSeek-R1 features, reasoning capabilities, and implementation details"
- "NVIDIA-Nemotron-Nano-9B-v2 model documentation covering efficiency optimizations and deployment strategies"
Poor Examples:
- "LLM documentation" (too vague)
- "This document contains detailed information about..." (too wordy)
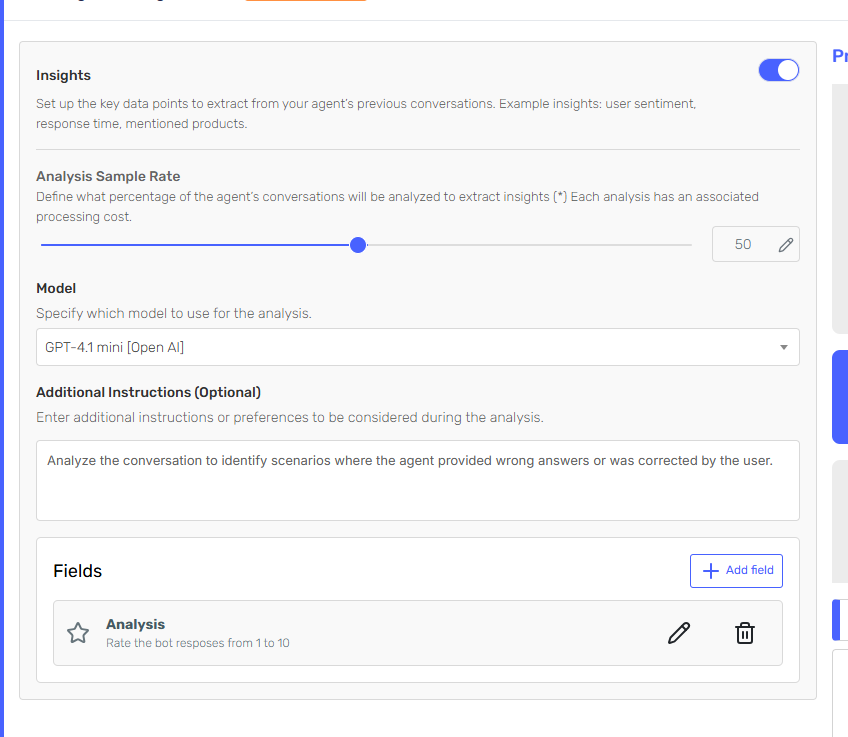
The metadata enhancement works automatically with existing agents, but you can optimize performance by configuring your agent's knowledge settings:
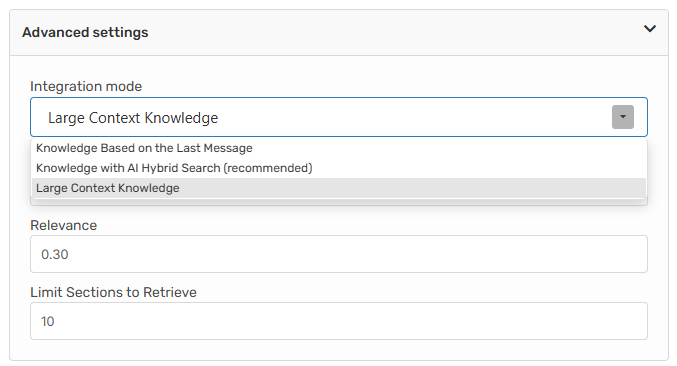
Notice that "Knowledge with AI Hybrid Search (recommended)" is selected as the integration mode. This is essential for metadata filtering to work effectively.
Ensure your agent's instructions reference the types of models or AI capabilities it supports, which helps with metadata matching.
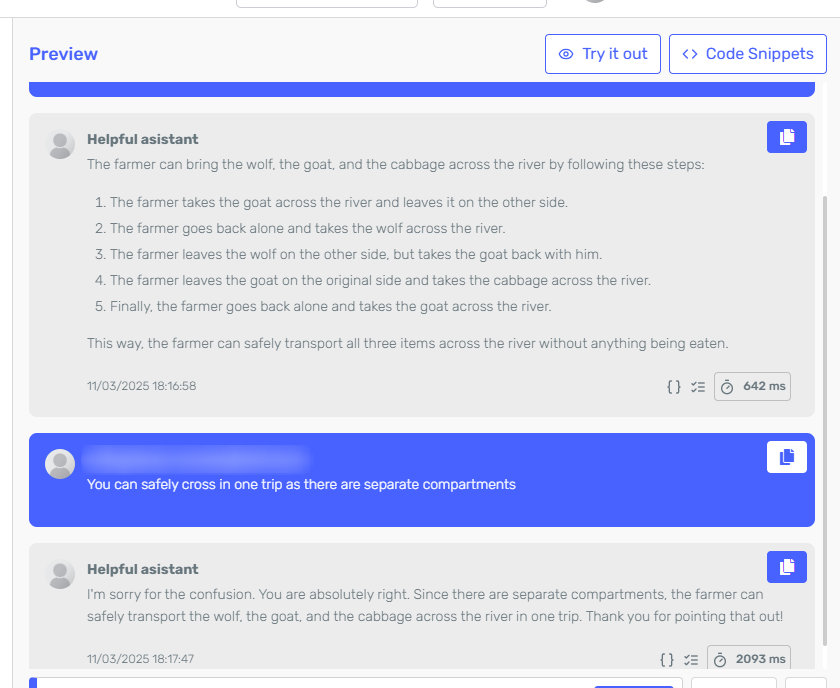
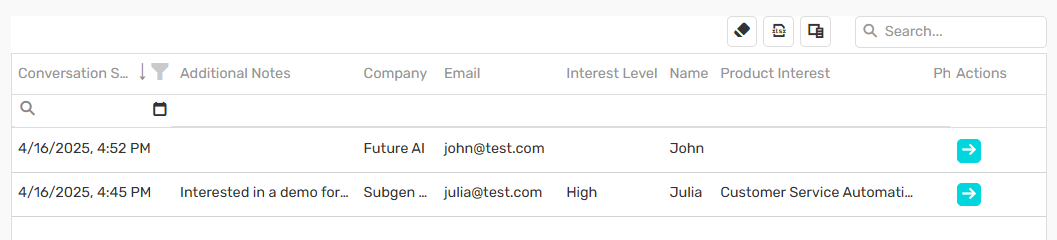
Use the preview chat to test how metadata improves document retrieval:
Test Query Example:
"What are the reasoning capabilities of DeepSeek-R1?"
With the simple model: DeepSeek-R1 tag, the agent will use AI Hybrid Search to provide accurate, model-specific information without mixing details from other models like Qwen3-Next-80B-A3B-Thinking or Llama-3.1-8B.
Understanding Retrieval Modes: Hybrid Search vs. Large Context
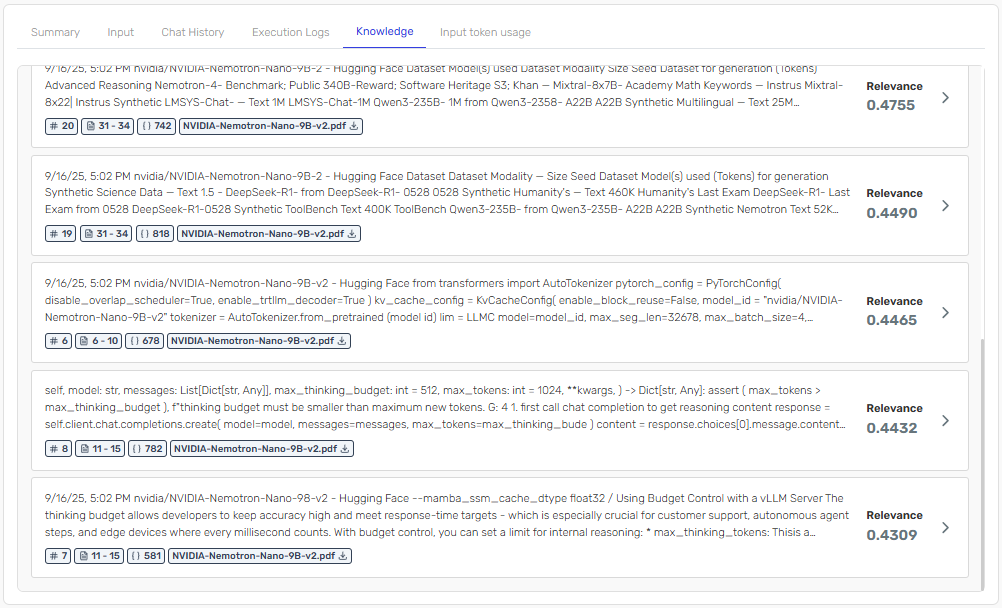
One of the key benefits of using metadata with hybrid search is how it affects which document sections are retrieved and added to the conversation context. In the following example, we'll demonstrate this by querying information about specific LLM models like NVIDIA Nemotron and DeepSeek-R1, showing how metadata filtering ensures only relevant model documentation is retrieved instead of mixing information from different models.
Large Context Mode (Without Metadata Filtering)
When not using hybrid search with metadata, the system may retrieve sections from multiple different models, potentially causing confusion:

In this mode, you might see sections about different models mixed together, making it difficult for the LLM to provide accurate, model-specific information.
With hybrid search and metadata enabled, the system only retrieves sections that are relevant to the specific model being discussed:
Notice how hybrid search mode ensures that only sections corresponding to the queried model are included in the context, leading to more accurate and focused responses.
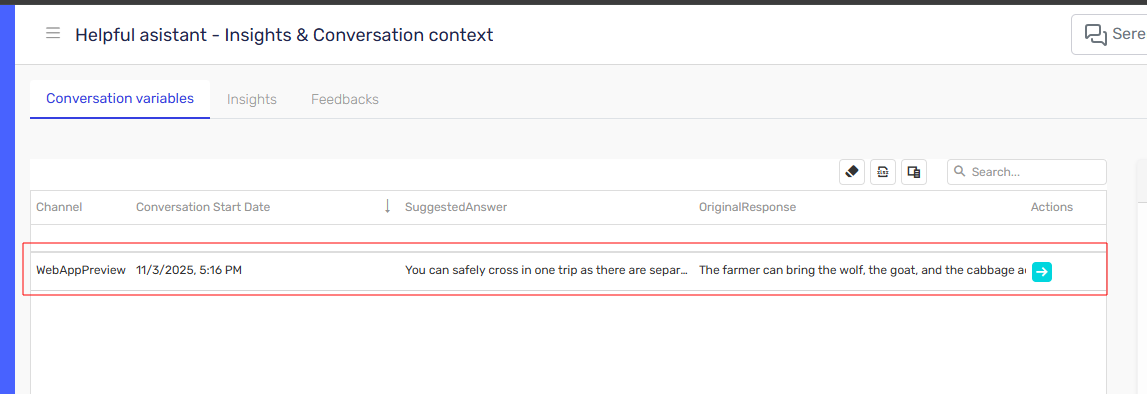
Viewing Retrieved Sections in Instance Details
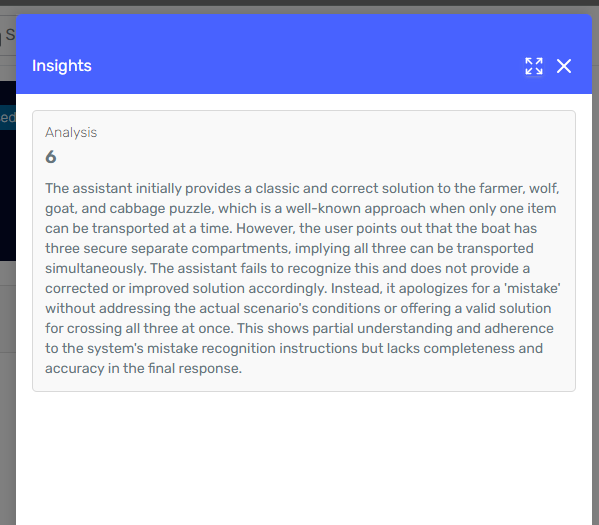
You can monitor which sections are being retrieved by viewing the instance details of your conversation. This transparency allows you to:
- Verify that the correct model information is being retrieved
- Debug any issues with metadata filtering
- Understand how your agent is selecting relevant content
The instance details show exactly which document sections were added to the message context, displaying the specific PDFs and their relevance scores (as shown in the images above where you can see files like NVIDIA-Nemotron-Nano-9B-v2.pdf, gpt-oss-120b.pdf, and Qwen3-Next-80B-A3B-Instruct.pdf with their respective relevance scores), helping you validate that hybrid search is working effectively.
Starting Simple: Model Name Only
Start with the simplest approach that solves your core problem - in this case, preventing cross-model information contamination:
model: Qwen3-Next-80B-A3B-Thinking
model: DeepSeek-R1
model: NVIDIA-Nemotron-Nano-9B-v2
model: Llama-3.1-8B
This single-tag strategy provides immediate benefits while being easy to implement and maintain. As your knowledge base grows, you can expand with additional dimensions:
model: Qwen3-Next-80B-A3B-Thinking
variant: Instruct
Implementation Best Practices
- Consistency is key: Whatever tagging strategy you choose, maintain it across all documents
- Start simple: A consistently applied simple system beats a complex, inconsistent one
- Test regularly: Use real user queries to validate retrieval accuracy
- Focus on quality: Meaningful tags are better than extensive but irrelevant tagging
Scaling Beyond LLM Documentation
This hybrid search approach applies to any domain with similar content structures:
- Product catalogs with variant-specific information
- Compliance documentation across different regulations
- Technical manuals for equipment families
- Process documentation across departments or regions
The key is identifying the primary dimension that differentiates your content and using that as your metadata foundation.
Conclusion
Document metadata transforms RAG-based agents from simple search tools into intelligent assistants. By providing structured context through tags and descriptions, you enable precise, targeted information retrieval across any domain.
The investment in organizing your knowledge base with metadata pays dividends in improved user experience and more effective AI-powered assistance. Start by adding simple tags to your documents and see the immediate improvement in response accuracy!