Using Forms to collect leads

In today's competitive digital landscape, generating high-quality leads is crucial for business growth. AI Agents can transform your lead generation process by engaging with visitors in a conversational manner while seamlessly collecting valuable information. In this article, we'll explore how to use the Forms capability in Serenity* AI Hub to create an effective lead collection system.
Why Use Forms for Lead Generation?
Traditional lead forms can be static and impersonal, often leading to high abandonment rates. Conversational AI offers several advantages:
- Natural Interaction: Visitors engage in a conversation rather than filling out fields on a form
- Progressive Data Collection: Information is gathered gradually throughout the conversation
- Personalized Experience: The agent adapts its questions based on previous responses
- Higher Completion Rates: Less intimidating than lengthy traditional forms
- 24/7 Availability: Collect leads around the clock without human intervention
Setting Up Your Lead Generation Form
Let's create an Assistant Agent that will engage with website visitors and collect lead information for your sales team.
Prerequisites
- Access to Serenity* AI Hub
- A clear understanding of what lead information you need to collect
Step 1: Create a Lead Generation Agent
Start by creating a new Assistant Agent specifically designed for lead collection. You can either use a template or create one from scratch.
Configure your agent with a personality that aligns with your brand. For lead generation, a friendly and helpful tone usually works best.
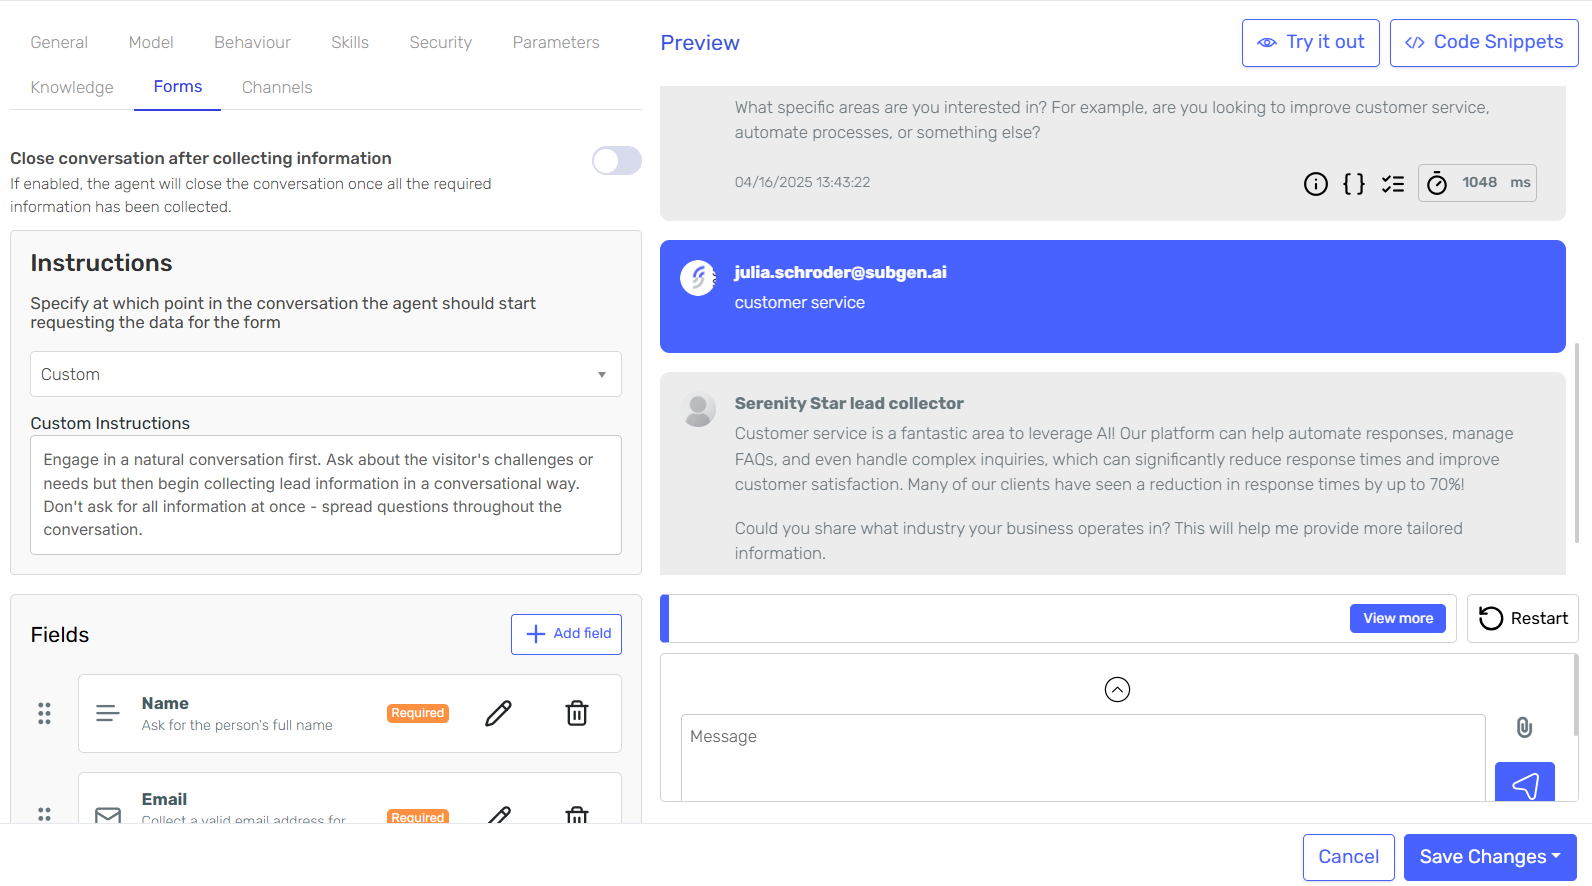
Step 2: Configure the Forms Feature
Navigate to the Forms tab in your agent configuration.
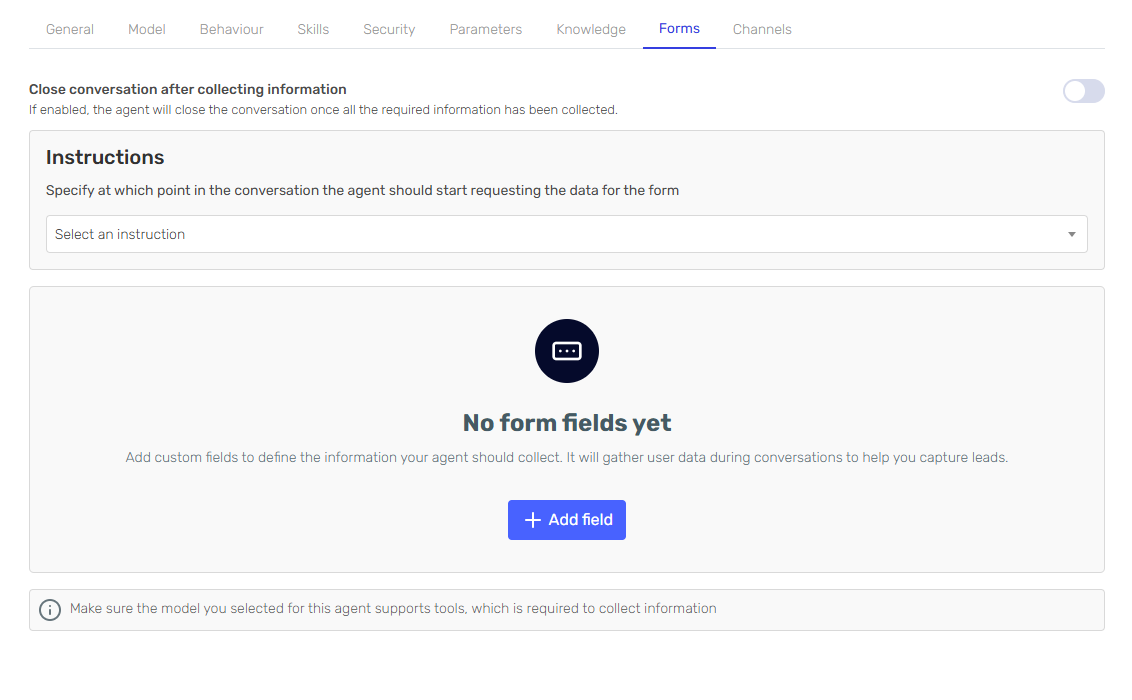
Click on "Add Field" to begin building your lead capture form.
Step 3: Define Lead Information Fields
For an effective lead generation form, consider adding these essential fields:
-
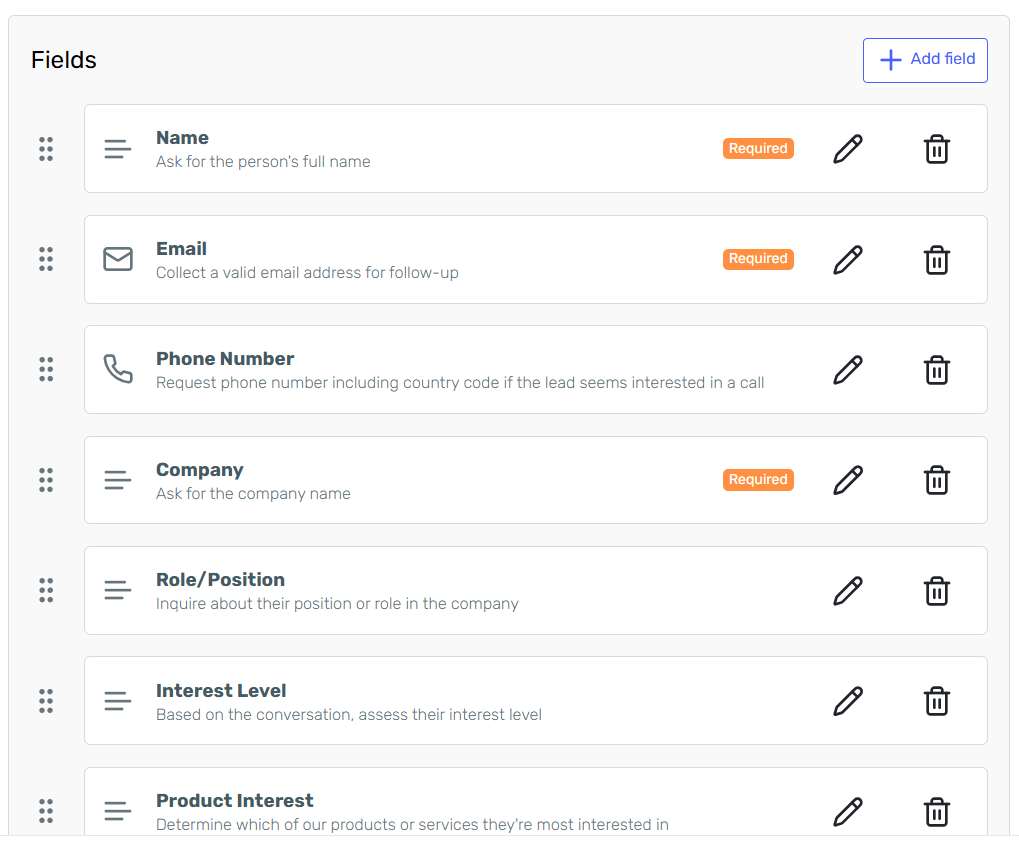
Name (Text type)
- Set as required
- Instructions: "Ask for the person's full name"
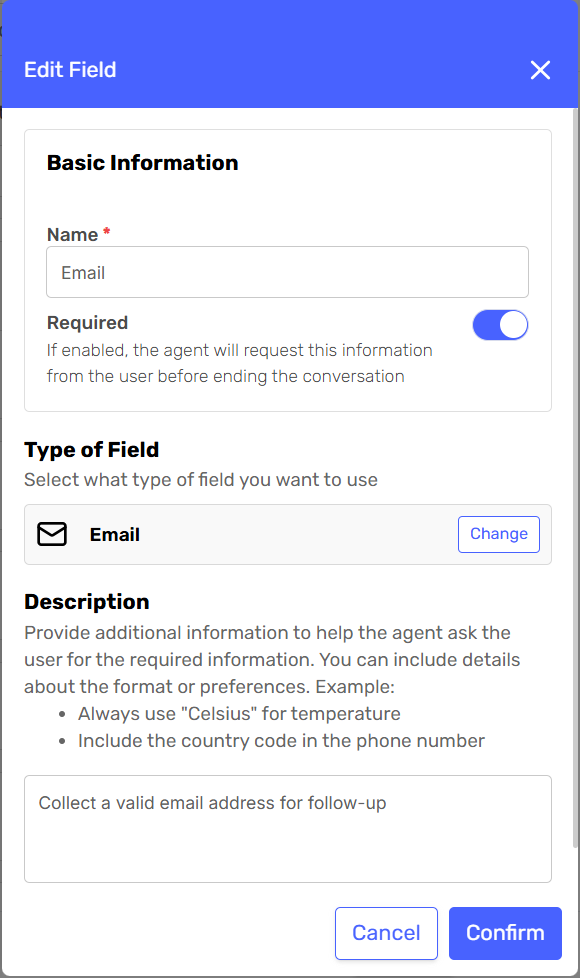
-
Email (Email type)
- Set as required
- Instructions: "Collect a valid email address for follow-up"
-
Phone Number (Phone type)
- Optional
- Instructions: "Request phone number including country code if the lead seems interested in a call"
-
Company (Text type)
- Set as required
- Instructions: "Ask for the company name"
-
Role/Position (Text type)
- Optional
- Instructions: "Inquire about their position or role in the company"
-
Interest Level (Select type)
- Options: High, Medium, Low
- Instructions: "Based on the conversation, assess their interest level"
-
Product Interest (Select type)
- Options: [Your specific products/services]
- Instructions: "Determine which of our products or services they're most interested in"
-
Additional Notes (Text type)
- Optional
- Instructions: "Capture any other relevant information shared during the conversation"
For each field, configure how it should be collected:
Step 4: Set Collection Instructions
For a lead generation use case, it's usually best to select "After a Few Messages" as the collection timing. This allows the agent to build rapport before asking for information.
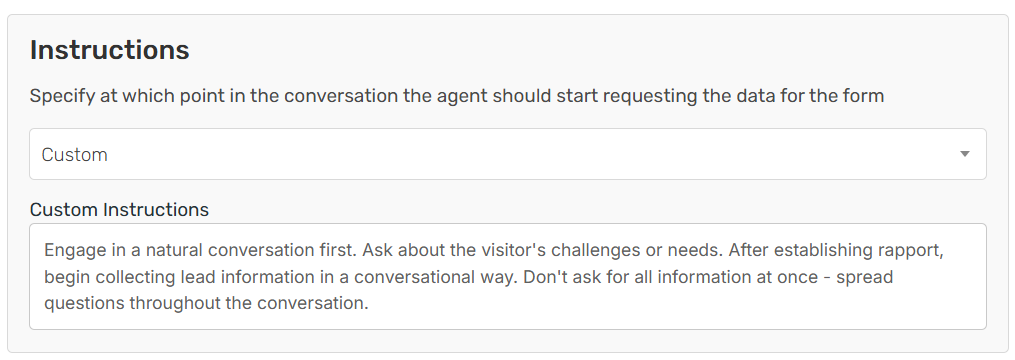
For custom instructions, you might use:
"Engage in a natural conversation first. Ask about the visitor's challenges or needs. After establishing rapport, begin collecting lead information in a conversational way. Don't ask for all information at once - spread questions throughout the conversation."
Step 5: Test Your Lead Generation Agent
Use the preview chat to test how your agent collects lead information. Pay attention to:
- How naturally the questions are integrated into the conversation
- Whether the agent collects all required information
- How the agent handles objections or hesitations
Make adjustments to your form fields and instructions based on the test results.
Step 6: Deploy Your Lead Generation Agent
Once you're satisfied with your lead generation agent, publish it to make it available for use. You can integrate it with your website, landing pages, or other digital channels.
Accessing and Managing Lead Data
After your agent has been collecting leads, you can access this valuable information from the agent card by clicking the "Forms" button.

On the forms page, you'll see all the lead data organized in a grid format:
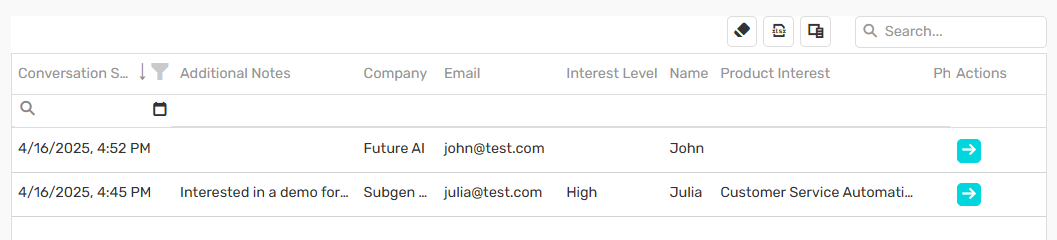
You can:
- Sort and filter leads
- Export lead data to Excel for integration with your CRM
- View different versions of your form to track performance over time
Best Practices for Conversational Lead Generation
- Start with Value: Have your agent provide helpful information before asking for contact details
- Be Transparent: Clearly communicate why you're collecting information and how it will be used
- Progressive Disclosure: Start with simple questions and gradually move to more detailed ones
- Offer Incentives: Consider offering something valuable in exchange for contact information
- Follow Up: Ensure leads are promptly followed up by your sales team
- Continuous Improvement: Regularly review conversations and adjust your form fields and agent instructions
Conclusion
Forms in AI Hub provide a powerful way to collect leads through conversational AI. By creating a natural, engaging experience, you can increase both the quantity and quality of leads while gathering rich contextual information that helps your sales team close more deals.
Ready to revolutionize your lead generation process? Start by creating your first lead collection agent today!