3 posts tagged with "Agents"

View All Tags

Using Forms to collect leads

· 5 min read
Julia Schröder Langhaeuser
Product Director

In today's competitive digital landscape, generating high-quality leads is crucial for business growth. AI Agents can transform your lead generation process by engaging with visitors in a conversational manner while seamlessly collecting valuable information. In this article, we'll explore how to use the Forms capability in Serenity* AI Hub to create an effective lead collection system.

Why Use Forms for Lead Generation?

Traditional lead forms can be static and impersonal, often leading to high abandonment rates. Conversational AI offers several advantages:

  • Natural Interaction: Visitors engage in a conversation rather than filling out fields on a form
  • Progressive Data Collection: Information is gathered gradually throughout the conversation
  • Personalized Experience: The agent adapts its questions based on previous responses
  • Higher Completion Rates: Less intimidating than lengthy traditional forms
  • 24/7 Availability: Collect leads around the clock without human intervention

Setting Up Your Lead Generation Form

Let's create an Assistant Agent that will engage with website visitors and collect lead information for your sales team.

Prerequisites

  • Access to Serenity* AI Hub
  • A clear understanding of what lead information you need to collect

Step 1: Create a Lead Generation Agent

Start by creating a new Assistant Agent specifically designed for lead collection. You can either use a template or create one from scratch.

Configure your agent with a personality that aligns with your brand. For lead generation, a friendly and helpful tone usually works best.

Step 2: Configure the Forms Feature

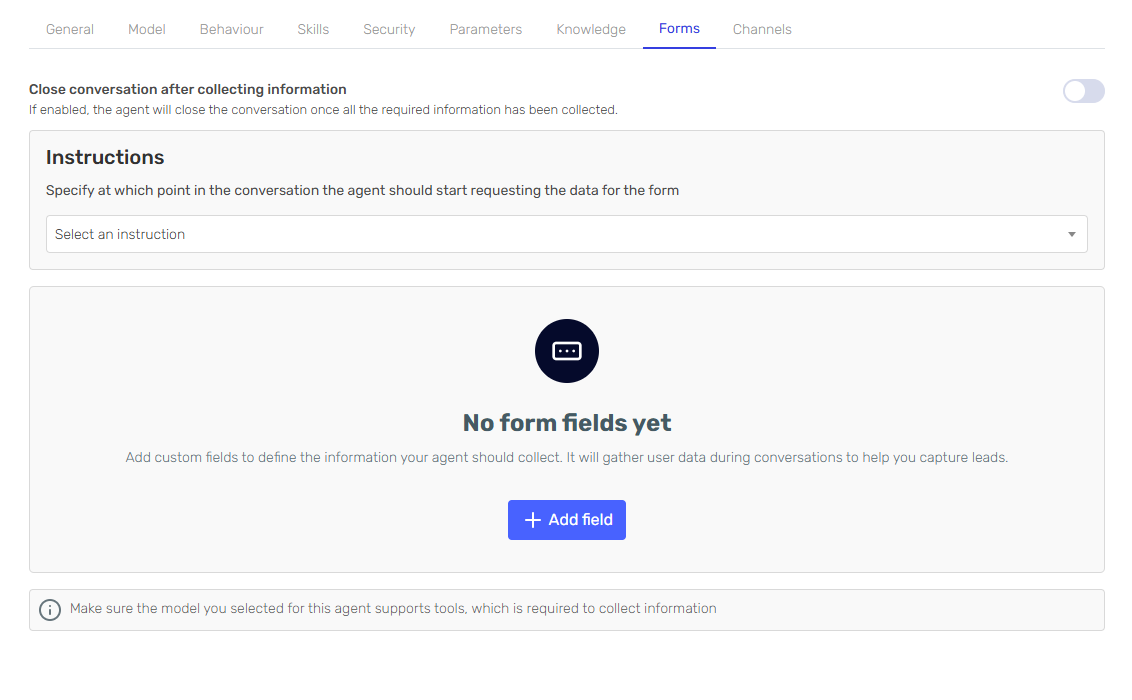
Navigate to the Forms tab in your agent configuration.

Forms Tab

Click on "Add Field" to begin building your lead capture form.

Step 3: Define Lead Information Fields

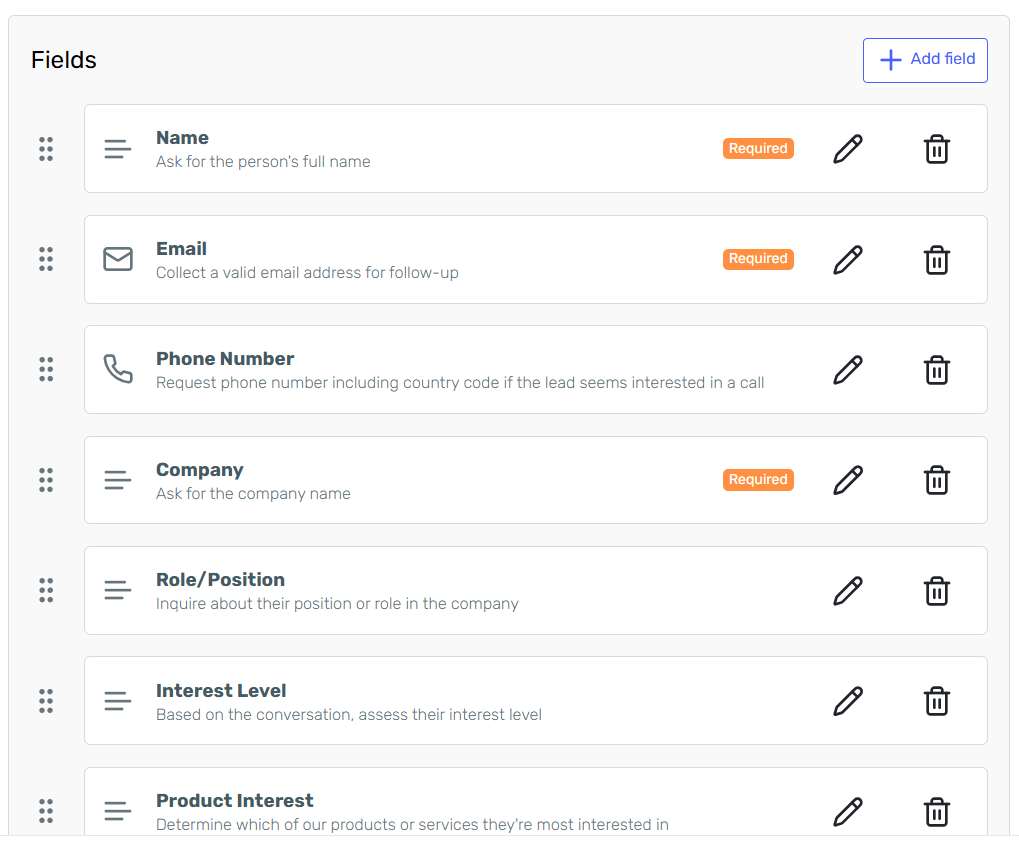
For an effective lead generation form, consider adding these essential fields:

  1. Name (Text type)

    • Set as required
    • Instructions: "Ask for the person's full name"
  2. Email (Email type)

    • Set as required
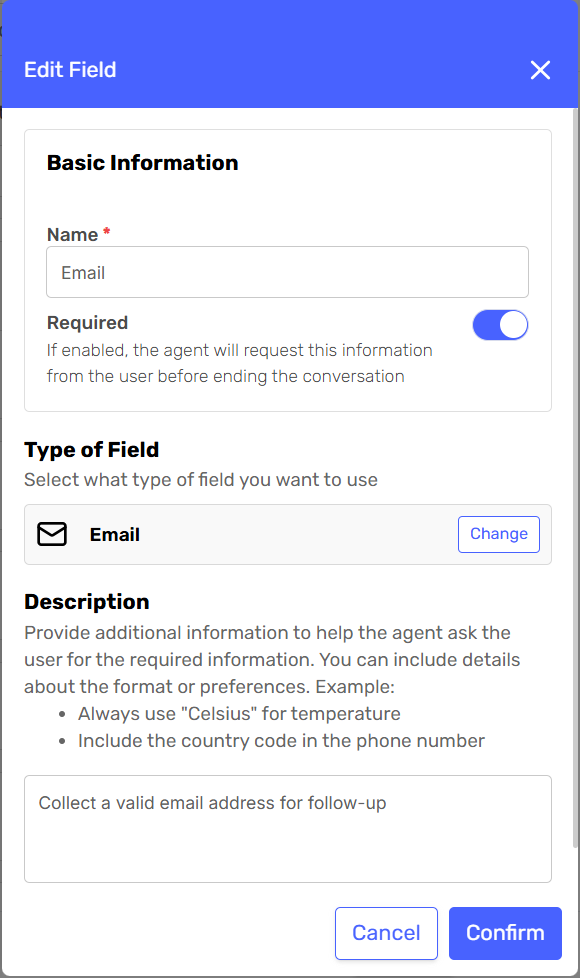
    • Instructions: "Collect a valid email address for follow-up"
  3. Phone Number (Phone type)

    • Optional
    • Instructions: "Request phone number including country code if the lead seems interested in a call"
  4. Company (Text type)

    • Set as required
    • Instructions: "Ask for the company name"
  5. Role/Position (Text type)

    • Optional
    • Instructions: "Inquire about their position or role in the company"
  6. Interest Level (Select type)

    • Options: High, Medium, Low
    • Instructions: "Based on the conversation, assess their interest level"
  7. Product Interest (Select type)

    • Options: [Your specific products/services]
    • Instructions: "Determine which of our products or services they're most interested in"
  8. Additional Notes (Text type)

    • Optional
    • Instructions: "Capture any other relevant information shared during the conversation"

For each field, configure how it should be collected:

Field Configuration Example Field Configuration Example

Step 4: Set Collection Instructions

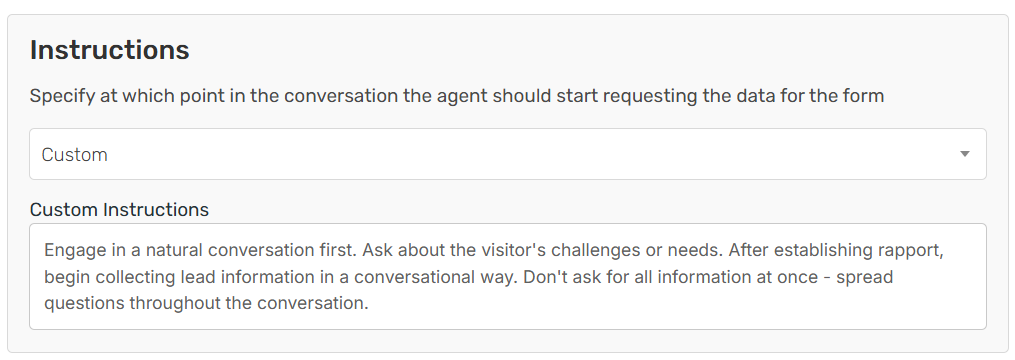
For a lead generation use case, it's usually best to select "After a Few Messages" as the collection timing. This allows the agent to build rapport before asking for information.

Collection Timing

For custom instructions, you might use:

"Engage in a natural conversation first. Ask about the visitor's challenges or needs. After establishing rapport, begin collecting lead information in a conversational way. Don't ask for all information at once - spread questions throughout the conversation."

Step 5: Test Your Lead Generation Agent

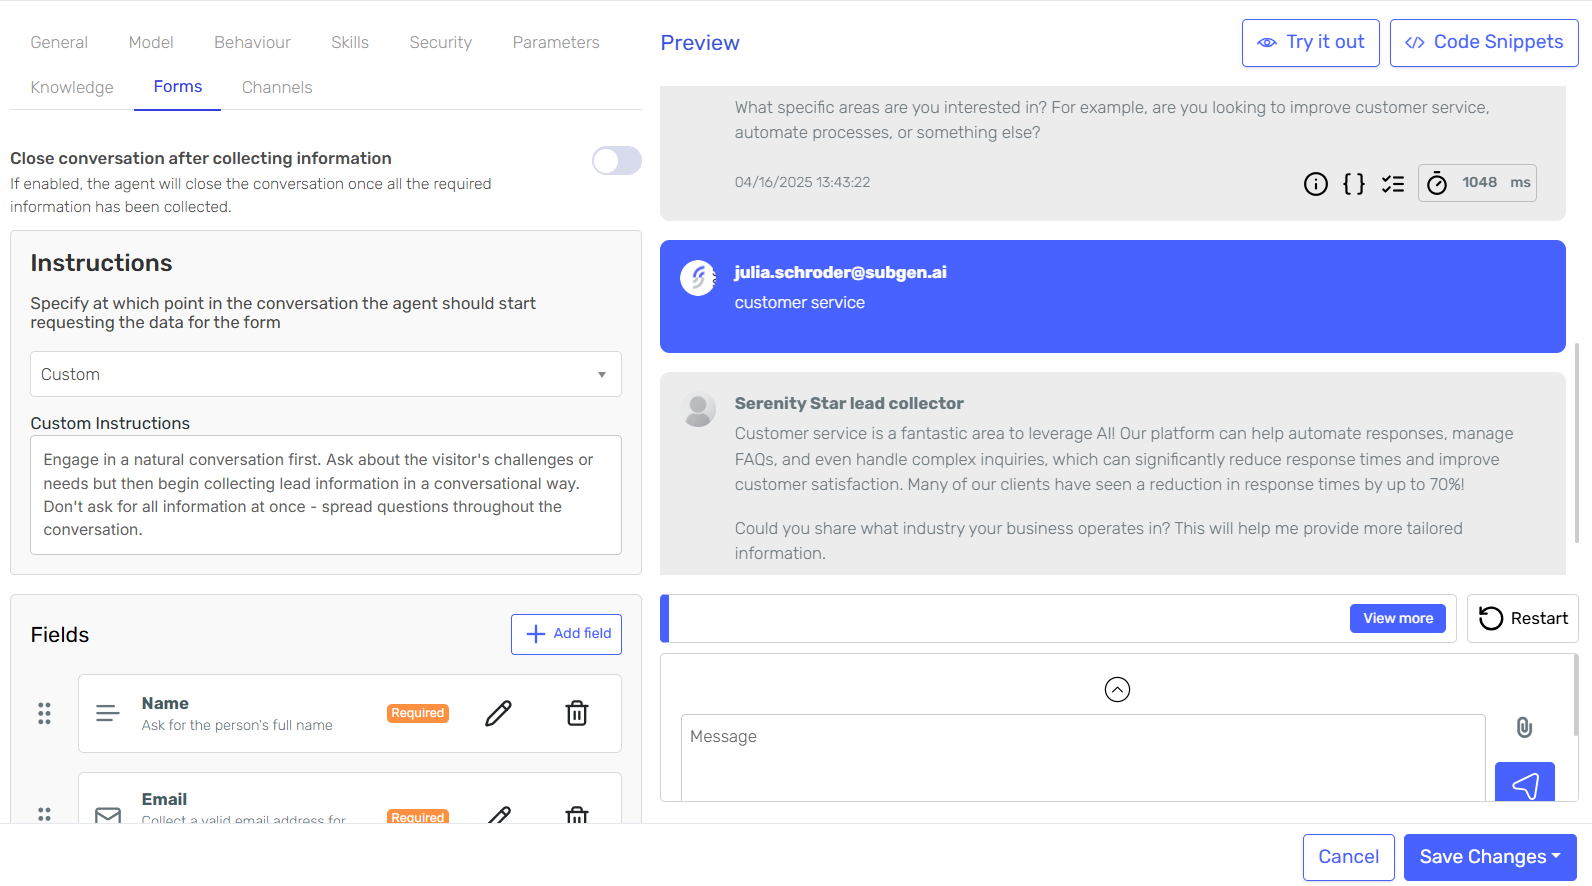
Use the preview chat to test how your agent collects lead information. Pay attention to:

  • How naturally the questions are integrated into the conversation
  • Whether the agent collects all required information
  • How the agent handles objections or hesitations

Testing Lead Form

Make adjustments to your form fields and instructions based on the test results.

Step 6: Deploy Your Lead Generation Agent

Once you're satisfied with your lead generation agent, publish it to make it available for use. You can integrate it with your website, landing pages, or other digital channels.

Accessing and Managing Lead Data

After your agent has been collecting leads, you can access this valuable information from the agent card by clicking the "Forms" button.

Access Forms Button

On the forms page, you'll see all the lead data organized in a grid format:

Lead Data Grid

You can:

  • Sort and filter leads
  • Export lead data to Excel for integration with your CRM
  • View different versions of your form to track performance over time

Best Practices for Conversational Lead Generation

  1. Start with Value: Have your agent provide helpful information before asking for contact details
  2. Be Transparent: Clearly communicate why you're collecting information and how it will be used
  3. Progressive Disclosure: Start with simple questions and gradually move to more detailed ones
  4. Offer Incentives: Consider offering something valuable in exchange for contact information
  5. Follow Up: Ensure leads are promptly followed up by your sales team
  6. Continuous Improvement: Regularly review conversations and adjust your form fields and agent instructions

Conclusion

Forms in AI Hub provide a powerful way to collect leads through conversational AI. By creating a natural, engaging experience, you can increase both the quantity and quality of leads while gathering rich contextual information that helps your sales team close more deals.

Ready to revolutionize your lead generation process? Start by creating your first lead collection agent today!

How to Integrate Your AI Agent with Calendly

· 3 min read
Máximo Flugelman
Máximo Flugelman
Project Manager

When we talk about AI Agents, a key feature to automate your processes and workflows is the capability of integrating with external services. One of these services can be Calendly, for accessing your agenda and organizing your day.

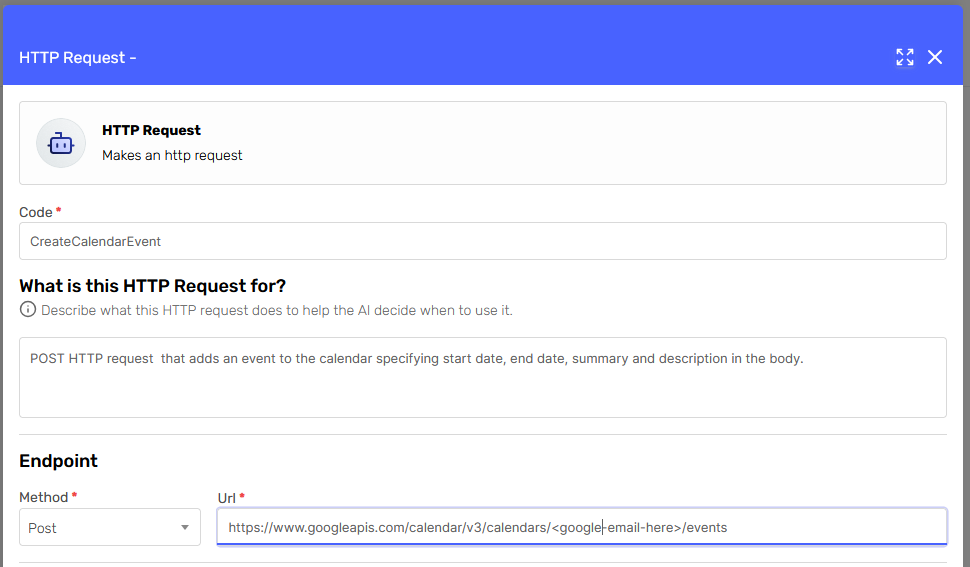
In this article, we will explore how to integrate your AI Agent with the Calendly API using the HTTP Request Skill in Serenity* AI Hub.

About the Example

We will be creating an Assistant Agent that integrates with Calendly to retrieve your daily scheduled events. We will use Calendly’s /scheduled_events endpoint to get a list of upcoming events for the logged-in user.

Prerequisites

  • You should have a Calendly account to follow this step-by-step guide.
  • Inside Calendly, create a Bearer Token that we will use for authentication with the Calendly API.

Setting Up the Agent

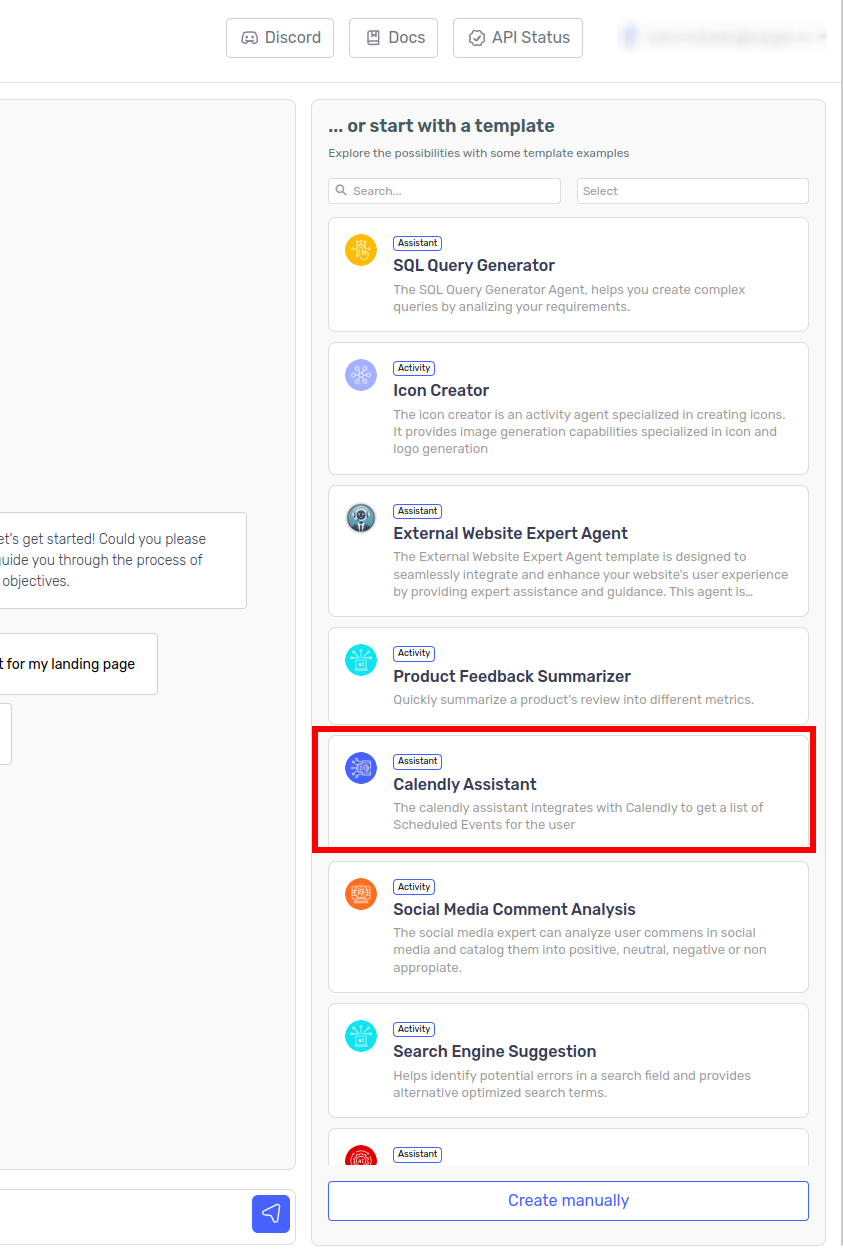
For this example, we will be using an existing Agent template in AI Hub called Calendly Assistant. Go to the agent creator screen and select the template from the list.

alt text

Skills Tab

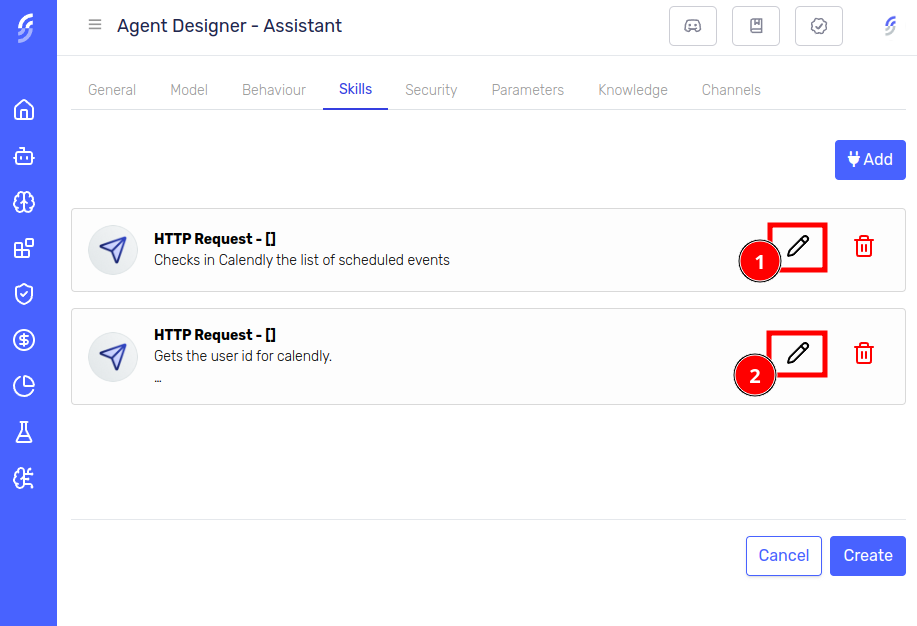
In the skills tab we can see two existing skills that will be used for the integration with Calendly:

  • The first skill will allow you to get the list of upcoming events
  • The second skill allows you to retrieve your Calendy user id

Click on edit the first skill so we can configure your authentication settings.

alt text

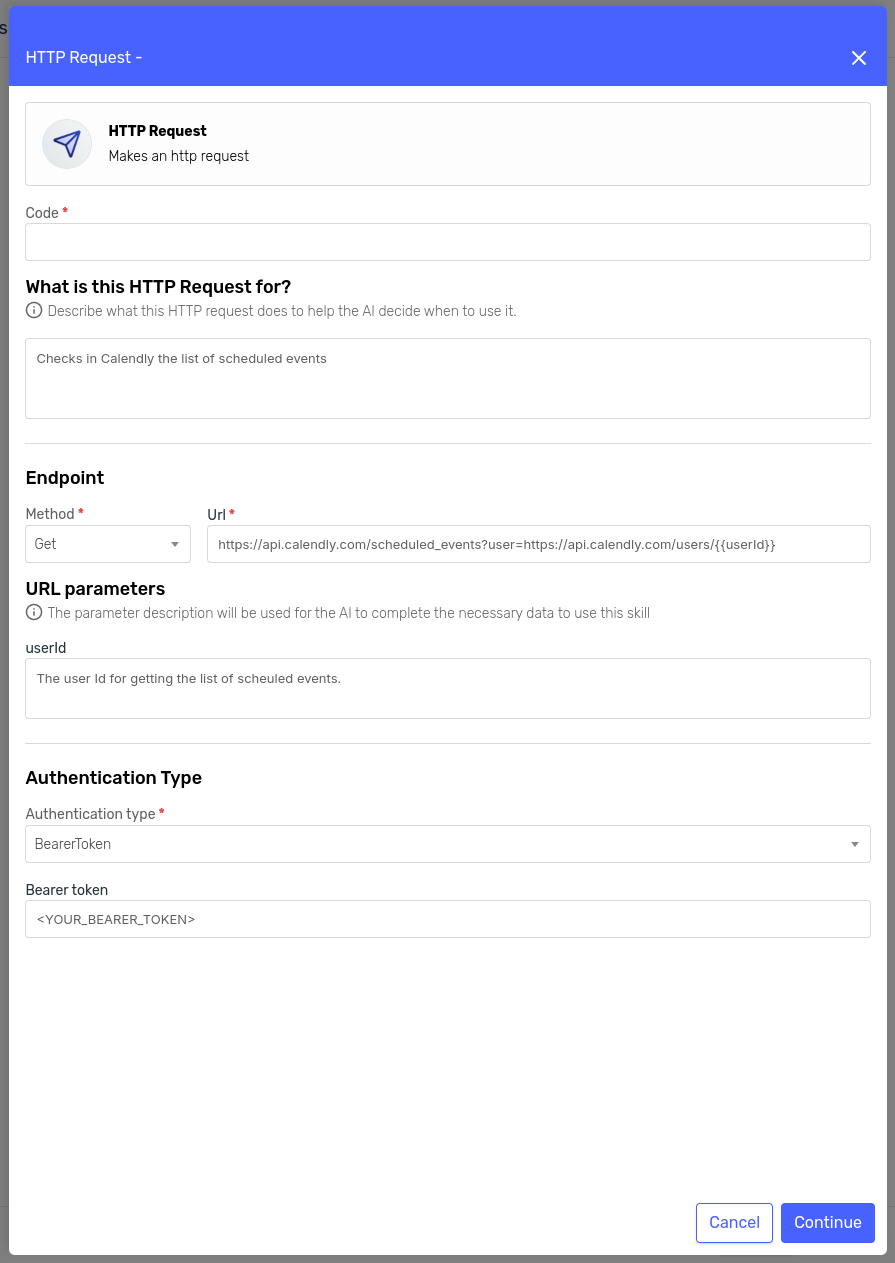
Let's go through the configuration settings needed for the Calendly request skill:

alt text

  • Code: A simple identifier for the skill.
  • What is this HTTP Request for? This defines the objective of this skill. If the agent determines that the specified condition is met, it will execute the skill.
  • Endpoint: Specifies the method type and base URL. In this case, we use the scheduled_events?user endpoint, which requires a user parameter. By using the {{userId}} syntax, we indicate that this parameter value will be automatically replaced by the AI. Additional parameters can also be specified using this syntax.
  • URL Parameters: Defines how the agent should replace each URL parameter. In this case, we use Calendly’s user identification system via the User Id.
  • Authentication: Replace the placeholder with your Calendly bearer token.

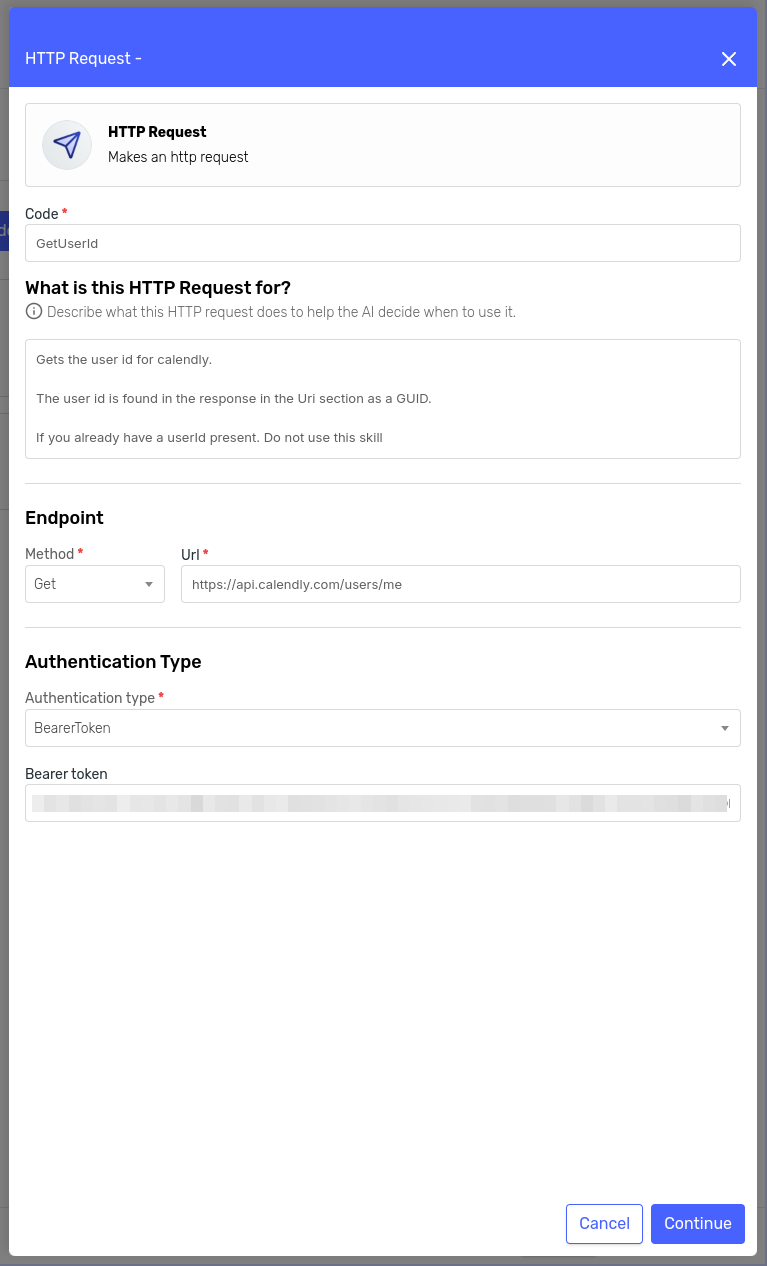
If you edit the second skill, the one that allows you to retrieve the user by, you should see the following configuration:

alt text

Replace the placeholder with your Calendly bearer token

Testing the Agent

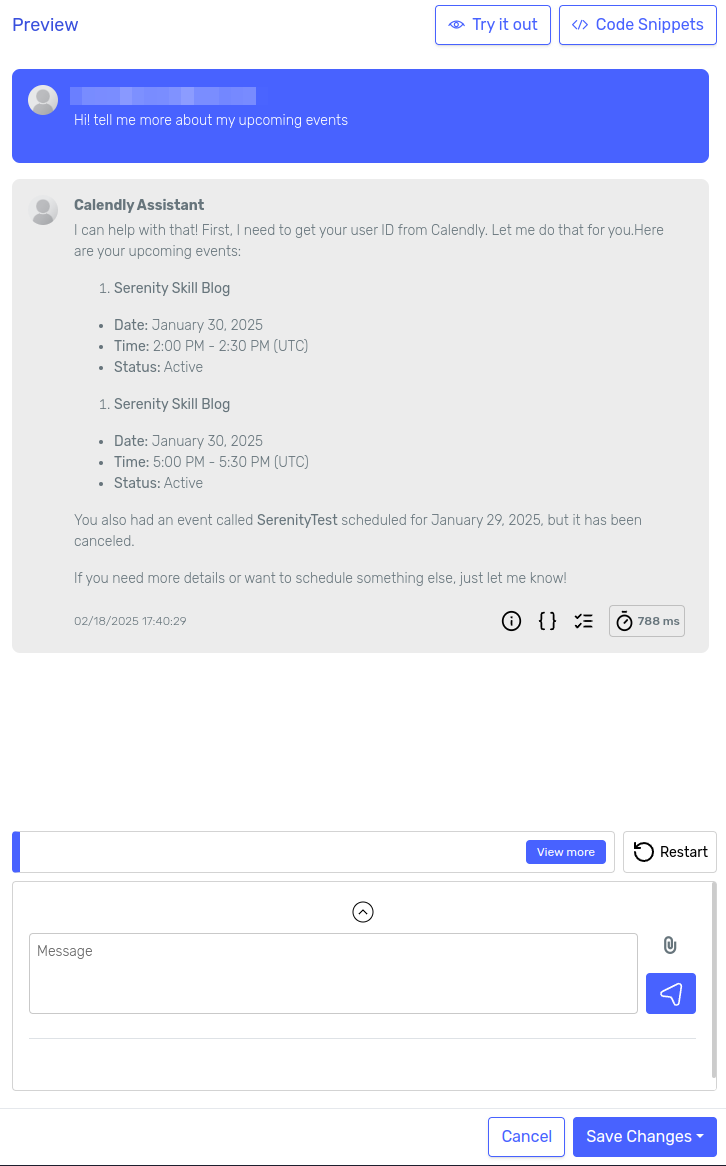
Once the skills are configured, simply type your question to test the agent. For example, you can ask "What are my scheduled events for today?" Your agent should respond with a message like this:

alt text

alt text

Final Tips

  • Check out the Calendly API Reference to further customize and add additional endpoints.
  • You can add dynamic parameters to your base URL, which will be completed by the agent based on the context of the conversation.
  • Clearly define the responsibility of each skill and when it should be executed. This will improve your agent’s performance by avoiding unnecessary skill execution.
  • Integrate your agent with your website, application, or any other service.

How to integrate Assistants with external APIs

· 5 min read
Máximo Flugelman
Máximo Flugelman
Project Manager

With Serenity* Star AI Hub, you can add plugins to an Agent so you can send HTTP Requests to an external API. This can be useful if you want to collect user information using the Chat Widget

Let's implement a simple agent that will do the following:

  • Ask the user for they Name, Last Name and Phone Number
  • Once all data is provided, an HTTP POST request will be sent to an external API that will register the user and return a User ID.
  • Inform the user that their registration was successful and return the User ID.

Prerequisites

You should have an API endpoint that allows for sending data using the following format in the body:

{
"name": "",
"lastName":"",
"phoneNumber:
}

And its response has the following structure:

{
"userId": ""
}

Creating an Assistant Agent to chat with the user.

First, create our Assistant Agent that will chat with the user. An Assistant, is a type of agent that allows you to interact with the user without having to deal with the complexity of the conversation flow. You just send the user's input to the agent, and it will return the response taking into account the context of the conversation.

If you want to learn more about assistant agents, checkout Assistant Agent

  1. Navigate to the Serenity* platform.
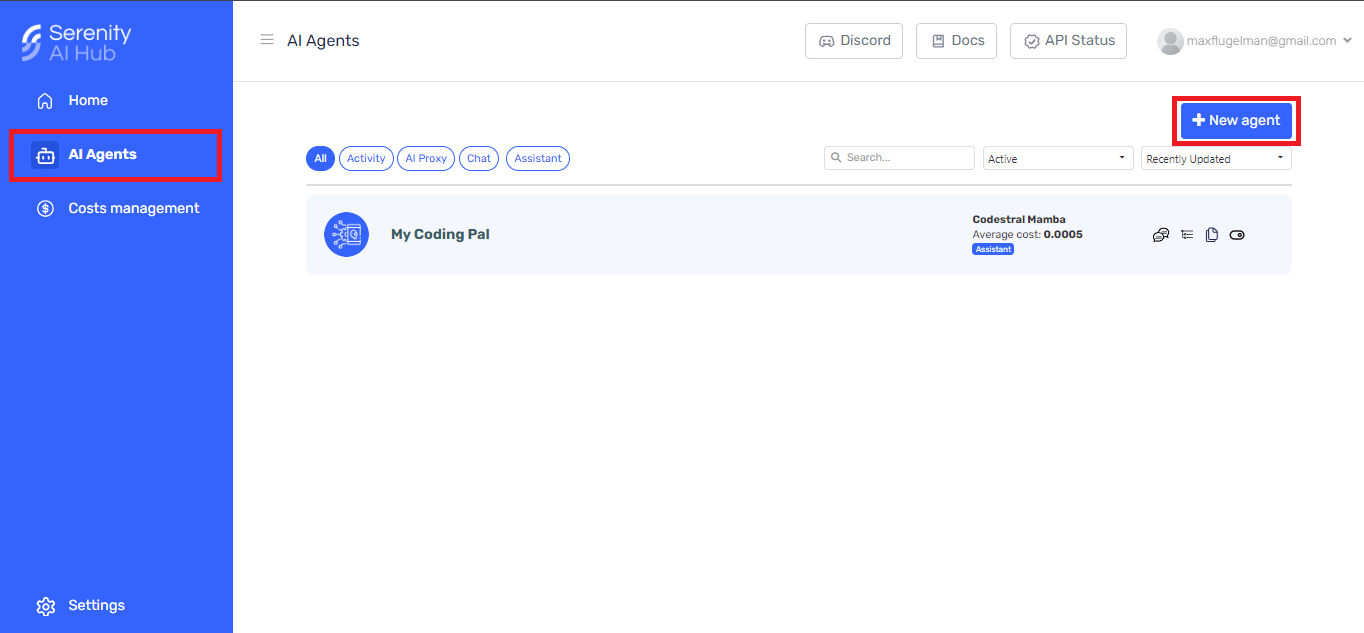
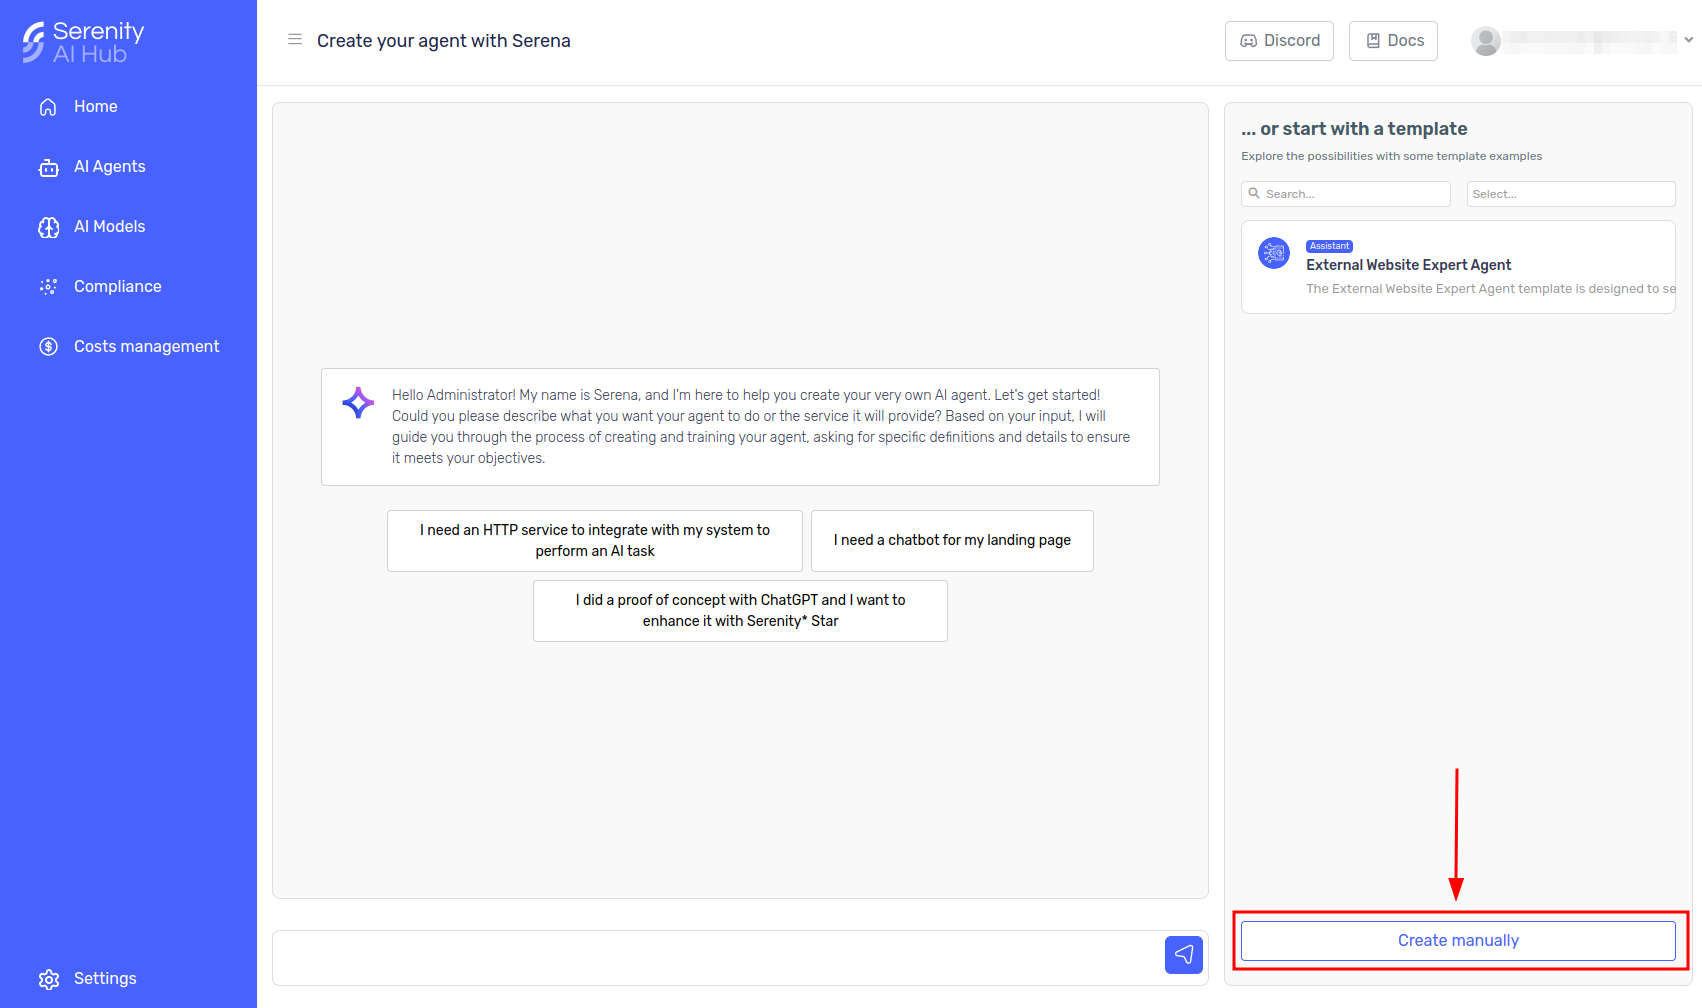
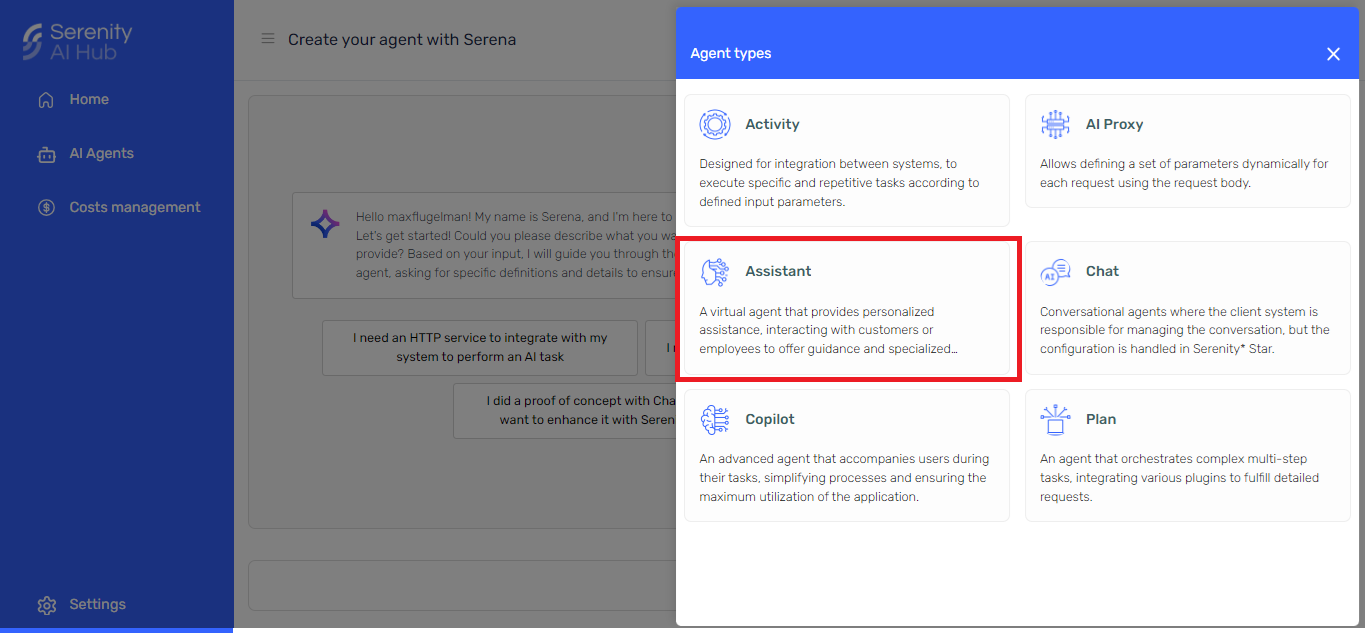
  2. On the Sidebar, go to agents and on this menu, select "New agent" at the top right. You will be taken Serena creation chat, we will skip this step, press on "Create Manually" and select "Assistant Agent" Access to agent grid Select create manually Select assistant agent

The form will have several tabs, General, Model, Skills, Parameters, Knowledge, Behaviour.

General Tab

In the General tab, fill the form with the following fields:

  • Name: A descriptive name of the agent, in this case, we will use User Registration Bot
  • Code: A unique code to identify the agent, we will use registration-bot
  • Description: A short description of what the agent does, in this case, we will use This agent will gather user information and store it in an external API
  • Avatar (Optional): You can upload an image that will represent the agent.

Behaviour tab

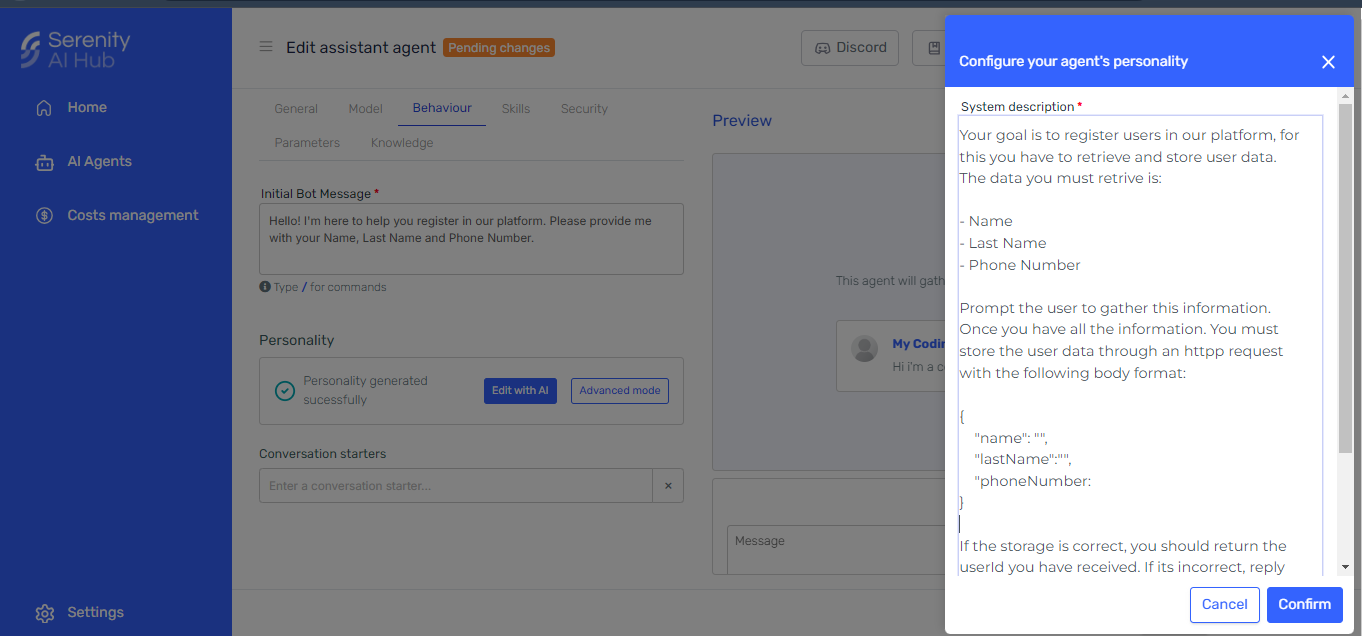
  • Initial Bot Message: This is the first message that the agent will send to the user. In this case, we will use Hello! I'm here to help you register in our platform. Please provide me with your Name, Last Name and Phone Number.

  • Personality: Here we have to tell the agent what we want to do. In this case, we want to gather users information, we will be using the advanced mode. Open the advanced mode and set the following prompt

    Your goal is to register users in our platform, for this you have to retrieve and store user data.
    The data you must retrive is:

    - Name
    - Last Name
    - Phone Number

    Prompt the user to gather this information.
    Once you have all the information. You must store the user data through an httpp request with the following body format:

    {
    "name": "",
    "lastName":"",
    "phoneNumber:
    }

    If the storage is correct, you should return the userId you have received. If its incorrect, reply "It's not posible to store the information right now"

    Extended view of agents personality

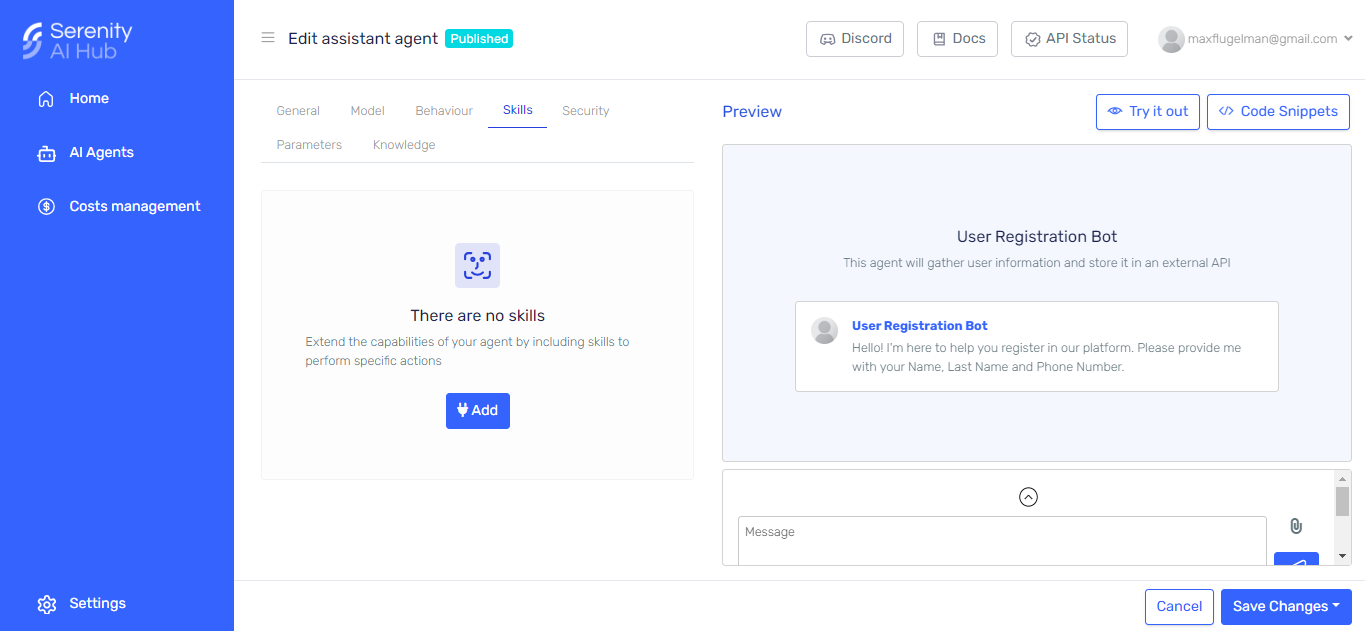
Skills Tab

  1. Click on "Add Skills" Add skills option

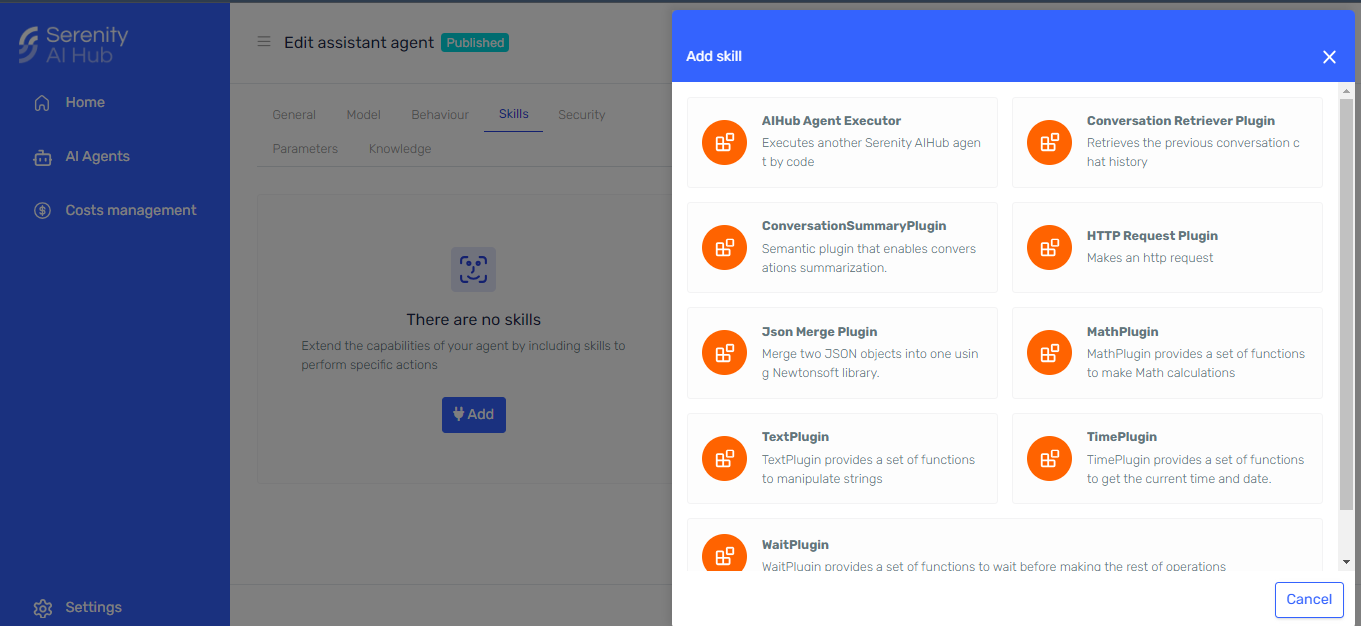
  2. Add the Http Request Plugin: alt text

Configuring the Plugin

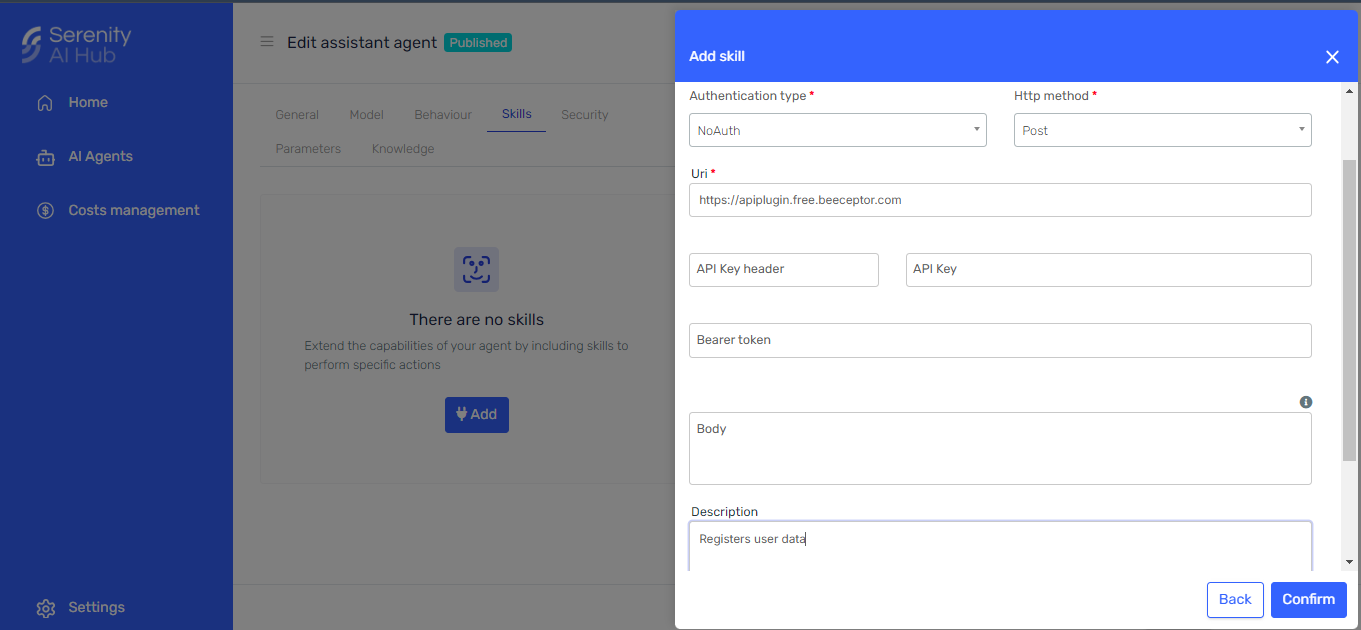
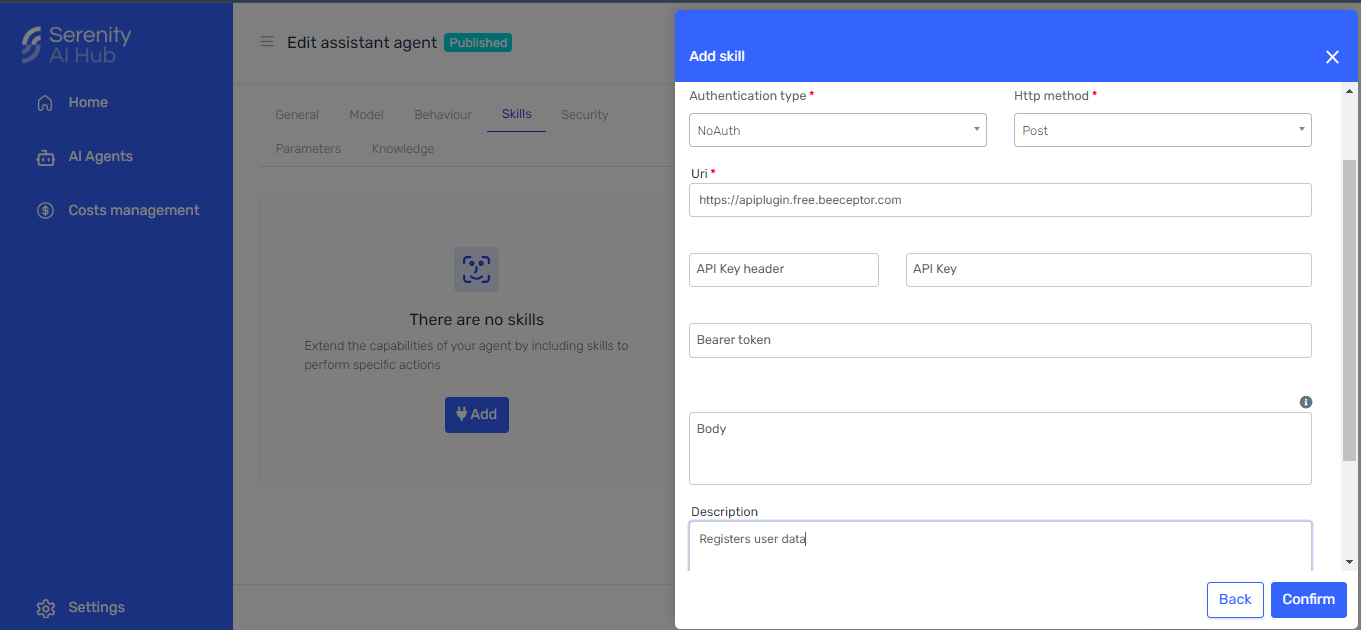
Fill out the form for the API configurations on the side panel wizard. Set up the authorization of your API, and complete de required fields.

In this example we will be using a mock server with no authorization so we only need to fill out the description and URI.

Description: This field should contain a description of what the endpoint does or the goal of the http request as the AI will use it to decide wether or not to make the call.

Body: As the body will be filled by the agent, we can leave it empty

URI: The endpoint of the request we will be using

Finally our Http Request Plugin looks something like this Configuration of the http request plugin Configuration of the http request plugin

Testing the Assistant

Finish by clicking on the "Create" button. You will be redirected to the agent's list.

Search for the agent an open it.

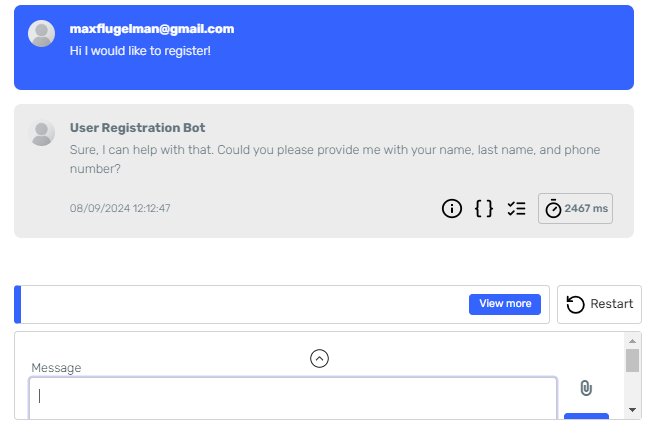
At this point, the assistant is ready, so let's try it out by writing on the preview window.

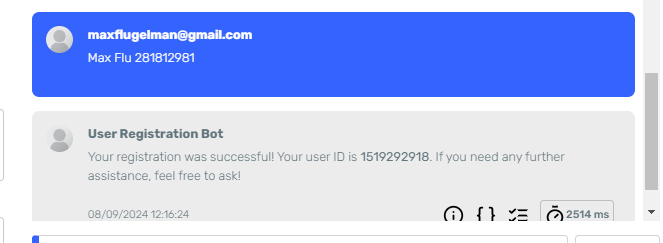
Asking the agent to register Agents response and succesfull registration

We can additionaly take a look at the mock server to make sure the request was succesfully received.

alt text

Great! It seems like the Agent has successfully sent the gathered data to the API and received a response.

Wrapping it up

  • Agents can make API calls by including the HTTP Request Skill
  • The plugin description should be comprehensive so that the agents can identify when to call it, specially when more than one call is configured.
  • The agent can retrieve an create a body from the conversation with the user
  • For better results, use Open AI Models when using this skills.
  • Http Request can manage various types of authorization depending on the endpoint requirements