Integrating Google Calendar with your Serenity* AI Agent
This guide walks you through integrating Google Calendar with your Serenity* Star agent using OAuth 2.0 authentication. You'll learn how to set up an HTTP Request skill that can create calendar events by making authenticated API calls to the Google Calendar API.
You can use this integration to interact with your Google Calendar in any way you like, such as creating and deleting events, retrieving event details, or updating existing events, all by asking your AI agent to perform these tasks.
Add an HTTP Request Skill
-
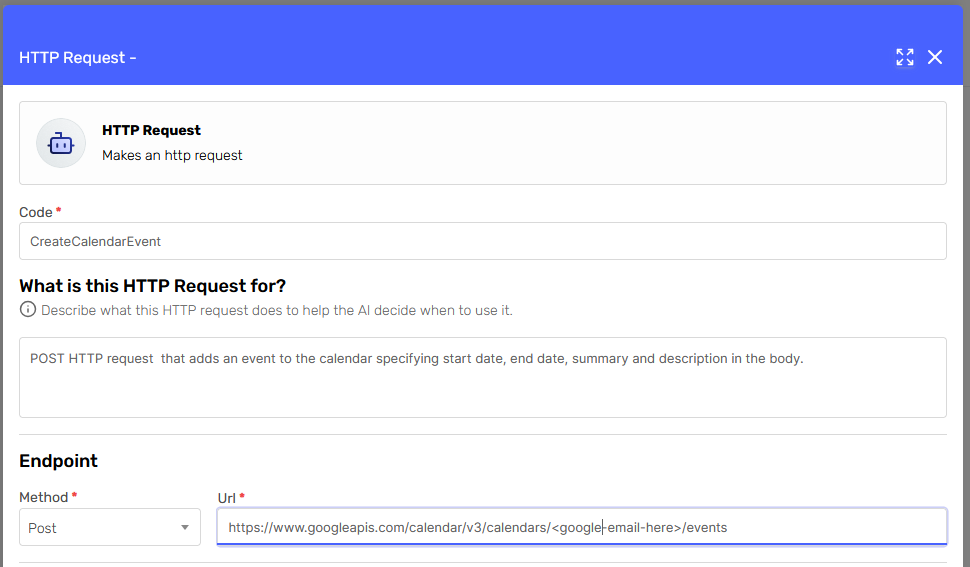
From the agent designer, add a new HTTP Request skill. In the following example, I'm preparing a skill to add new events to my calendar.
Configure the following settings:
- Code: CreateCalendarEvent
- Description: POST HTTP request that adds an event to the calendar by specifying start date, end date, summary, and description in the body.
- Method: POST
- URL:
https://www.googleapis.com/calendar/v3/calendars/<google-email-here>/events- Replace
<google-email-here>with a valid email (e.g., "[email protected]")
- Replace
-
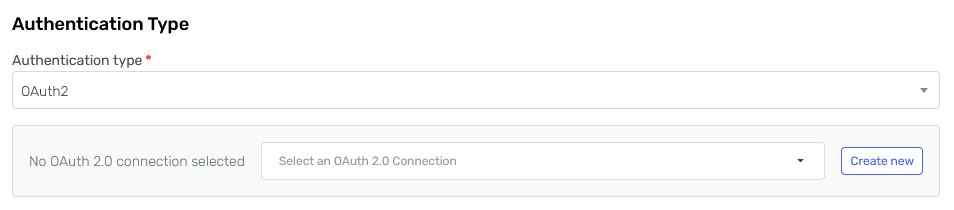
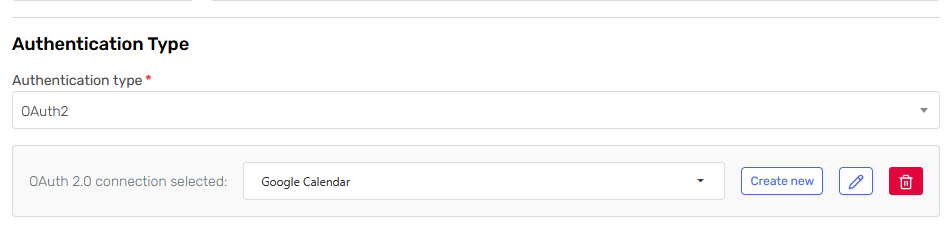
Select OAuth2 as your authentication type and press "Create new"
Configuring the OAuth 2.0 Connection
Complete the OAuth 2.0 Connection Configuration form:
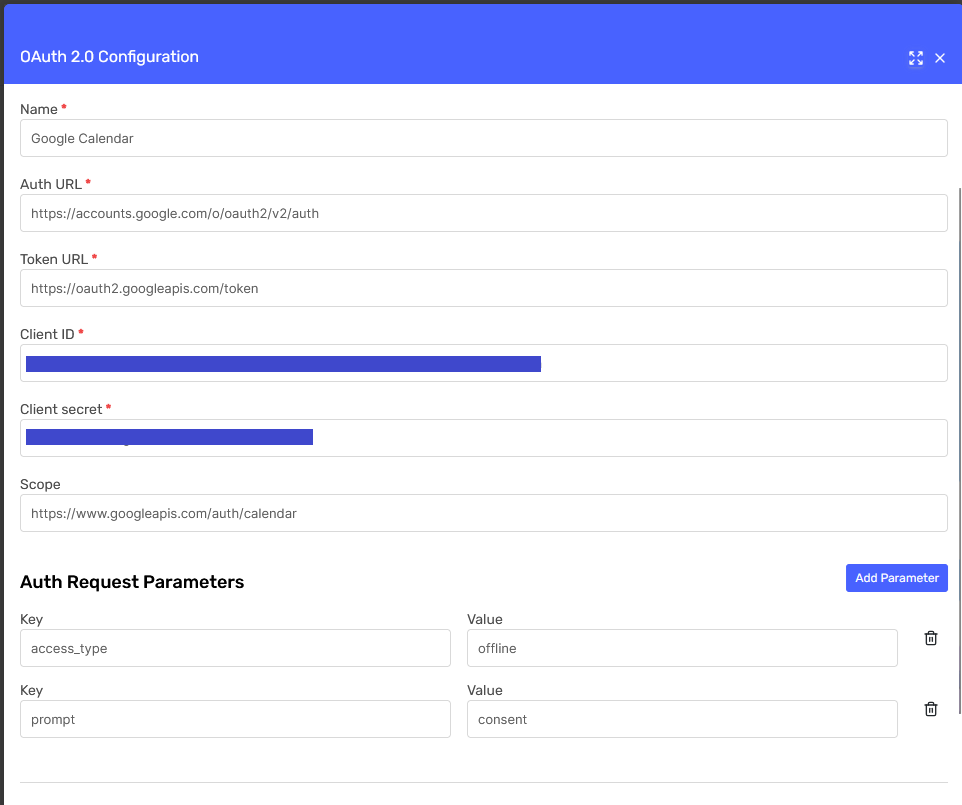
Configure the following settings:
- Name: Google Calendar (this is just to identify the connection)
- Auth URL:
https://accounts.google.com/o/oauth2/v2/auth - Token URL:
https://oauth2.googleapis.com/token - Client ID: Your Google OAuth app client ID (generated via Google Cloud Console)
- Client Secret: Your Google OAuth app client secret
- Scopes:
https://www.googleapis.com/auth/calendar
For Google OAuth, you also need to add two additional Auth Request Parameters:
Access Type Parameter:
- Key:
access_type - Value:
offline
Prompt Parameter:
- Key:
prompt - Value:
consent
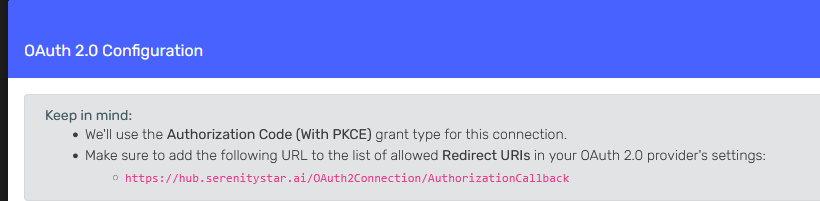
Important: Make sure to add the Redirect URI to your Google OAuth app as specified at the top of the form:
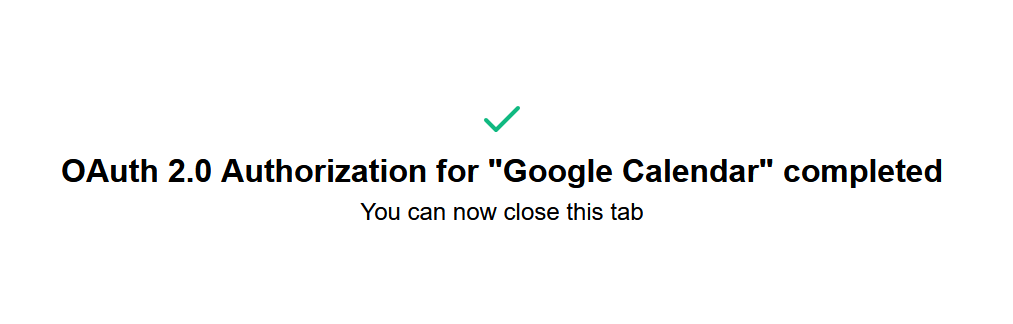
Once the OAuth connection is complete, click "Continue" and go through Google's login and consent screens. You should see this success message:
Close the tab and return to the OAuth 2.0 Connection form. You should see the new connection configured in the OAuth 2.0 selector:
Finish Configuring the HTTP Request
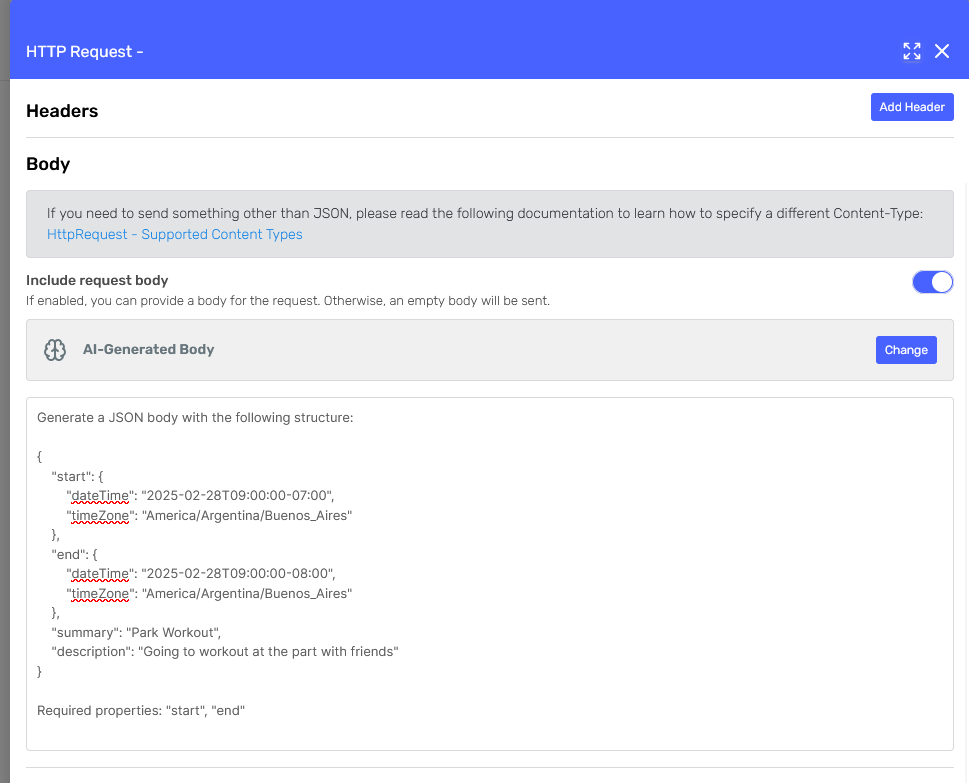
Press "Continue" to set up the rest of the request information. In this step, you may need to configure the request body. For my "Create Event" request, I used an AI-generated body like this:
What's Next?
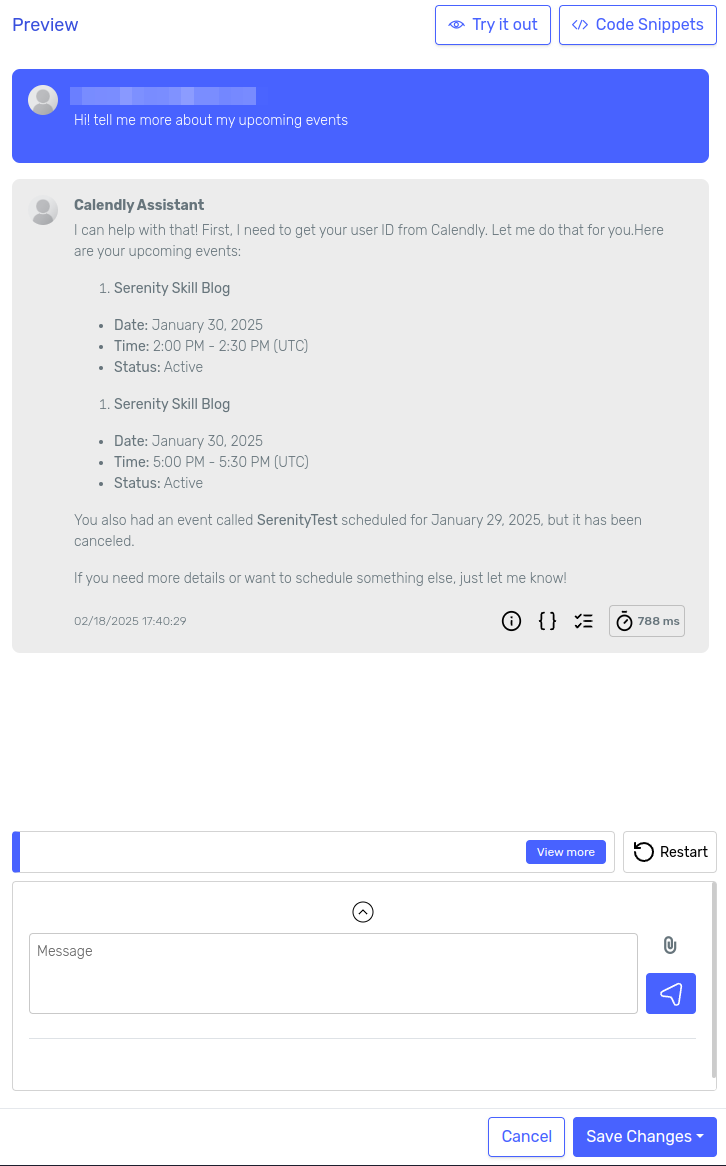
You can now try your Agent from the Preview panel. Ask it to create a calendar event, and it should respond with a confirmation message.
Once you're sure that's working correctly, you can reuse this OAuth 2.0 connection in other HTTP Request skills to provide your Agent with other ways to interact with your Google Calendar, such as retrieving events or deleting them.
Keep in Mind
- Permissions: Ensure your Google OAuth app has the necessary permissions to access the Calendar API. You can manage these in the Google Cloud Console.
- Your Agent will act on your behalf: When you set up the OAuth connection, your agent will be able to create, modify, and delete events in your Google Calendar. Keep this in mind before sharing your agent publicly.