Datasets
Introduction
Datasets transform how your agents work with structured data. Instead of processing CSV files as plain text, Datasets allow your agents to query data like a database, delivering precise answers based on exact data points.
When you add a CSV file as a Dataset, Serenity* Star converts it into a queryable database table. Your agent can then filter, search, aggregate, and perform calculations on your data to provide accurate, data-driven responses.
Common Use Cases:
- Product catalogs with inventory and pricing information
- Customer databases for support agents
- Policy documents with structured rules and guidelines
- Pricing lists and availability tracking
- Any structured data that requires precise querying and filtering
Understanding Datasets
Before creating your first dataset, let's understand the key concepts:
- Dataset: A collection of one or more related tables. Think of it as a database that groups related information together.
- Table: Each CSV file you upload becomes a table within your dataset. Tables contain rows and columns of structured data.
- Queryable Data: Your agent can execute SQL queries against your data to find specific information, perform calculations, or filter results.
Create Your First Dataset
You can create datasets in two ways: manually from the Datasets module, or automatically when uploading CSV files through the Knowledge tab in the Agent Design Studio. We'll cover both methods.
Manual Dataset Creation
Use this method when you want full control over your dataset structure and plan to use the same data across multiple agents.
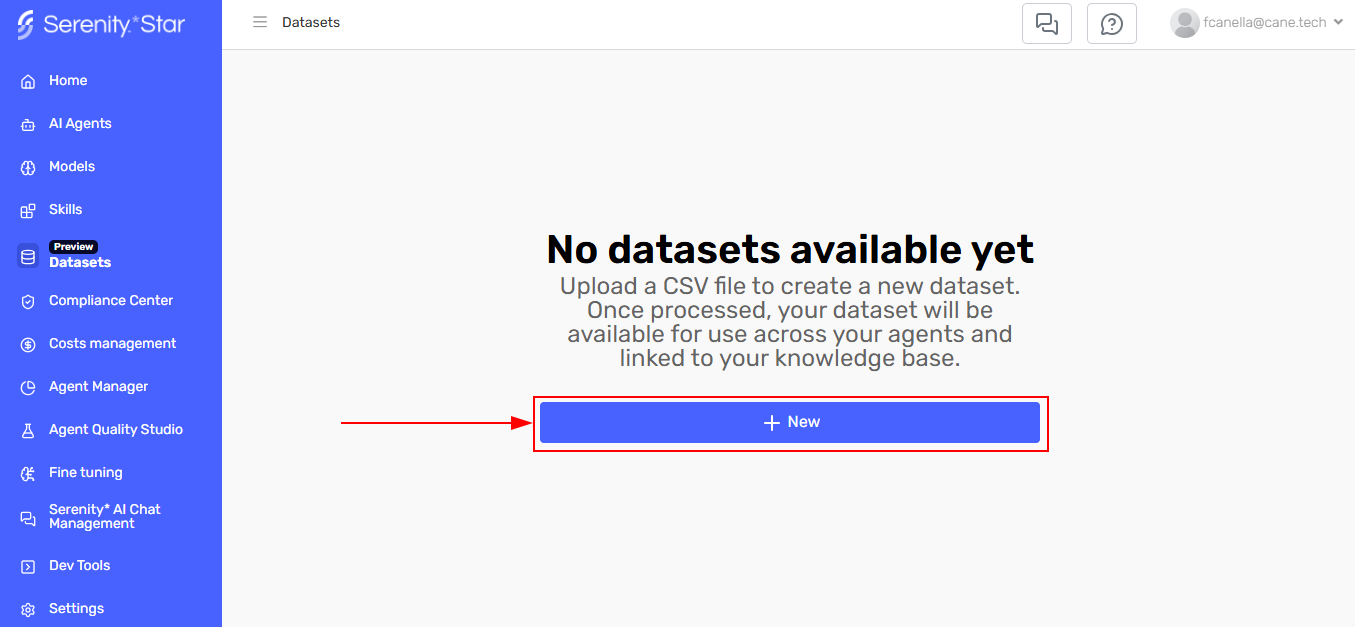
Step 1: Access the Datasets Module
Navigate to the Datasets module from the sidebar navigation.

If this is your first time accessing Datasets, you'll see an empty state prompting you to create your first dataset.
Step 2: Create a New Dataset
Click the "Create New Dataset" button to begin.
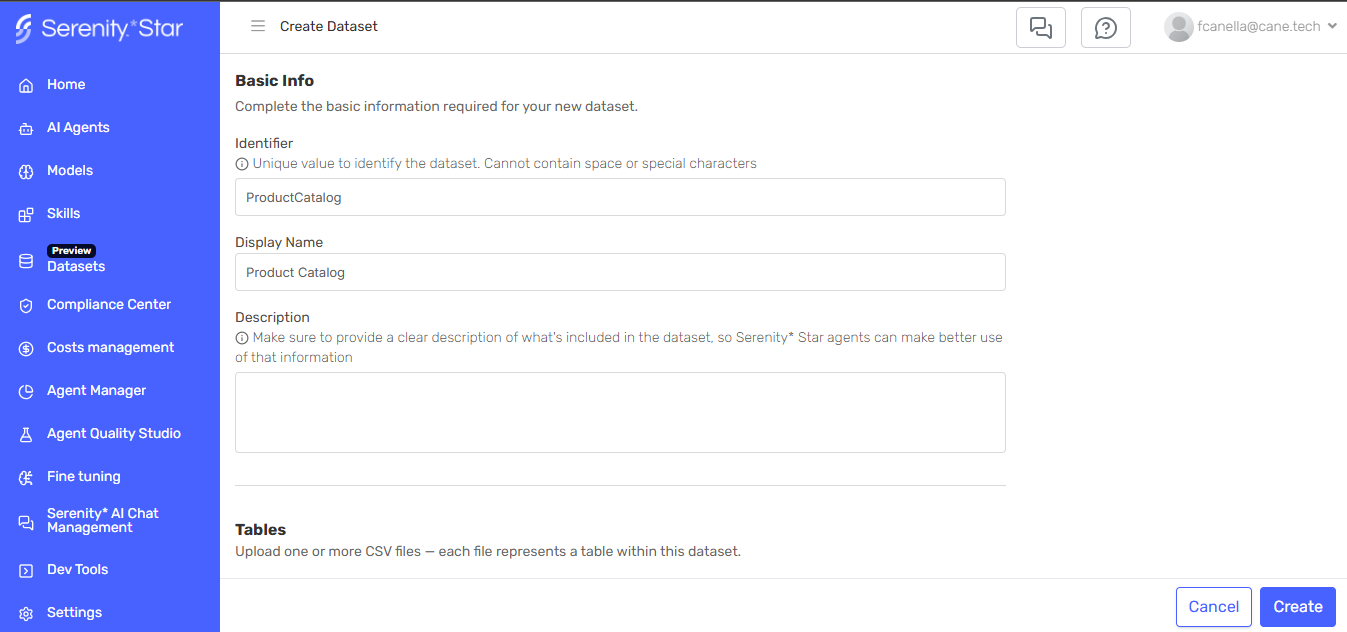
Step 3: Fill in Dataset Details
You'll need to provide the following information:
-
Identifier: A unique identifier for your dataset (numbers and letters only, no spaces or special characters)
- Example:
ProductCatalog,CustomerData,HrPolicies
- Example:
-
Display Name: A friendly name that will be shown throughout the interface
- Example:
Product Catalog,Customer Database,HR Policies
- Example:
-
Description: A brief explanation of what data this dataset contains and its purpose
- This helps the agent and team members understand the dataset content
Use descriptive identifiers with letters and numbers only (no spaces or special characters). We recommend using PascalCase like ProductCatalog or CustomerSupportData. This makes it easier to identify datasets as your library grows.
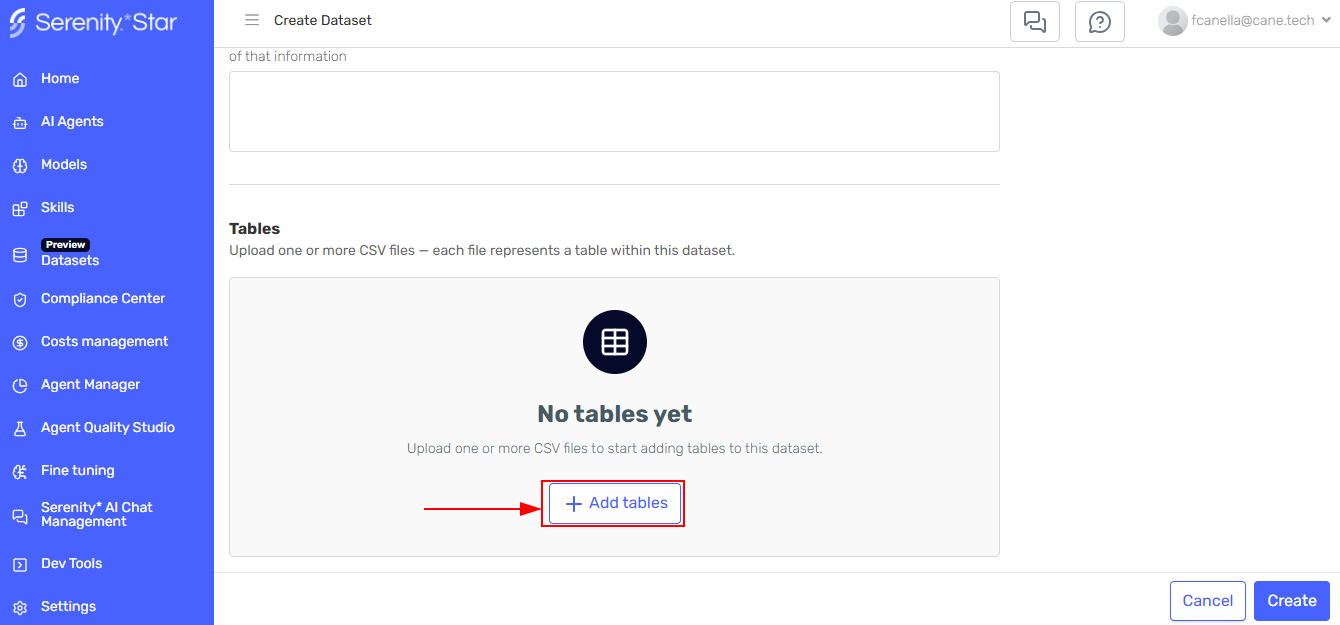
Step 4: Add Your First Table
To complete the dataset creation, you must add at least one table by uploading a CSV file.
-
Click "Add Table" in the dataset view. If this is your first table, you'll see an empty state with the Add Table button.
-
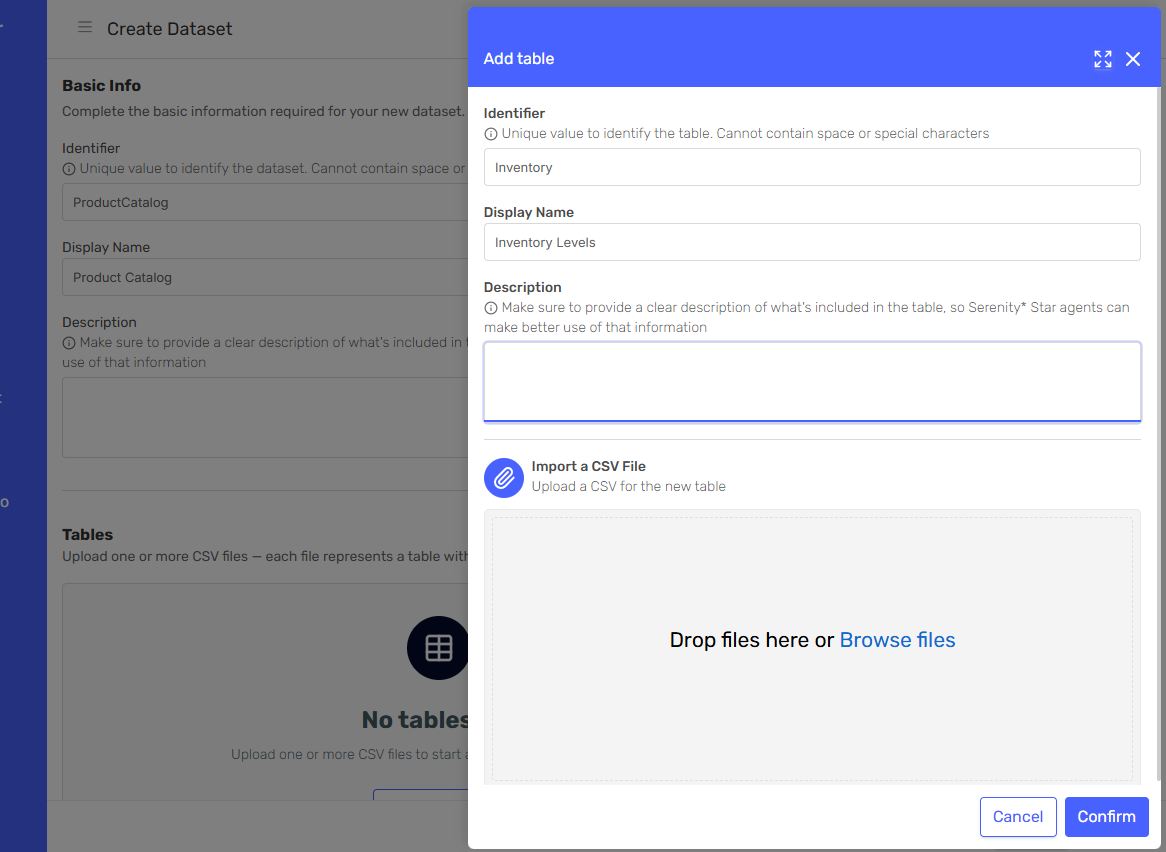
A side panel will open. Provide the table information:
- Table Identifier: Unique name for this table (e.g.,
Products,Inventory) - Table Display Name: Friendly name (e.g.,
Products,Inventory Levels) - Table Description: What data this table contains
- Table Identifier: Unique name for this table (e.g.,
-
Upload your CSV file by clicking Browse files or by dragging and dropping it
-
After uploading, a new table card will appear showing the
Pendingstatus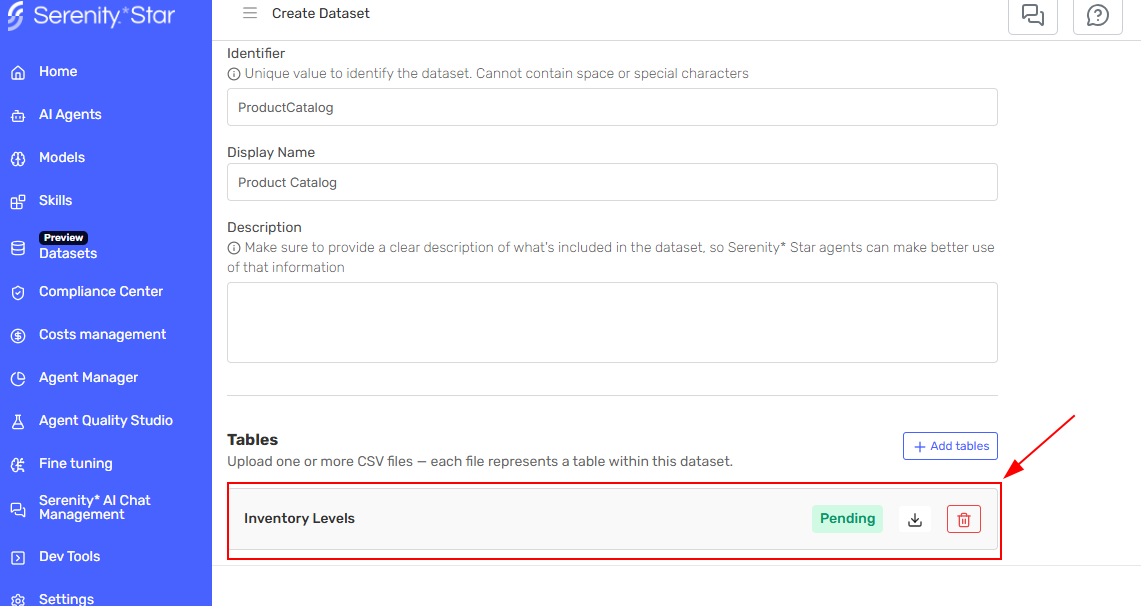
Your CSV file must:
- Have column headers in the first row
- Use consistent data types within each column
- Use UTF-8 encoding
Step 5: Create the Dataset
Click "Create" to save the dataset and confirm all the changes you made.
Step 6: Wait for Processing
After creating the dataset, Serenity* Star will process all your CSV files in the background. This involves:
- Analyzing the CSV structure
- Inferring data types for each column
- Creating a queryable database table
- Generating a schema that helps your agent understand the data
You can track the processing status in the datasets grid. The status will change from Pending to In Progress to Completed.
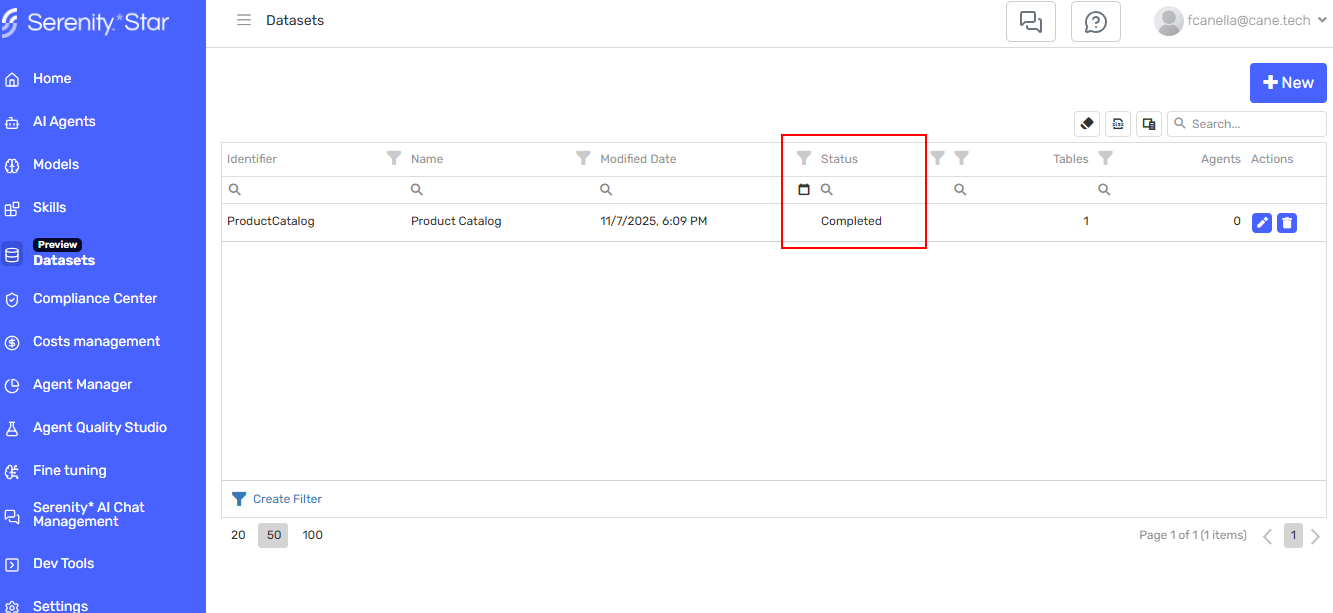
Once the status shows Completed, your dataset is available for use.
Any changes you make to datasets (adding tables, deleting tables, appending data, replacing data) from the datasets management screen will only take effect once you confirm the changes. Until then, your agents will continue using the current version of the dataset.
Automatic Dataset Creation from Agent Design Studio
When you upload CSV files directly in the Agent Design Studio's Knowledge tab, Serenity* Star automatically creates a special "Default Dataset" for that agent.
To upload CSV files, follow these steps:
- Navigate to your agent in the Agent Design Studio
- Go to the Knowledge tab
- Click "Add Knowledge" and select Files
- Upload one or more CSV files
For detailed instructions on uploading files to your agent's Knowledge, see the Knowledge documentation.
After uploading the files, Serenity* Star automatically:
- Creates a dataset with identifier
Default[YOUR-AGENT-CODE] - Names it
Default dataset for [YOUR-AGENT-NAME] - Converts each CSV file into a separate table
- Assigns the dataset to your agent
This default dataset appears in:
- Your agent's Knowledge sources (each CSV file appears as an individual file, but they are tables in the default dataset that your agent can query)
- The Datasets grid alongside your other datasets (for viewing and management)
Assign Datasets to Agents
Once you have created a dataset manually, you can assign it to one or more agents. Note that default datasets (created automatically from CSV uploads) can only belong to a single agent.
Step 1: Access Agent Knowledge Settings
- Navigate to your agent in the Agent Design Studio
- Go to the Knowledge tab
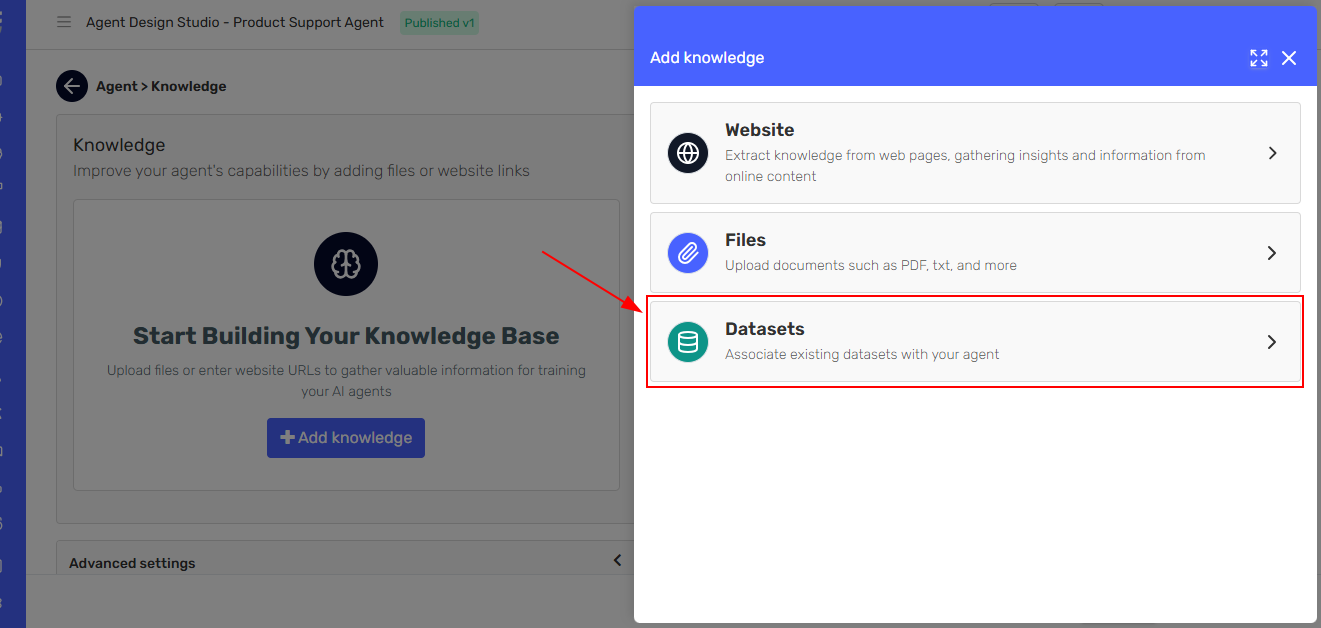
- Click "Add Knowledge"
Step 2: Select Dataset Option
From the side panel, select the Datasets option.
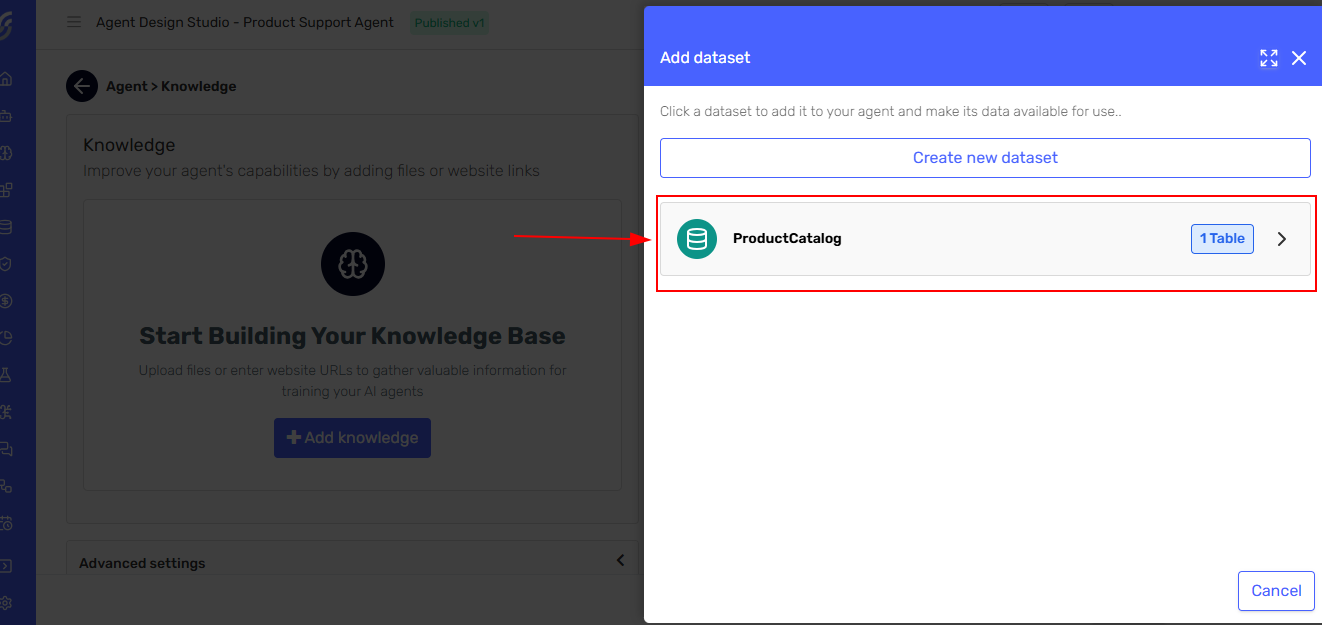
Step 3: Choose Your Dataset
A side panel will open showing all available datasets. Select the dataset you want to assign to your agent.
You can also create a new dataset directly from this panel by clicking "Create New Dataset".
Step 4: Confirm Assignment
After selecting a dataset, it will appear in your agent's Knowledge sources list. Click "Save Changes" to finalize the assignment.
The dataset is now available for your agent to query during conversations.
Working with Tables
Once your dataset is created, you can manage its tables in various ways.
Add a New Table
To add additional tables to an existing dataset:
- Open the dataset from the Datasets module
- Click "Add Table"
- Provide the table details and upload your CSV file
- Click "Save" to confirm the changes to your dataset
- Wait for processing to complete
This is useful when you want to add related data to an existing dataset. For example, adding an Inventory table to complement your Products table.
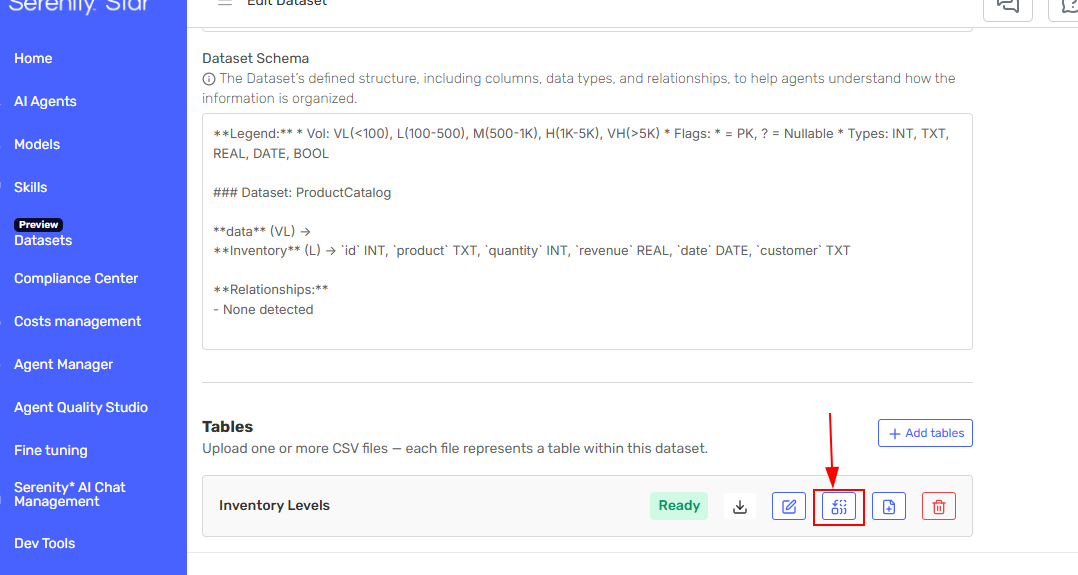
Replace Table Data
Use Replace when you need to completely update a table's content with fresh data. This removes all existing rows and replaces them with the new data.
When to use Replace:
- Daily inventory updates
- Complete price list refreshes
- Replacing outdated information
Important: The new CSV must have the same column structure (same number of columns and compatible data types) as the original table.
To replace a table:
-
In the dataset view, locate the table you want to update
-
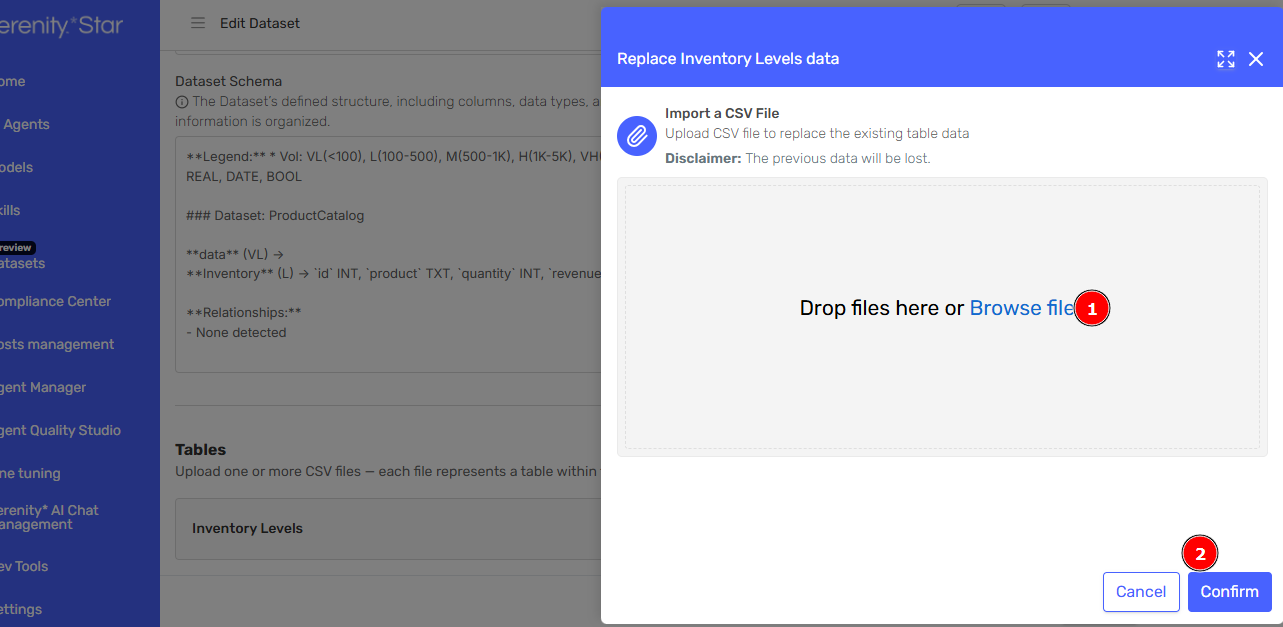
Click the Replace button on the table card
-
A side panel will open. Upload your new CSV file with the replacement data
-
The table will be marked for replacement
-
Click "Save" to confirm the changes to your dataset
While the replace operation is pending or in progress, your agent will continue to have access to the previous version of the table. The new data becomes available once processing is complete.
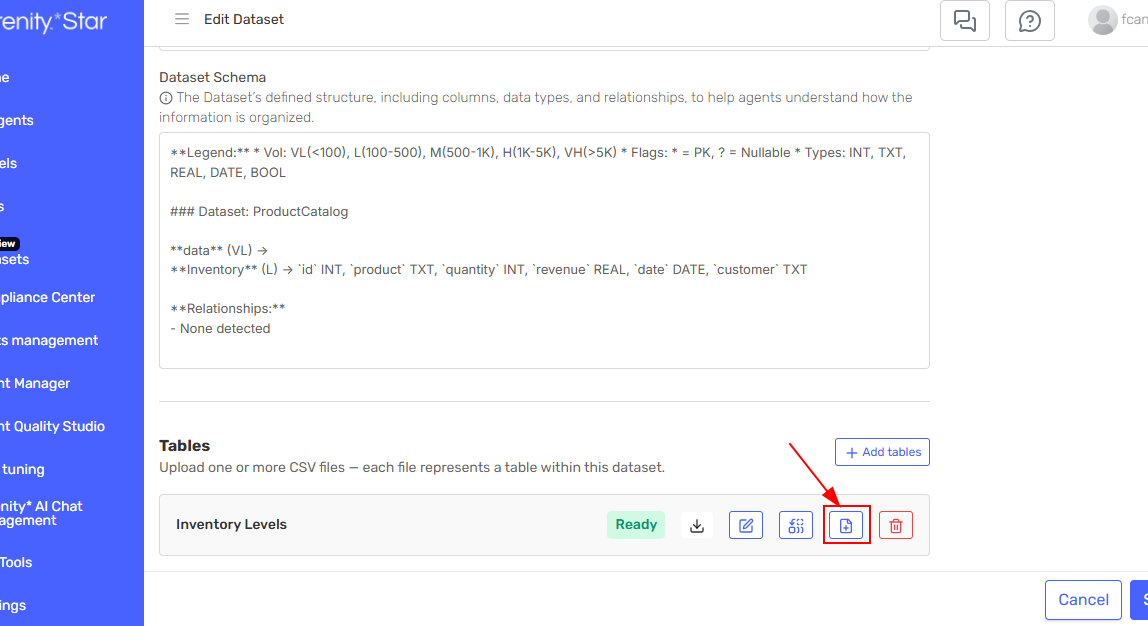
Append Data to Table
Use Append when you want to add new rows while preserving existing data. The new rows are added to the end of the table.
When to use Append:
- Adding new products to a catalog
- Accumulating historical data
- Incremental updates without removing old records
Important: The CSV must match the existing table's structure exactly (same columns and data types).
To append data:
-
Locate the table in your dataset
-
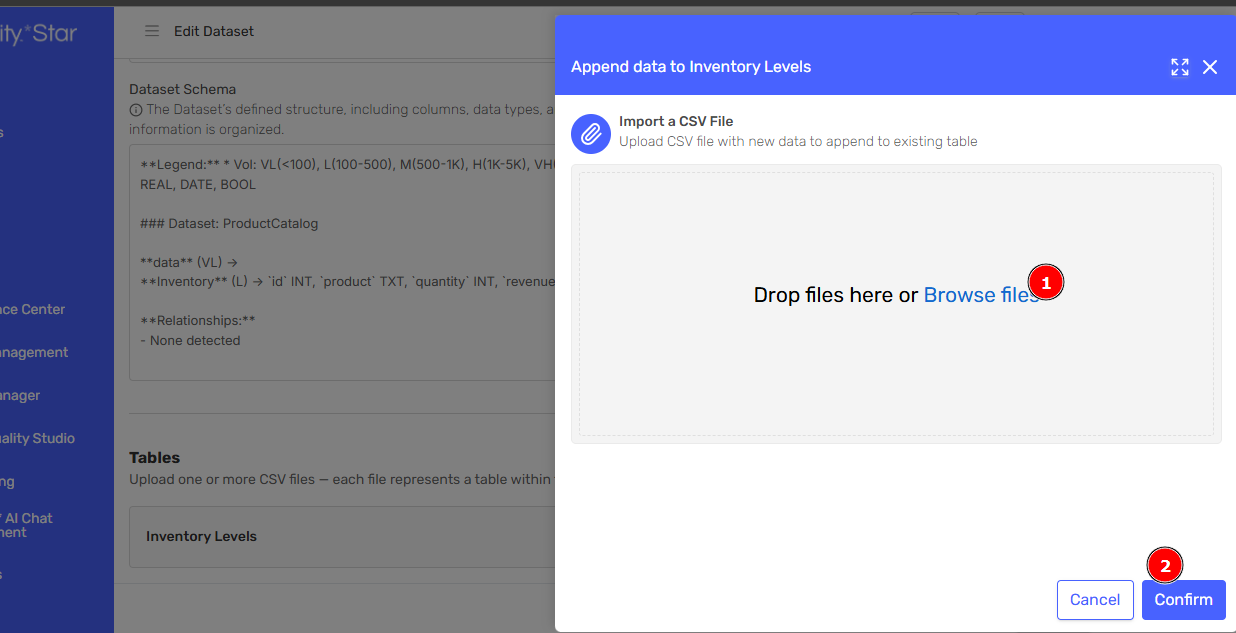
Click the Append button on the table card
-
A side panel will open. Upload your CSV file with new rows
-
The table will be marked for appending new data
-
Click "Save" to confirm the changes to your dataset
While the append operation is pending or in progress, your agent will continue to have access to the previous version of the table. The appended data becomes available once processing is complete.
Edit Table Records
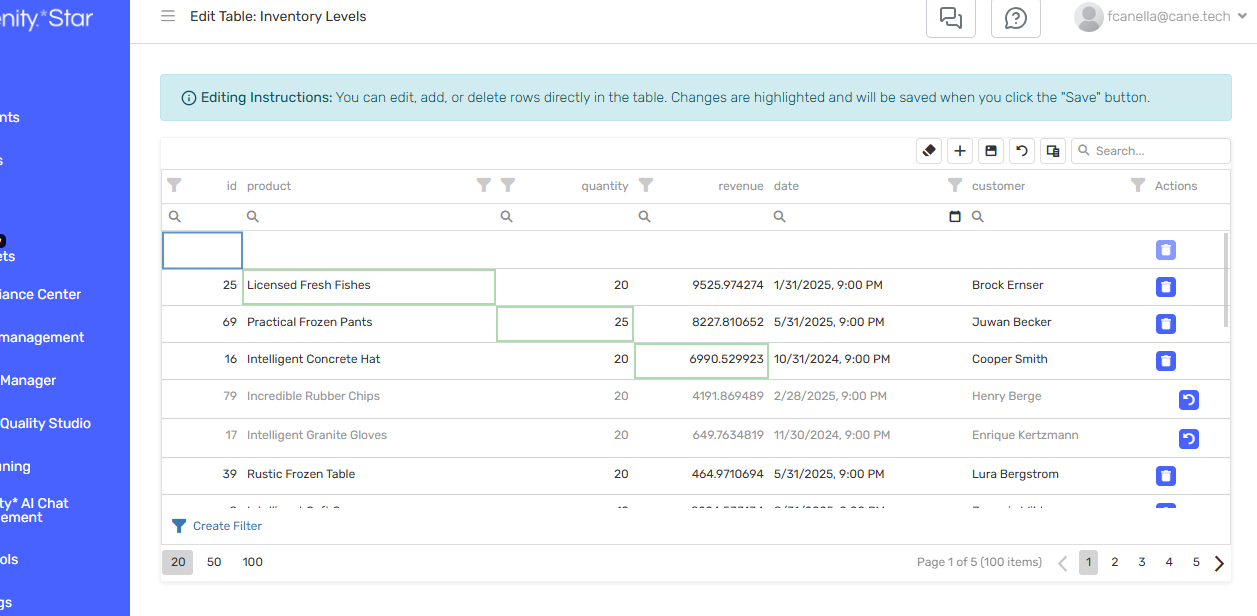
You can edit data directly within Serenity* Star using the inline table editor.
-
Click the Edit icon on the table card
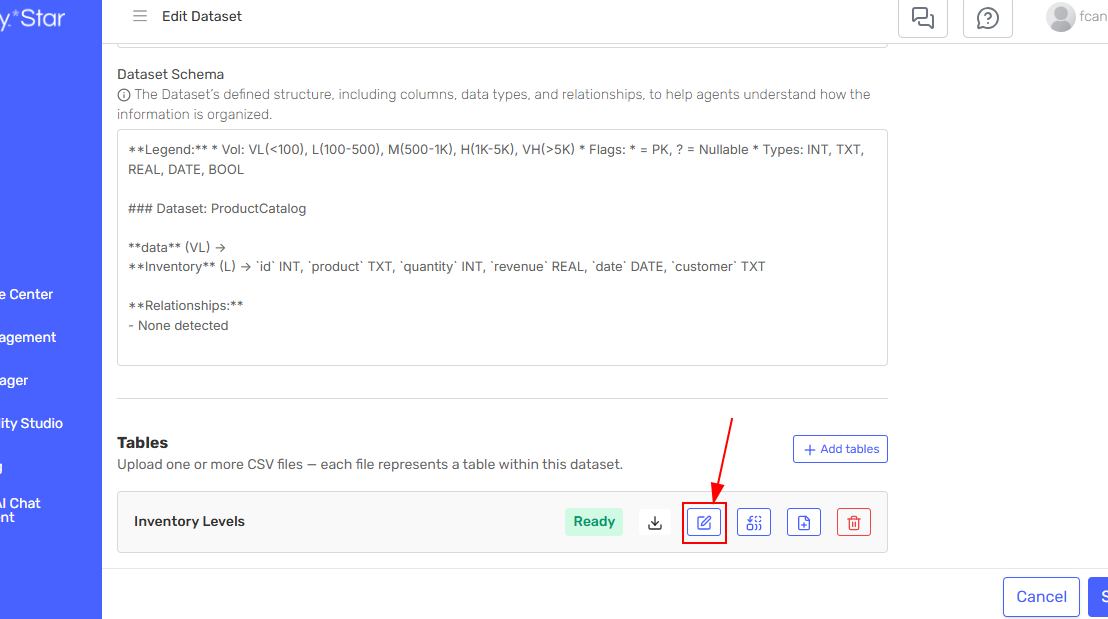
-
A paginated grid view of your data will open where you can:
- Click any cell to edit its value
- Use the search and filter options to find specific records
- Navigate through pages of data
- Click Save to apply your changes
This is helpful for:
- Correcting individual values
- Making small updates without re-uploading the entire file
- Quick data fixes
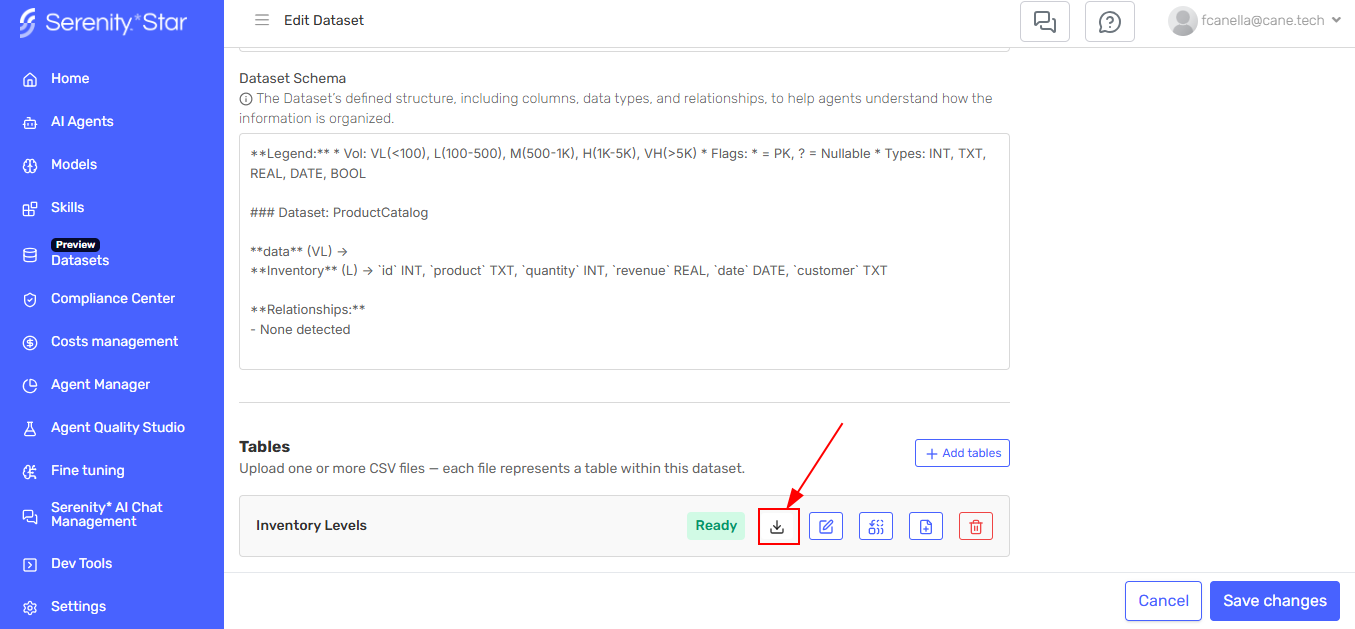
Download Table Data
You can export the current contents of any table as a CSV file. This downloads the current state of the data, including any edits you've made, not the original uploaded file.
From the Datasets Module:
-
Open your dataset from the Datasets module
-
Locate the table you want to download
-
Click the Download button on the table card
-
The table data will be exported as a CSV file
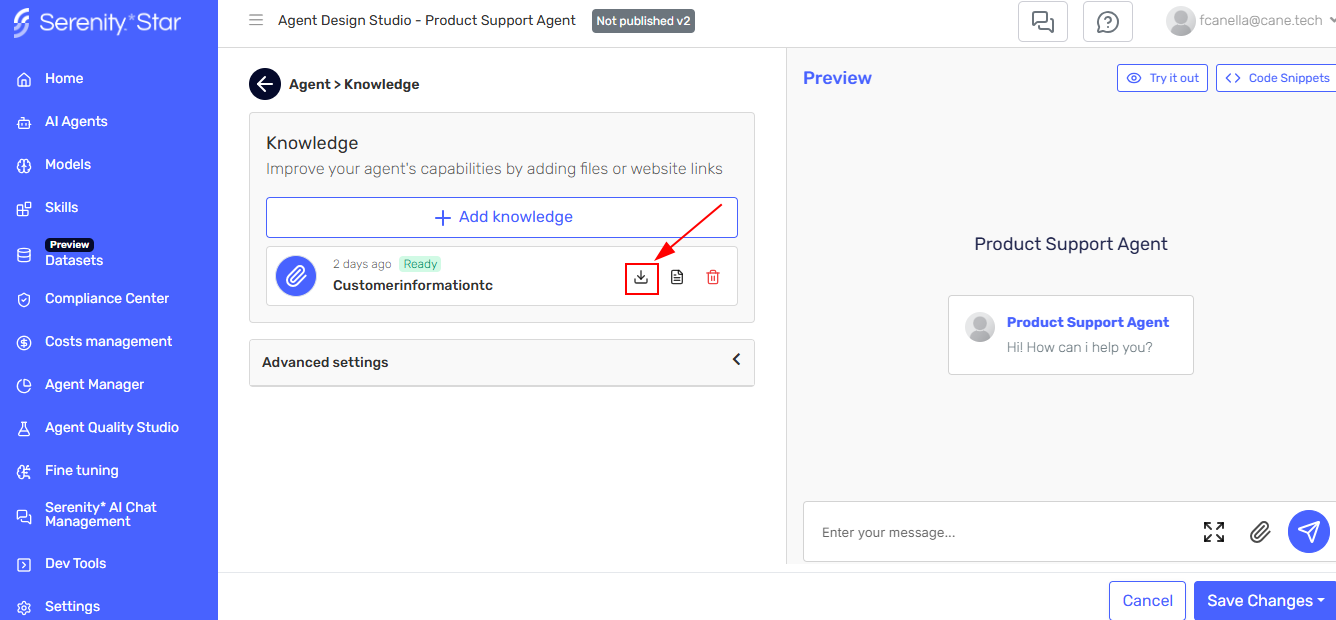
From the Agent Design Studio:
-
Navigate to your agent in the Agent Design Studio
-
Go to the Knowledge tab
-
Locate the dataset in the knowledge sources list
-
Click the Download icon next to the table name
-
The table data will be exported as a CSV file
Delete a Table
To remove a table from a dataset:
-
Locate the table you want to remove in your dataset
-
Click the Delete button on the table card
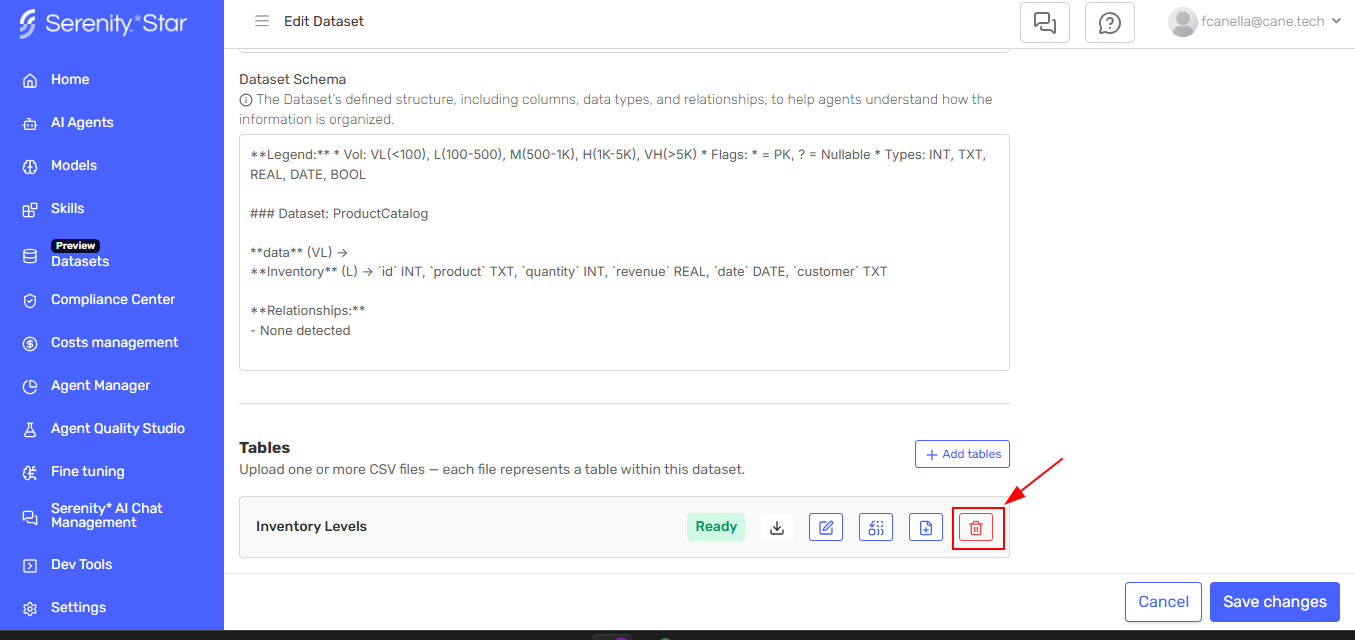
-
The table will be marked for deletion
-
Click "Save" to confirm the changes to your dataset
A dataset must contain at least one table. If you try to delete the only table in a dataset, you'll need to delete the entire dataset instead.
When deleting a table that has already been created, the deletion operation runs in the background. Your agent will continue to have access to the table until the deletion process is complete.
Manage Datasets
View All Datasets
The Datasets module shows a grid of all your datasets with the following information:
- Dataset name and identifier
- Number of tables
- Number of agents using this dataset
- Current status
- Creation date
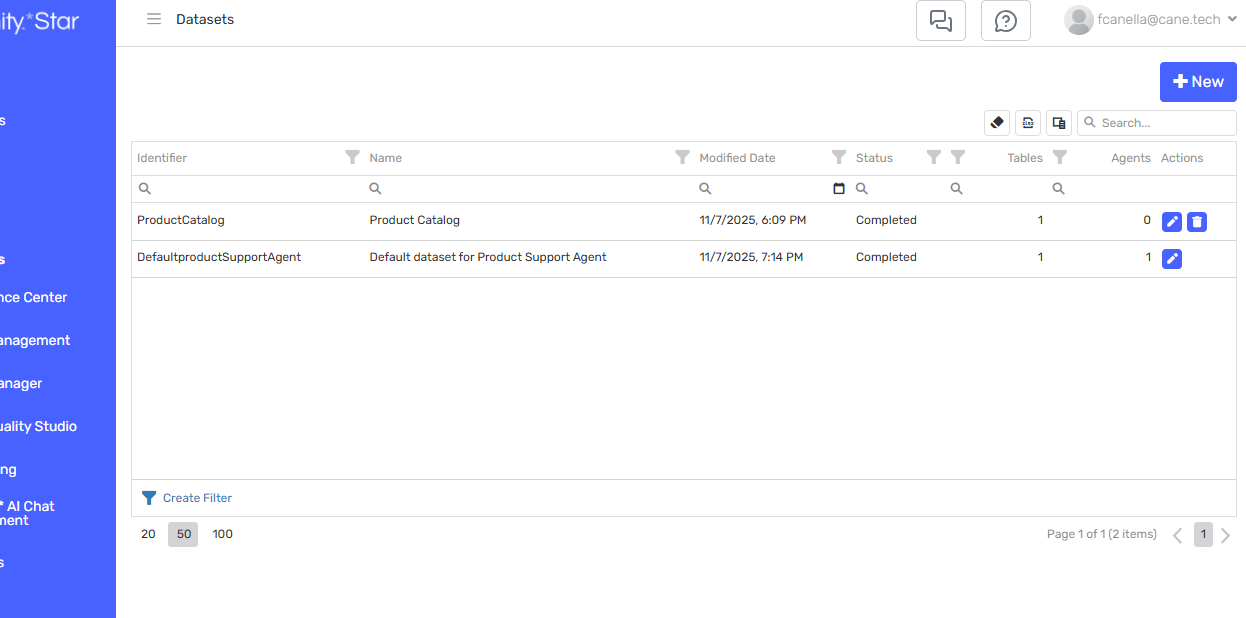
Use the search bar to quickly find specific datasets.
Edit Dataset Details
You can update a dataset's display name and description:
- Click on the dataset to open its details
- Click the Edit button
- Update the display name or description
- Save your changes
The dataset identifier is permanent and cannot be modified after creation. Choose your identifiers carefully when creating datasets.
Delete a Dataset
To delete a dataset:
- Locate the dataset in the grid
- Click the Delete button
- Confirm the deletion
You cannot delete a dataset that is currently assigned to any agent. First, remove the dataset from all agents, then delete it.
Best Practices
CSV Formatting
✅ Do:
- Include clear column headers in the first row
- Use consistent data types within each column
- Format dates as YYYY-MM-DD
- Remove any merged cells or complex formatting
❌ Don't:
- Mix different data types in the same column
- Use formulas or macros
- Include multiple header rows
- Use special characters that might cause parsing issues
Data Maintenance
- Review regularly: Update your datasets as your source data changes
- Use Replace for full updates: When refreshing entire tables, use Replace
- Use Append for additions: When adding new records only, use Append
- Test after updates: Always verify your agent works correctly after updating data
- Clean up unused datasets: Remove datasets that are no longer needed
Supported CSV Format
- Must be valid CSV (comma-separated values)
- UTF-8 encoding
- Headers required in first row
- Consistent column count across all rows