Getting Started with Fine Tuning
This comprehensive guide will walk you through the essential steps to begin your fine tuning journey in Serenity* Star. By the end of this guide, you'll have successfully created your first fine tuning request and understand the key concepts needed to customize AI models for your specific needs.
Prerequisites
Before you begin, ensure you have:
- ✅ An active Serenity* Star subscription with fine tuning access
- ✅ A dataset prepared in JSONL format (see Data Preparation Basics below)
- ✅ Basic understanding of your use case and desired model behavior
Step 1: Access the Fine Tuning Dashboard
If your subscription includes fine tuning access, you'll find the fine tuning option in the sidebar navigation.

Click on the fine tuning option to access the dashboard:
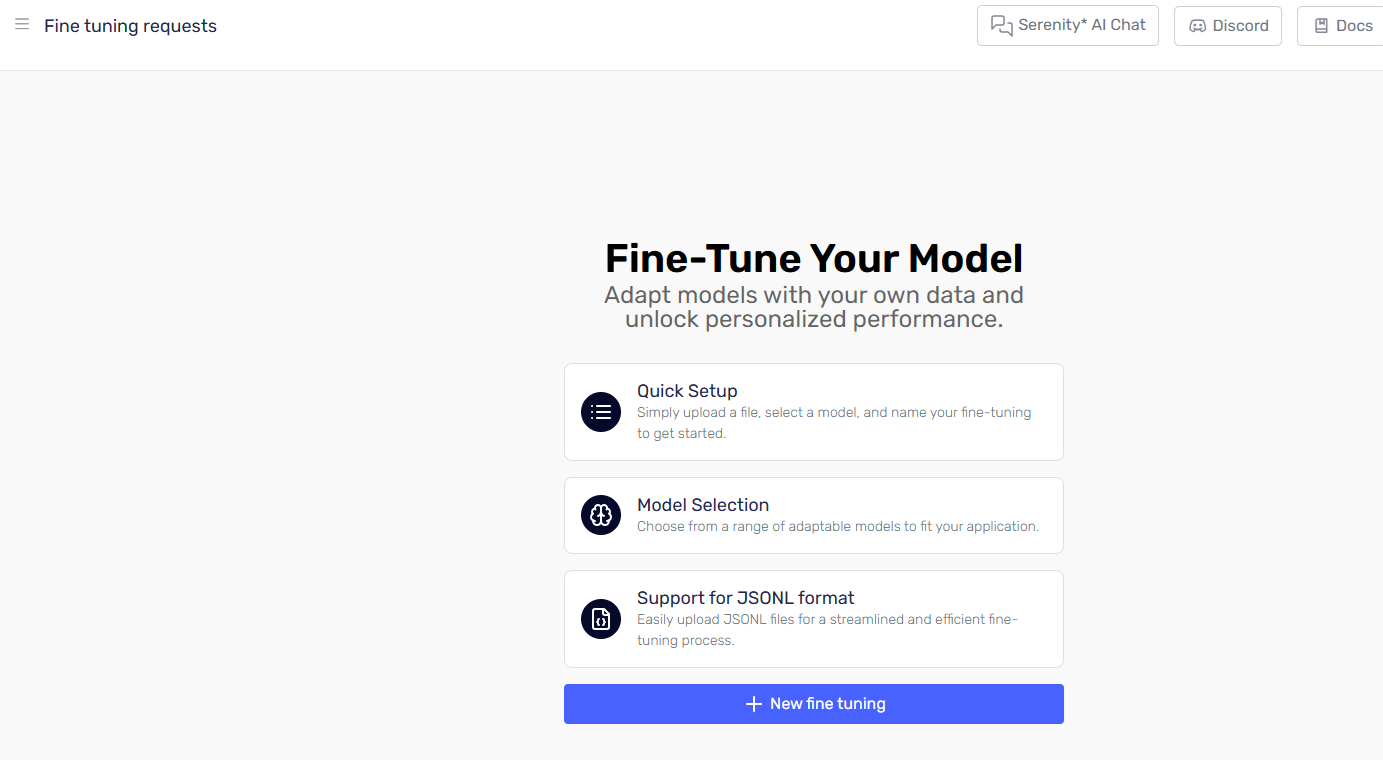
If you don't see the fine tuning option in your sidebar, contact your account administrator to verify your subscription includes fine tuning capabilities.
Step 2: Create Your First Fine Tuning Request
To create a new fine tuning request, click the "New Fine Tuning" button from the dashboard.
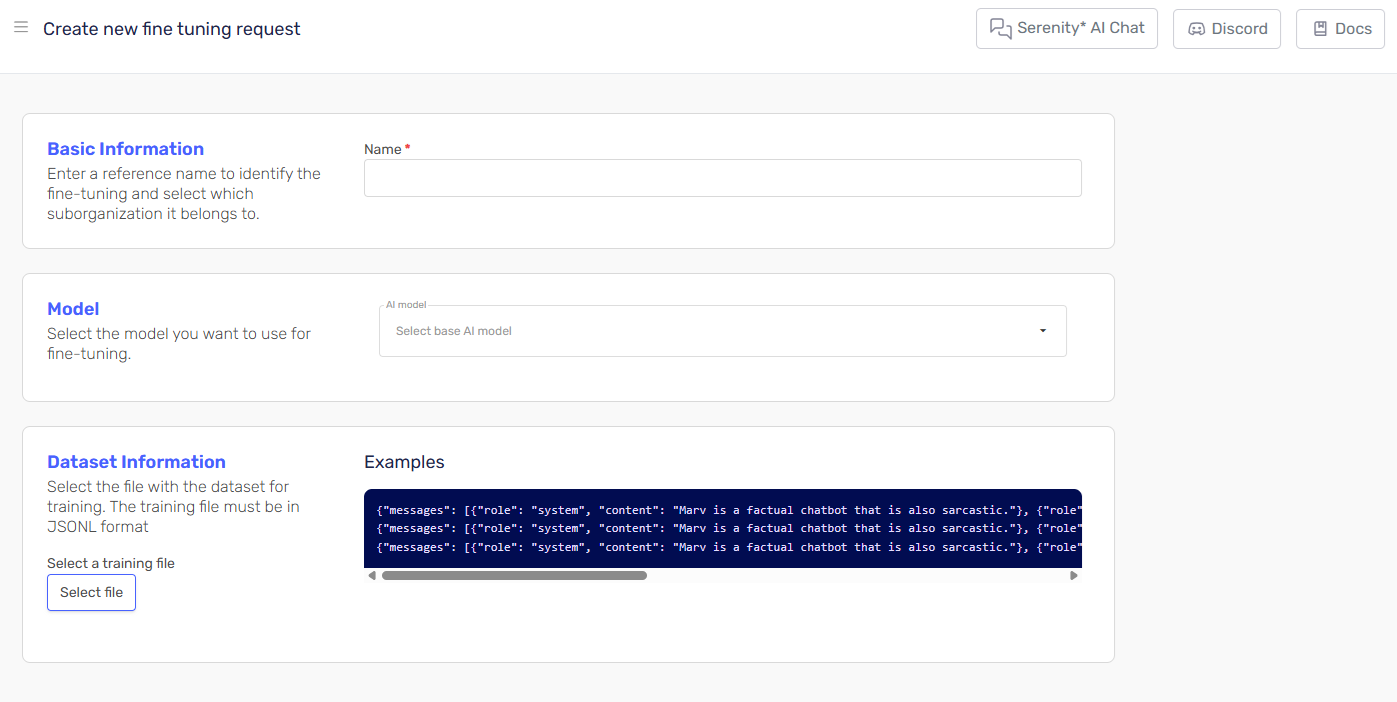
Required Fields
You'll need to complete three essential fields:
-
Name: A descriptive identifier for your fine tuning request
- Choose a name that clearly describes your use case (e.g., "Customer Support Bot", "Technical Documentation Writer")
- This will help you identify the model later in your dashboard
-
Model: The base model you want to fine-tune
- Not all models support fine tuning
- Popular options include GPT-3.5-turbo and GPT-4 variants
- Consider your performance needs and budget when selecting
-
Dataset: Your training data in JSONL format
- Must be a valid JSONL file (newline-delimited JSON)
- See the Data Preparation Basics section for formatting requirements
Creating Your Request
- Fill in all required fields
- Review your selections carefully
- Click the "Create" button to submit your request
Fine tuning requests cannot be modified once submitted. Double-check your dataset and model selection before creating the request.
After creation, the new fine tuning request will appear in the index grid and the first status will be "Pending", once the the process starts it changes to "Validating files" (see Understanding Fine Tuning Request Statuses below).

Once, the process is complete, the status will be "Success". At this point, you can also see the fine-tuning tokens that were used during the training process and the model code that you'll need to reference when using your fine-tuned model.

And the details will show more data, like the cost of the fine tuning process
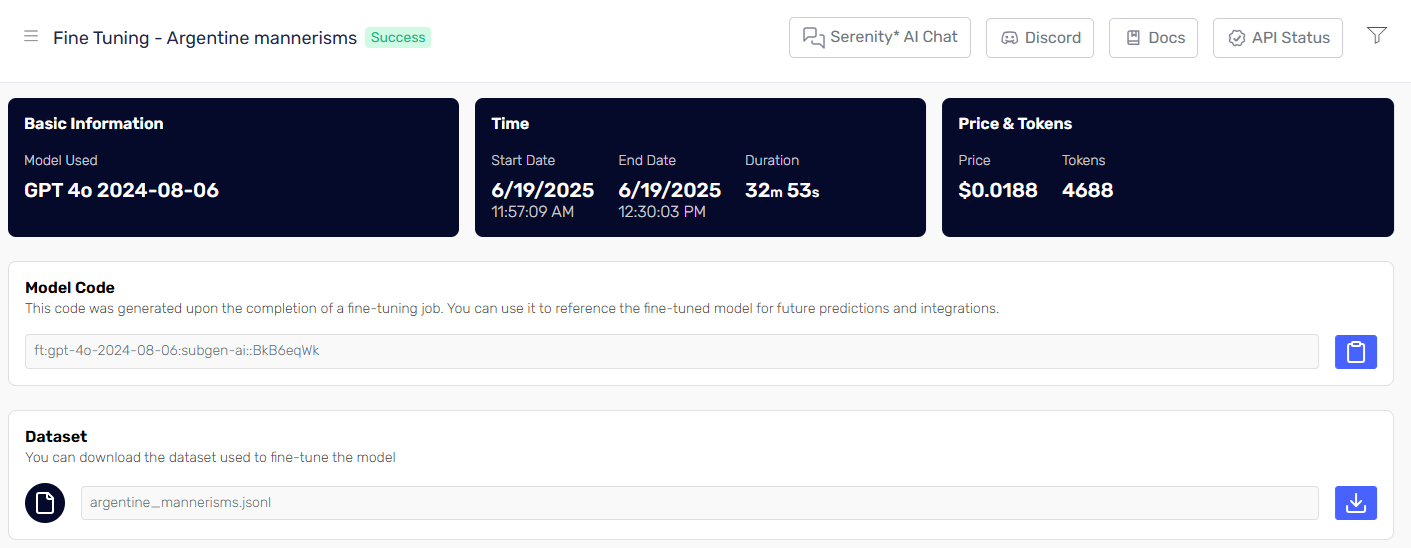
Using your fine tuning model is straight forward, just choose it in the model selection

Understanding Fine Tuning Request Statuses
Once you've created your fine tuning request, it will progress through several status stages. Understanding these statuses helps you track progress and identify any issues that may arise.
Status Overview
Your fine tuning request can have the following statuses:
| Status | Description | What's Happening |
|---|---|---|
| Pending | Initial state after creation | Request is being prepared for processing |
| Validating Files | File validation in progress | System is checking your dataset format and content |
| Queued | Waiting for processing resources | Request is valid and waiting in the training queue |
| Running | Training in progress | Model is actively being fine-tuned with your data |
| Success | Training completed successfully | Your fine-tuned model is ready to use |
| Error | Training failed | An issue occurred during the process |
| Cancelled | Request was cancelled | Training was stopped by user or system |
| Disabled | Request has been disabled | Model access has been restricted |
What to Expect During Each Stage
Pending → Validating Files
- Duration: Usually 1-2 minutes
- What happens: System validates your JSONL file format and content
- Action needed: None, wait for validation to complete
Validating Files → Queued
- Duration: Immediate if validation passes
- What happens: Your request enters the training queue
- Action needed: None, your request will be processed in order
Queued → Running
- Duration: Varies based on queue length
- What happens: Training resources are allocated and training begins
- Action needed: None, training will start automatically
Running → Success
- Duration: Depends on dataset size
- What happens: Your model is being fine-tuned and validated
- Action needed: None, you can monitor progress in the dashboard
Something went wrong?
If your request shows an Error status enter the details of your request and an Errors part will be visible.

You can refresh the dashboard to see real-time status updates. The system automatically updates the status as your request progresses through each stage.
Data Preparation Basics
Proper data preparation is crucial for successful fine tuning. Your dataset must be in JSONL (JSON Lines) format, where each line contains a complete JSON object representing a training example.
JSONL Format Requirements
Each line in your JSONL file should follow this structure:
{"messages": [{"role": "system", "content": "You are a helpful assistant."}, {"role": "user", "content": "What is the capital of France?"}, {"role": "assistant", "content": "The capital of France is Paris."}]}
Data Structure Guidelines
- System Message: Define the model's behavior and role
- User Message: The input or query from the user
- Assistant Message: The desired response from the model
Example Dataset
Here's a sample of well-formatted training data for a customer support bot:
{"messages": [{"role": "system", "content": "You are a customer support representative for TechCorp. Be helpful, professional, and concise."}, {"role": "user", "content": "How do I reset my password?"}, {"role": "assistant", "content": "To reset your password, visit our login page and click 'Forgot Password'. Enter your email address, and we'll send you a reset link within 5 minutes."}]}
{"messages": [{"role": "system", "content": "You are a customer support representative for TechCorp. Be helpful, professional, and concise."}, {"role": "user", "content": "What are your business hours?"}, {"role": "assistant", "content": "Our customer support is available Monday through Friday, 9 AM to 6 PM EST. For urgent issues outside these hours, please email [email protected]."}]}
Quality Guidelines
- Minimum Examples: Include at least 50-100 high-quality examples
- Consistency: Maintain consistent formatting and response style
- Diversity: Cover various scenarios your model will encounter
- Accuracy: Ensure all responses are factually correct and appropriate
Start with a smaller, high-quality dataset (50-100 examples) for your first fine tuning experiment. You can always create additional fine-tuned models with larger datasets once you've validated your approach.
Training times are estimates and may vary based on model complexity and system load.